STONE STEVEN'S NURSERY

It was such a fun challenge to turn my daughters nursery into my sons. It went from full on girl world to a tiny man cave in the best way.

*You will be able to find all the sources and links at the bottom of this post!

For my daughter, I intentionally purchased staple items that would be gender neutral, so we were able to keep most of the big items in her room and used them in his. We repurposed the dresser, nightstand, lamp, mirror, Keekaroo changer pad, rocker, and wicker baskets. Below is her sweet nursery, and the room I would turn into my sons! This is the starting point.

As I was dreaming up his space, the pieces I knew I needed to change were the rug, crib and crib skirt, vase and florals, books, wall paint, chair, and art.

Since this was our first son, there were two pieces of keepsake art that I wanted to have hanging in his room. These would be the anchor pieces for this space!

The first was a picture of his great, great, great grandfather (yes, 3 greats!) with his great, great grandfather. Josh’s mom gifted this photo to all of her kids a few Christmases ago, and I finally got to use it in a meaningful place in our home. Stone Steven is named after his Papa, Steve, and it is so special to see the generations of Craft men that have gone before Stone every time I walk in his room. I antiqued the frame and it is just the perfect anchor piece.

The second piece that I wanted to source was a bronze custom plaque that would hold his name and birth year. We hope to give this to Stone when he leaves our home as a piece he can hang in his own home. I was born and raised in New England, and I am always inspired by the custom plaques they have on the front of their homes telling a small story about who lived in the home and what year it was established. It was so fun to bring my love for New England into this space. I cannot recommend the plaque company enough. They even sent custom screws along with the plaque.


I hope you love this transformation as much as I do. Thank you always to my dear friend, Kelsey Wilson, for capturing these early days with our son in his tiny space. We cherish them!

Stone is named after the passage in the Bible in Joshua 4. “And Joshua set up at Gilgal the twelve stones they had taken out of the Jordan. He said to the Israelites, “In the future when your descendants ask their parents, ‘What do these stones mean?’ tell them, ‘Israel crossed the Jordan on dry ground.’ For the Lord your God dried up the Jordan before you until you had crossed over. The Lord your God did to the Jordan what he had done to the Red Sea when he dried it up before us until we had crossed over. He did this so that all the peoples of the earth might know that the hand of the Lord is powerful and so that you might always fear the Lord your God.

SOURCES AND LINKS

NURSERY

*All of the frames were antiqued, as well as the bronze car, the airplane, the stool, and the kids chairs. The ‘Hardy Boys’ books are keepsakes from Joshua’s dad.

CLOTHING

STONE STEVEN'S HOME BIRTH STORY

Stone Steven Craft - our son. He is here and he is better than we could have thought. He has a beautiful full head of dark brown hair and just the most precious tiny face. We could not love him more - and yet, somehow, with each day, we will. We know so little about who he is so far, and yet, we know everything about him at the same time. We cannot wait to get to know him with each day we get to steward his life.


The day I found out I was pregnant with Stone, I really thought that he would be a girl. We had a girl name picked out and we started calling him by that name. We did the sneak peak test to find out gender early, and to say that I was utterly shocked when I saw the blue confetti would be an understatement. My initial feelings had never been wrong with the gender of my babies. But, I think deep down, I knew it was a boy. There were tiny little nudges that are just for me to know that had me, deep in my soul, knowing that it would be a boy.


Thank goodness the Lord knows better than I do because having a son for even a few short weeks outside my belly and 9 months in my belly, I have already been changed by his life. I would not trade his life for anything and I am eternally grateful he is mine, ours.

After the home birth with my second daughter, Eleanor, my husband and I immediately knew that another home birth was right for us for this upcoming birth. I found out I was pregnant with Stone on August 14th 2023, and I called Haven Birth and Wellness (our home birth practice in Franklin, TN) before I even told my husband to make sure we got in! I then sat with the news by myself to soak it in for one day, and then told my husband the next day, August 15th. It was the first time I was able to surprise him with a pregnancy.


During my pregnancy, I had three really specific prayers for the actual birth.

The first prayer was that I would get to experience going into labor spontaneously without induction of any kind. With my first pregnancy, Everly, the hospital would not let us go past 41 weeks so I was induced at 40w5d that ended in an epidural. I am so thankful for that experience, but with my next, I wanted a different experience. With my second, Eleanor, there were concerns that she was IUGR (Intrauterine Growth Restricted) and after many tests, ultrasounds, and consults, the recommended course of action was to induce early with a membrane sweep and castor oil, and continue forward with our planned home birth. She was born at home very quickly at 38w5d. So, with my son, I really hoped to experience spontaneous labor.

The second prayer was that his birth would be filled with worship and clarity, and not being rushed.

The third prayer was that Everly, my oldest, would get to be involved in some way in the birth.

And wow did we get answers to those prayers.


MIDDLE OF FEBRUARY | I started experiencing some really painful, and movement restricting nerve pain at the top of my uterus and I was struggling to pick up the girls or do simple tasks that required cross movement of my abdomen. Heat was the only thing that helped and I spent most nights up until Stone was born on the couch with a heating pad on my side.

TUESDAY, APRIL 1st | I was starting to experience prodromal labor that was stronger than Braxton hicks, but nothing worth timing and making no progress. I went antiquing with a sweet friend with both my girls and walked through all of the contractions, only stopping for a few of them. Prodromal labor lasted up until Friday, April 5th, and I felt energized to get some big things around the house done that weekend with Josh. However, I also started feeling like I really need to be resting.

FRIDAY, APRIL 4th | I had my last workout at F45. I did not know that it would be my last workout, but what a gift it has been for all three of my pregnancies to move my body and strengthen it, even through the end of pregnancy.


SATURDAY, APRIL 6th | A friend invited me to antique on Sunday, April 7th, and I trusted my body and my gut, and declined, saying I needed to rest. I am always amazed at how in tune instinctually I am with my body and my needs when I am pregnant.


SUNDAY, APRIL 7th | My contractions started turning more painful/intense, and more cramp like than they had been the week prior. These went on until I truly started labor the next day. I spent alot of Sunday rocking in Stone’s nursery and drinking Red Raspberry Leaf tea.


MONDAY, APRIL 8th | This was solar eclipse day and my labor day!

MORNING | I woke up this morning and had a gut feeling that something was different about this day. I documented my growing belly in our bathroom mirror and in Stone’s nursery, which I usually didn’t do in the mornings. In my head, I thought April 8th would be a good day to have a baby. I had my early devotions, and spent the morning doing chores around the house with the girls as I moved through light contractions. We went on our usual 2 mile walk through our neighborhood and then had lunch together as a family. (Perks of work from home for Josh!)


1:00 PM | Ever usually goes down for a nap at 1 PM with Eleanor, but she only naps 2-3 days a week these days. The other days she just plays for rest time. I had my 38 week appointment at Haven at 1:30 PM, and something in me told me to take Ever with me to this appointment. I had a chiropractic appointment at 4:10 PM and hoped to run to Paper Source up in Brentwood to get cards and paper to stamp Stone’s feet on. This would be my first time just totally intentionally skipping Ever’s nap, but I really missed my big girl and wanted to spend that 1-1 time with her. Little did I know it would be a really special afternoon with her.


1:30 PM | While waiting for Caroline to see me at my Haven appointment, Ever and I got to read birth affirmation cards together. We continued to talk through birth and what Mama was about to go through. When we went back, Ever was able to listen to Stone’s heartbeat and help measure my belly. Stone grew 2.5 cm for his fundal height from a week ago! This was a huge answer to prayer, as with my last pregnancy, this was the first sign we had that Eleanor was measuring small. She was about 5 cm behind on her fundal height at 38 weeks. Being at 36.5 cm fundal height put Stone in the clear for being able to continue on without intervention/talks of induction. I opted not to have Haven check my dilation/effacement, as I just wanted to trust my body and not psych myself out.


1:50 PM | Ever and I made our way to Paper Source, about 15 minutes up the road from Haven. The eclipse was happening when we arrived at Paper Source, and the clouds were dark. We looked at cards together, found the paper for Stone’s footprints, and walked back to the the car.

2:20 PM | I loaded Ever up in the back of the minivan and went around to hop into the driver seat. As I sat down, I immediately knew that I was loosing my mucus plug. I didn’t really know what to do because I knew I needed a bathroom, but I had Ever in the car and I didn’t have the ability to carry her in to a store to use the bathroom. So, I used what I had in the van and climbed to the very back where Ever was sitting in her carseat. I pulled out her OXO travel potty seat, grabbed a potty bag, and I sat there until I passed everything. Ever saw the blood and said “Oh no mama, you have an ouchie, you need a bandaid. But it’s ok, you can be brave and I can make it all better. ” She held my hand and I got to talk to her about birth. I told her that sometimes, blood is good. We talked about how birth isn’t scary and she does not need to be afraid of this. Birth is good and she will be meeting her brother soon. She said “Oh mama, that is great. I so excited to meet baby boy.” She then wanted to use the potty seat like I did.


2:35 PM | I called the Haven team and told them I don’t think I am in labor yet, but that I lost my mucus plug. I just wanted to put that on their radar. They told me it could be today or a few days now before we have our baby and to call when labor picks up. Since I had a chiropractic appointment scheduled in an hour, I asked them if there was any concern with going to that appointment. They said no - it will only help progress labor in a good way and continue to prepare your body.

2:40 PM | I called my husband and told him what happened. I asked him if he thought I should go to the chiropractic appointment. The appointment was about 25-40 minutes away from our house because I would be leaving at 4:45 PM which would be rush hour. At this point, contractions had started to slowly pick up and I had a gamble decision. We decided I should go to the chiropractic appointment. I had almost 1.5 hours of time to use up though, so Ever and I made our way to Costco. I was able to use their bathroom to clean up properly, and then I was the girl practically falling into the watermelon container trying to bring home 3 watermelons. If you know me, you know how much I love watermelon, especially pregnant. We then scooted over to the Costco car wash. Ever is usually pretty fearful of the car wash. But this time, as we drove in, Ever said, “Mama, I’m going to be so brave, but I’m going to close my eyes!” I was really, really proud of her. While at Costco, Josh texted me a picture of out entire birth tub and floor set up for labor. We had planned to do that that evening, but I think he knew this baby was coming soon. He is my project manager, and I love watching him shine in his own way during my labors.


3:40 PM | We finished our errands and got to our Chiro appointment a little early. Right outside of the office building was this really fun mini park that I had never noticed, so Ever and I spent special time at the park together just having 1-1 time.


4:10 | Ever and I went into my Chiro appointment. I have seen Dr. Carolyn with Peak Performance for all three of my pregnancies and she is a gift! She let Ever help adjust me and massage my round ligament/nerve pain, and she did so good. I told Dr. Carolyn that I would be shocked if I didn’t have this baby tonight.


5:15 PM | Traffic was not too bad from Franklin to Spring Hill and I made it home! We had no food in the fridge, so immediately, I made a grocery list and Josh ran out to the store to stock the fridge while I fed the girls dinner. At this point, there was no doubt labor had started and I was having to slow down/stop during contractions to start to breathe through them. I brought out my birthing ball to the kitchen to labor on while I made dinner and sat with the girls. Eleanor decided to join me on the birthing ball and she ‘labored’ with me. I cannot get over her tiny curls. I started timing contractions and they were coming every 2-3 minutes.


7:09 PM | I was really starting to need Josh but we needed to put our girls down. I texted my dear friend Peyton and asked if she could come help put the girls down. She was here in 10 minutes and from their giggles during bath time and story time, they had the very best time with her!

7:10 PM | I showered to have warm water run over me and just feel refreshed.

7:21 PM | I called the Haven team to let them know my contractions were really close together and that I think they should start to head over to our home. They asked some questions, agreed, and said they would be to our home in about 40 minutes.

8:15 PM | The girls were really missing their mama, and Peyton came down to ask me to come up and say goodnight to the girls, as they kept asking for me. Ever held my hand while I breathed through contractions and I got to kiss both of my best gals goodnight one last time before meeting our son. When I walked downstairs, I saw Lauren Drees and immediately, I knew everything would be ok because she was here. Her presence can calm and light up any room simultaneously, and she was a really welcome sight!


9:15 PM | After our whole team arrived, they checked my heart rate and blood pressure. They also checked dilation and effacement and I was 4 cm dilated and 50 effaced. I was not yet in active labor. They offered to give me some space and sit in the living room while I got in ‘labor land’ in our bedroom and laid down. After laying down for 45 minutes or so, I felt like contractions were getting further apart, and not progressing. I got up to move for a few minutes and went out to chat with the Haven gals in the living room. They suggested I draw a bath with epsom salt to see if warm water helps to progress me into active labor.

10:30 PM | I got in our bathtub and decided to have a banana. I was unable to have dinner earlier but I knew I needed something small and easy to digest. I had all of my birth affirmations around me, and Josh was there reminding me of how capable I am and that I can surrender my body right now to do what it needs to do.


11:50 PM | Labor was definitely progressing and I was starting to have to focus and really breathe down through contractions.


MIDNIGHT | The Haven team came in to the bathroom to see how I was doing, and we decided to check to see how I was progressing. Stone’s heart rate was slow, but steady and in a good spot. I was finally at 6.5 cm dilated and 70% effaced. I had made so much progress in the water and we were officially in active labor. Lauren Drees suggested that we start filling up the birth tub with water so that I could be more comfortable while I labored.

12:25 AM | I moved to our bedroom to the birth tub and was so much more comfortable. At this point, I was in transition and was focused on each wave of a contraction. They gave me a wooden ball with some spikes on it to hold while I labored and this helped a lot to squeeze during contractions. During the next hour and a half, Joshua, my team, and I listened to worship music, they sang and talked about the goodness of God and birth, they prayed for me as I experienced each contraction, and they helped me adjust my positions to find relief during each wave.

During this time, I was in this tension time of wanting labor to be over because it was so intense, but also, not rushing his process of coming into the world. The phrase that I kept saying over and over again between contractions was ‘I am not in a hurry’ . I did not want to rush through the hard because it was there that my heart needed to stay until he was ready. I had affirmations up on our dressers all around the birth tub, and the one that I kept bringing to mind was “This is just a wave, He won’t let you go under.” And He didn’t. I was sustained by the Lord, my husband, and my team the whole time.


1:35 AM | Finally, my body was ready to start actively pushing. I told the team that my body wanted to push and with 3 pushes, his head came out first.

1:45 AM | With two more pushes, the rest of his sweet little body came, and Josh and I, together with Lauren, pulled him to my chest.


The song “It Is Well” by Bethel and Kristine DiMarco was the song I delivered him to, and I cannot imagine a more fitting song for his birth. It is WELL that we have a son. The Lord knew from the very beginning of time, and before my life ever existed, that we would have a son. And it is WELL with my soul.


1:50 AM | Five minutes after Stone was born, Everly woke up. She never wakes up in the middle of the night, but this night, I think she just knew. Josh went upstairs to comfort her, but she kept asking for me.

2:00 AM | I delivered my placenta while Josh was upstairs with Everly, and Stone was able to latch and start nursing. I had a very small tear, barely a 1 degree, so there were no stitches necessary. They did say that we should keep Stone in our room for a few nights so I could heal quickly by not going up and down the stairs all day and night for feeds.

2:15 AM | Ever came downstairs with her dad and got to meet baby Stone for the first time. She was so sweet and curious about him, and it was a special and unexpected moment with just us.

3:45 AM | Josh and Lauren measured Stone. He was 19.5 inches long, and weighed 6 lbs 13 oz. He was our biggest baby yet! Everly was 6 lbs 11 oz, and Eleanor was 6 lbs 3 oz.


4:30 AM | The Haven team had emptied the tub, cleaned up the floor mats we taped down, did two loads of laundry of towels and sheets from birth, and they packed up to head home and rest. We then got to soak in time with just us three before the girls woke up.


5:00 AM | Josh brought the pack and play down to our room and set it up. We got about one hour of sleep once we laid him down and it was a much needed one hour.


8:15 AM | Josh woke up the girls and brought them downstairs to meet their baby brother. It was so special to watch them be curious about him and love on him.


It is still not lost on me that we get to steward a tiny man and fold him into the rhythms of our life. His birth was more than I could have asked for. We were unhurried in our souls and our three great prayers were answered for his birth.

There are no other hands we could have imagined helping us bring our son to this side of my belly. Josh, Lauren, Lauren, and Lia - thank you for being that team.

We are praising the Lord for our three children. What a good, good thing it is to have the privilege to raise them and be their mama.

Unless the Lord builds the house, the builders labor in vain. Unless the Lord watches over the city, the guards stand watch in vain. In vain you rise early and stay up late, toiling for food to eat — for he grants sleep to a those he loves. Children are a heritage from the Lord, offspring a reward from him. Like arrows in the hands of a warrior are children born in one’s youth. Blessed is the man whose quiver is full of them. They will not be put to shame when they contend with their opponents in court.
— Psalm 127

CLEAN CHOCOLATE SOURDOUGH BREAD

I love sourdough bread. And I love chocolate. But we also eat clean for my husbands autoimmune disease. So, I set out to find a clean Chocolate Sourdough, but eventually just decided to create it myself.

It has the perfect touch of sweetness from coconut sugar, and then pops of dark chocolate from the chocolate chips. It is the perfect after dinner treat or brunch bread. I hope you absolutely love it!

Below are sone of my favorite tools for sourdough:

I hope these recommendations help set you up for success as you bake your sourdough!


CLEAN CHOCOLATE SOURDOUGH BREAD

PREP TIME: 2 days, including bulk fermentation and cold proofing | BAKE TIME: 55 mins

  • 125 grams Starter

  • 365 grams of Water

  • 500 grams of Flour

  • 12 grams of Salt

  • 100 grams of Coconut Sugar

  • 50 grams of Cocoa Powder

  • 125 grams of Chocolate Chips

I - Pull out your scale, and add the starter from your Weck jar, and the water, to your bowl. Whisk them together until the starter is all blended in, and small bubbles appear.

II - Add the flour, salt, coconut sugar, cocoa powder, and chocolate chips to your bowl. Mix them all together with a fork or whisk. Once you have mixed or whisked them together until they are clumpy, begin to use your hands to knead the ingredients until they have formed a messy, loose ball.

III - Let your dough rest on the counter in the bowl for 45 minutes covered with a tea towel.

IV - Complete 3 stretch and folds on your dough every 45 minutes, covering the bowl with a tea towel after each stretch and fold.

V - After the third stretch and fold, leave your dough on the counter overnight, covered with a tea towel. Your dough should roughly double in size overnight.

VI - First thing in the morning, take your dough out of the bowl and lay it on the counter. Stretch the dough gently until it is a small rectangle. Fold the dough in thirds one way and then in thirds the opposite way until you have a ball of dough.

VII - Shape your dough into a tight ball with pushes and pulls on your counter. (I do not put flour on the counter while I do these pushes and pulls.) Once you have the dough shaped, lightly sprinkle your banneton basket with flour using your wooden spatula. Using the bench scraper, place the shaped dough into your banneton basket and cover it with a fabric dough bowl cover.

VIII - Place the banneton basket in the fridge to proof for 8-36 hours.

VIIII - When you are ready to bake your bread (Sometime within 8-36 hours), preheat your oven to 450 degrees before taking the dough out of the fridge.

X - Once your oven is preheated, cut a square piece of parchment paper big enough to come up just over the sides of your dutch oven. Take your dough out of the fridge. Place the dough on the parchment paper and lightly sprinkle with flour. using your wooden spatula (This will help the designs from your bread lame show better!) Use your bread lame to score the bread to your desired design. Place the dough on the parchment paper in the dutch oven and put the lid on. Place the dutch oven in the oven.

XI - Bake covered for 22 minutes. Once your timer goes off, take the lid off of the dutch oven and bake uncovered for 30 minutes uncovered. (This timing works perfect for my oven - your oven may cook slower or faster so the timing may be a little trial and error as you learn your oven.)

XII - Take the bread out of the dutch oven with the edges of the parchment paper and place it on the counter for 30 mins to 1 hour before eating! (This is the hardest part, but so worth the wait!)

I hope you love making - and most importantly, eating - this clean chocolate sourdough bread. Enjoy!

Sincerely-

CRANBERRY ORANGE APPLE CIDER

If you are looking for a way to offer a warm drink to your guests, have beautiful rich colors on your table, AND have your home smelling like Christmas, I have the perfect, quick, and simple crockpot recipe that you need.

You will simply need a crockpot or a large pan for your Apple Cider to warm in. I hope you love it!


CRANBERRY ORANGE APPLE CIDER

PREP TIME: 5 minutes | COOK TIME: 1 hour

  • 1/2-3/4 cups of fresh Cranberries

  • 2 Oranges sliced

  • 10-12 Cinnamon Sticks

  • Fresh Apple Cider (No sugar added)

I - Pour 1 jug of Apple Cider into a crockpot.

II - Slice 2 Oranges and add on top of the Apple Cider.

III - Top with Cranberries and Cinnamon sticks.

IV - Turn your crockpot on high and leave uncovered to warm and make your home smell like Christmas!

That’s it! So easy. So simple. So beautiful. So yummy. (Feel free to spike it if that is your thing!) May you invite people in to your home with joy this Christmas season and may it feel like home to those who need a friend.

Sincerely-

CRAFTS HOMEMADE BLUEBERRY JAM (PALEO)

I grew up going blueberry picking in New England during the late summer, and I absolutely love blueberry jam. I am team chunky jam, and cannot get enough of it. One my favorite things about blueberry jam, especially when homemade, is that it is extremely versatile.

For this recipe, it would be beneficial to have a Farberware Masher to mash the blueberries (If you prefer them like that!). This is technically a meat masher, but works perfect for this jam! It will not scratch or ruin your pans either, which is a bonus.

It would also be beneficial to have canning jars ready to store your jam. These are my favorite!

Below are a few fun ways to enjoy your jam:

  • Toast with grassfed butter

  • Atop homemade sourdough bread

  • Grassfed burger with bacon, avocado, and lettuce

  • Sausage for breakfast

  • Goat cheese on Simple Mills Rosemary and Sea Salt (Almond Flour) crackers

  • Good Culture Cottage Cheese (Basically like dessert!)

  • …and of course the ultimate classic - PBJ! (Almond Butter and Ezekiel Bread)

This recipe is made with three simple ingredients and you will never want to eat store bought jam ever again.


CRAFTS HOMEMADE BLUEBERRY JAM (PALEO)

PREP TIME: 5 minutes | COOK TIME: 30-35 minutes

  • 5 cups frozen organic blueberries

  • 3/4 cups of maple syrup (1 cup if you like your jam a touch sweeter)

  • 2.5 tablespoons of lemon juice

I - Add blueberries, lemon juice, and maple syrup to a pot.

II - Cook on medium high for 25 minutes, stirring occasionally with a spatula. (Please beware that as the jam boils, it may bubble up and splash on your hand or clothes. It will be VERY hot and could burn you.)

III - Reduce to medium heat for the last 5-10 minutes. It is a personal preference to mash the blueberries. I love to keep them whole. To mash the blueberries, simply use your Farberware Masher to make your jam smooth.

IV - Timing can vary with how long this cooks and when it is done. You can tell it is done when it starts to get thickens and the bubbles make a louder noise. This is when it has turned from a liquid to a thicker gelatin. This may take some time to master how long it takes on your stove.

V - Remove from the heat. Let cool and thicken for 10 minutes.

VI - Pour the jam into canning jars. Refrigerate and enjoy.


I hope life is a little sweeter as you make your own blueberry jam.

Sweet blessings,

Ash

DIY LAUNDRY ROOM MAKEOVER

Laundry rooms are special, because they are daily, mundane places. And it is in those places where we most often meet Jesus. This quote by Elisabeth Elliot inspired my entire laundry room, and is a sweet reminder that we are called to simply be faithful - right where we are - even in the laundry rooms.

This job has been given to me to do. Therefore, it is a gift. Therefore, it is a privilege. Therefore, it is an offering I may make to God. Therefore, it is to be done gladly, if it is done for Him. Here, not somewhere else, I may learn God’s way. In this job, not in some other, God looks for faithfulness.
— Elisabeth Elliot

THE BEFORE AND THE PLANNING

Wow. The only place to go is up from here. I am so thankful for a laundry room, but my aesthetic heart was hurting looking at this space. Not only that, but it was so impractical and the whole space was so underutilized in regards to storage, organization, and function of doing laundry in this space.


WHAT WAS IMPORTANT TO ME?

When designing this laundry room, there were a few things that were important to me:

  1. Drawer Storage: The built-ins had to have pull out storage. We don’t have great storage options in our home, so anywhere that functional storage meets beauty, I celebrate.

  2. Place to Hang Dry Clothes: I hang dry so many of our clothes, and since we have a second floor washer and dryer, I did not want to have to go up and down to hang clothes for them to hang dry.

  3. Deep Ledge above Washer and Dryer: It had to have a ledge deep enough for me to apply treatment to clothes, or do some light folding.

  4. Keep the Natural Light: It had to keep the beautiful natural light that we have. There is a very short and wide window that allows me to work in the day without turning the light on. I did not want to lose that.

  5. Cover the Washer Cords: The solution had to cover the washer cords that were exposed above the washer. This was the Achilles heel of the built-ins design process.

  6. Access to the Water Shut Off for the Washer: The built in solution HAD to have access to the water shut off and washer plug-in in the event there was a leak. This made the design tricky, but led to a really fun ‘faux drawer’ in the built in. But you would never know. ;)

I drew up the quick vision in my head, and I sent it over to my dad. He is a world class New England carpenter, and loves to serve by using his hands. He said ‘I can do that - but only for my girl!’. (Daddy’s and daughters are a special thing.)


The week before we were planning to start on this mini DIY and remodel, our washer and dryer completely broke. They came with the house when we bought it, and turns, out they were way older than we thought.

There were three things that were important to us when looking for a new washer and dryer:

  1. Front Loader: It had to be a front loader so that I could place a shelf over the top of the washer and dryer. We have a small narrow laundry room, and I wanted that above space.

  2. Washer Self Dry Feature: It is very, very common for front loaders to have mold grow in the front lip because it never dries. That is what was happening to our old one.

  3. Lock Feature: I have a very curious 2.5 year old who loves to help with laundry, but also, loves to push all the buttons on the washer and dryer. I needed a way to be able to lock the buttons so she could not turn them off mid-cycle.

The washer and dryer set we found hit all of those must haves, and we absolutely love it! It is by GE, and visually, it is beautiful. I chose the matte nickel finish and it almost looks like a dark tan color. It does have a clean white option, and that would be stunning as well for a different vibe.


HOLD YOUR DESIGN LOOSELY

If you are in the middle of doing a home remodel, especially if it is DIY, always remember to hold your initial design and plan loosely! It was one thing to draw out my vision, but then when we actually tried to add the shelf right under the window, it caused two main problems:

  1. It blocked SO much of the natural light - I did not expect that. It was an immediate no go for that reason.

  2. Functionally though, I forgot to account for the height of the rod, and the height of the hangers, and it simply was not going to be functional to hang clothes once we saw it there.

So we scratched that plan all together! And honestly, it turned out better than my initial vision. So hold your plan loosely, and watch it turn out better than you thought it would.

In a perfect world, we would have redone the floors, added bead board and wallpaper, and put in a new light fixture. But when we realized we needed a new washer and dryer all together, that plan changed. We decided to pour that money into more functional appliances! I hope to add a new light fixture at a later time (I would like one on a dimmer for late night laundry) and paint/spruce up the inside of our linen closet. This was our solution for hanging clothes and it has worked out perfectly. Don’t let not doing everything perfectly stop you from doing something.

If you can’t do everything, choose the things that will make the biggest bang for your buck, and break it up in buckets! This is not our longterm home, so we were ok to not go above and beyond, but still maximize the right things. This update will be a HUGE selling point for home buyers in the future.


BUILT IN PROCESS

Below you will see the process of how the built-ins were designed, especially around that plug in and the water shut off. All the drawers slide out, even the faux one. You can also see where he tried to put the wood under the window to see how the shelf would work. As you know already, it didn’t! But at least we tried.


PAINT SAMPLES AND FINAL COLORS

Paint is so hard. It is hard because it looks different in every home and every room. It can vary based on the colors you have in the room, the lighting, and the accents you choose. There are a few things I always do when choosing paint colors:

  1. Multiple Swatches: Always get multiple swatches and place them in the room you want to paint. I have started with as many as 30 swatches to as little as 2. But it is usually around 10-15 that I tape on the wall.

  2. Day vs Night Lighting: Look at the swatches in both day and night lighting. You may love one color in day and hate it at night. That will not be a winner. As I rule a color out, I will simply take the swatch off the wall to eliminate them.

  3. Paint on the Walls: Once I narrow it down to 2-4 options, I will buy paint samples and place the samples on the wall. It is best to use a roller instead of a brush. Learn from my mistakes!

  4. Paint on a Piece of Wood for Non-Wall Colors: For the built-ins, I took a cheap piece of wood from Lowes and painted the four samples on the wood. I then placed the wood along the built in so I could see how it would look in the place that it would actually be in the room. This was very helpful to come to my final decision!

Below are the paint colors we went with:


THE BIG REVEAL!

Everything that I sourced, I linked below on the rolling bar. I also linked each item at the very end of this post.

May you never forget that home spaces are meant to be lived in. I believe beauty and functionality can intersect, with laundry overflowing and cold cups of coffee all around the home. This is the everyday beautiful mundane. May you be inspired today to make your home a place you love living, one small change at a time.

WASHER and DRYER

ORIGINAL CALLIGRAPHY ART | You can also order your own custom piece from my shop here!

RUG

WALL HANGERS

CABINET KNOBS

VASE

WICKER BASKET

RUG TAPE

WOODEN FRAME (SMALL)

WOODEN FRAME (LARGE)

DETERGENT POD GLASS JAR

DRYER BALLS

DETERGENT PODS (LESS TOXIC - NOT PERFECT)

WOODEN HANGERS

FELT HANGERS

MEADOW ART PRINT

BRASS LINT JAR | I sourced this at a local antique shop. I do not have a link.

BRASS VASE | I sourced this at a local antique shop. I do not have a link.

ANTIQUE FRAME | This was gifted to me by a friend and was sourced at an antique shop.

BOOKS | I sourced all of them at a local antique shop.

FLORALS | Sourced from Hobby Lobby.

Sincerely-


HOMEMADE SALT DOUGH ORNAMENTS

There is nothing sweeter than homemade ornaments on your tree at Christmas. We are team special ornaments all the way!

Every year for my girls first Christmases, I have made handprint and footprint salt dough ornaments. I was really intimated by them at first, but they are surprisingly easy, and so special. This year, we made some fun picture frame salt dough ornaments for Ever to gift to her friends, and she even painted one so we can remember her little artwork by!

Here are the items you will need to make your own:

  • Flour

  • Water

  • Salt (I used Pink Himalayan salt for that touch of blush for the girls!)

  • Something to press into the dough to cut out shapes (I used the lid of an Almond butter jar - you don’t have to be fancy. You can get creative with items in your kitchen)

  • A sturdy straw to press a hole into the ornaments (These ones are similar to what I use)

  • Ribbon (This one is my favorite)

  • Wax Paper

  • Baking Sheet or Pampered Chef Stone

  • Cooling Racks (These are similar to ours)

  • Poly Spray (This is the one we used)

  • Rolling Pin (This is the one we have an love)

  • Hot glue gun (If you want to make the picture frame ones!)


HOMEMADE SALT DOUGH ORNAMENTS

Prep: 5 mins | COOK TIME: 2-2.5 hours

  • 2 cups of flour

  • 1 cup of salt

  • 1 cup warm water

I - Mix all 3 ingredients into a bowl or a kitchen aid mixer bowl. Mix throughly.

II - Take salt dough in hands and knead it until it is soft.

III - Place salt dough on wax paper on a table. Use rolling pin to flatten the salt dough.

IV - Cut out your desired shapes! If you are doing handprints and footprints, grab your little one and have your spouse or friend help you press down. You will want to make the imprint deeper than you think so that it stays after you heat them. *Make sure to use to straw to press a hole into the cut out to make sure you have a way to hang them!

V - Place cut outs on a Pampered Chef Stone or your baking sheet. Cook for 2-2.5 hours @ 225 degrees.

VI - Place cut outs on cooling rack and let sit overnight. From here, you can paint them, add photos, hot glue multiples together, or so much more.

VII - Bring cut outs outside and lay on wax paper. Spray them with the poly spray and let them dry for 45 minutes. Turn them over, and repeat.

VIII - Add your ribbon or string! Then, you are ready to hang them on the tree of gift them!

I hope you enjoy making these as much as we have every year for our girls first Christmases. I have a feeling these will be keepsakes for your tree for a very long time.

Sincerely-

Ash


ELEANOR SAGE’S NURSERY

My husband and I moved into our new home in December 2021 as I was 3 months pregnant. After we got everything unpacked, and the house in somewhat of an order, it was time to start working on our second daughter’s nursery.

My hope in each room I design in our home is that it would be beautiful, functional, and life giving. We hope to have a peaceful home when people enter, and I believe how you design your home matters to achieve this.

My vision was to bring in antique pieces for some added character in this newer home, incorporate round corners and edges to tie shapes together, and bring dainty, feminine, earthy colors (mauve, sage, and cream/white with warm woods) that would make this space a place I loved spending time in with our Ellie girl.

For the antique frames, I had two pieces that I wanted to showcase:

  1. Calligraphy Keepsake: I calligraphed the song ‘Give Me Jesus’ by All Sons and Daughters for above her crib. Joshua and I worshipped to this song at our wedding ceremony, so it holds very special meaning. (P.s. You can purchase your own calligraphy keepsake HERE!)

  2. Watercolor Portrait: My dear friend, Dianuh Aerin, gifted a watercolor keepsake to me at my baby sprinkle. It was inspired by a photo from our maternity session with Kelsey Wilson, and it was such a special gift. I never want to forget the days of Eleanor’s life when I carried her in my womb.


This was the first room I designed from blank walls to full reveal in our new home, and I have to say, it just might be my favorite room in the house! I hope you feel inspired and find some practical things to help bring your home to life.

Kelsey captured our first few days as a family in her sweet nursery, and I will cherish these moments forever. Babies don’t keep.

Sweet blessings,


ELEANOR'S HOME BIRTH STORY

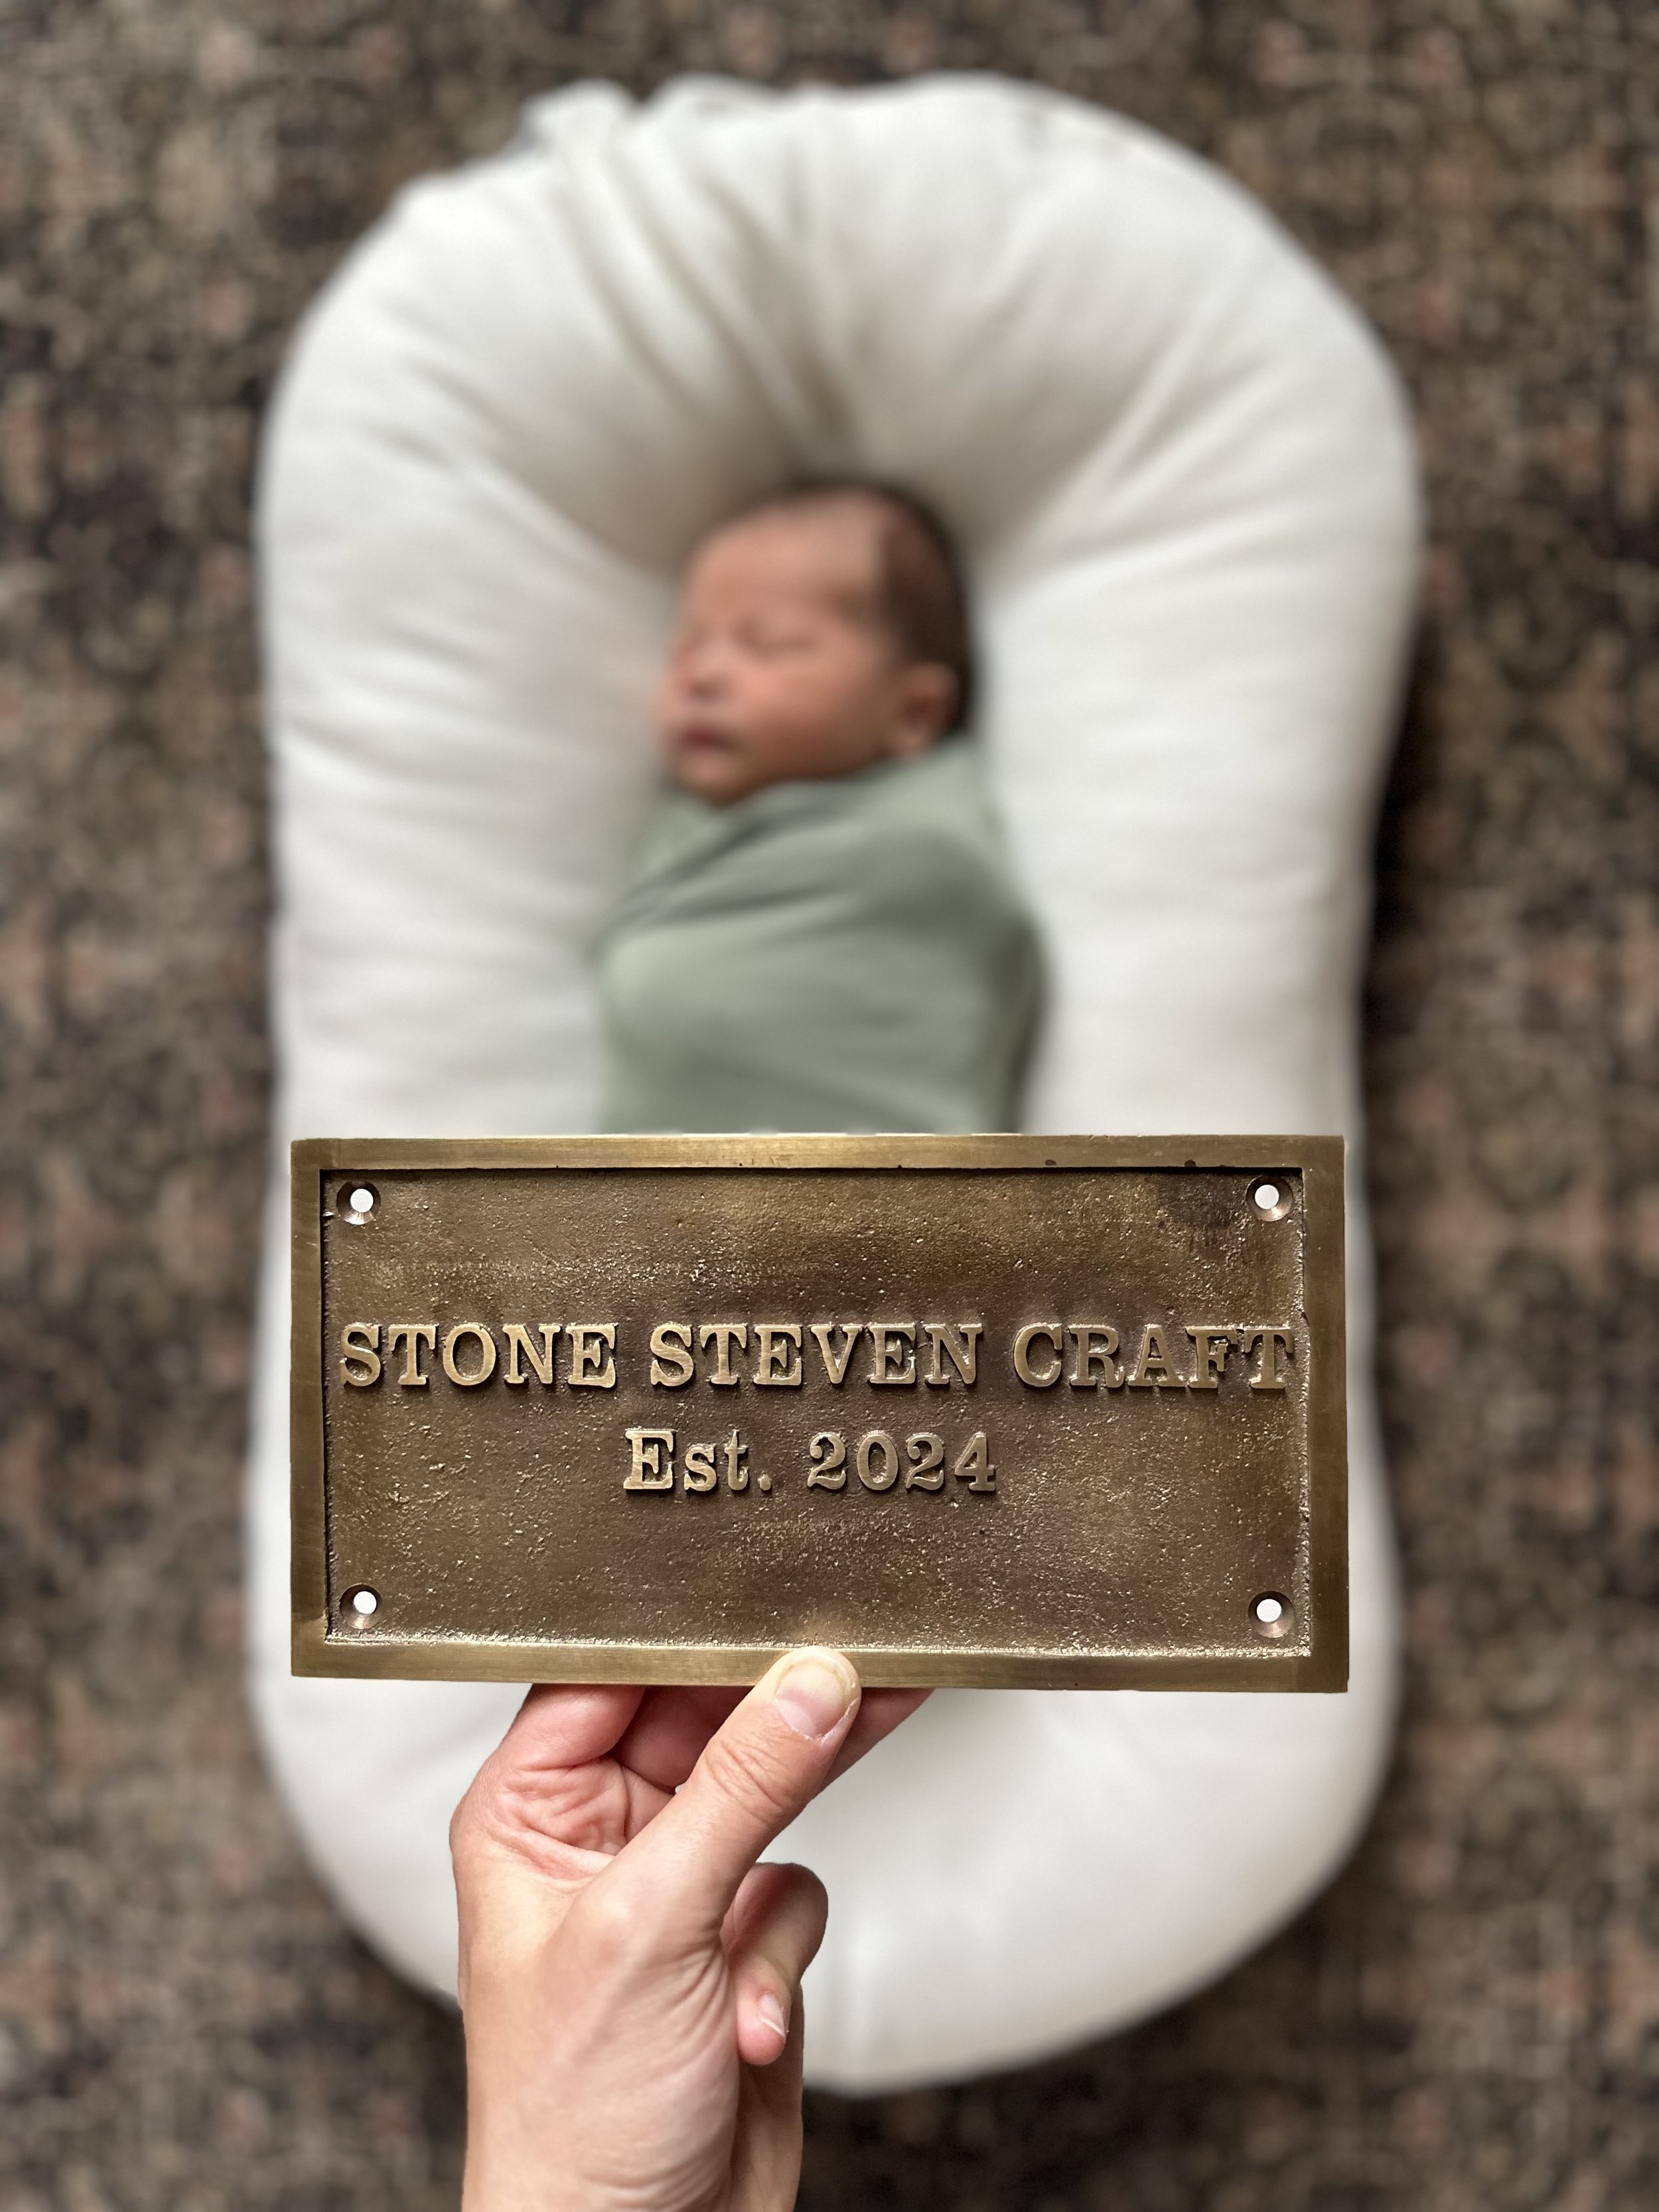
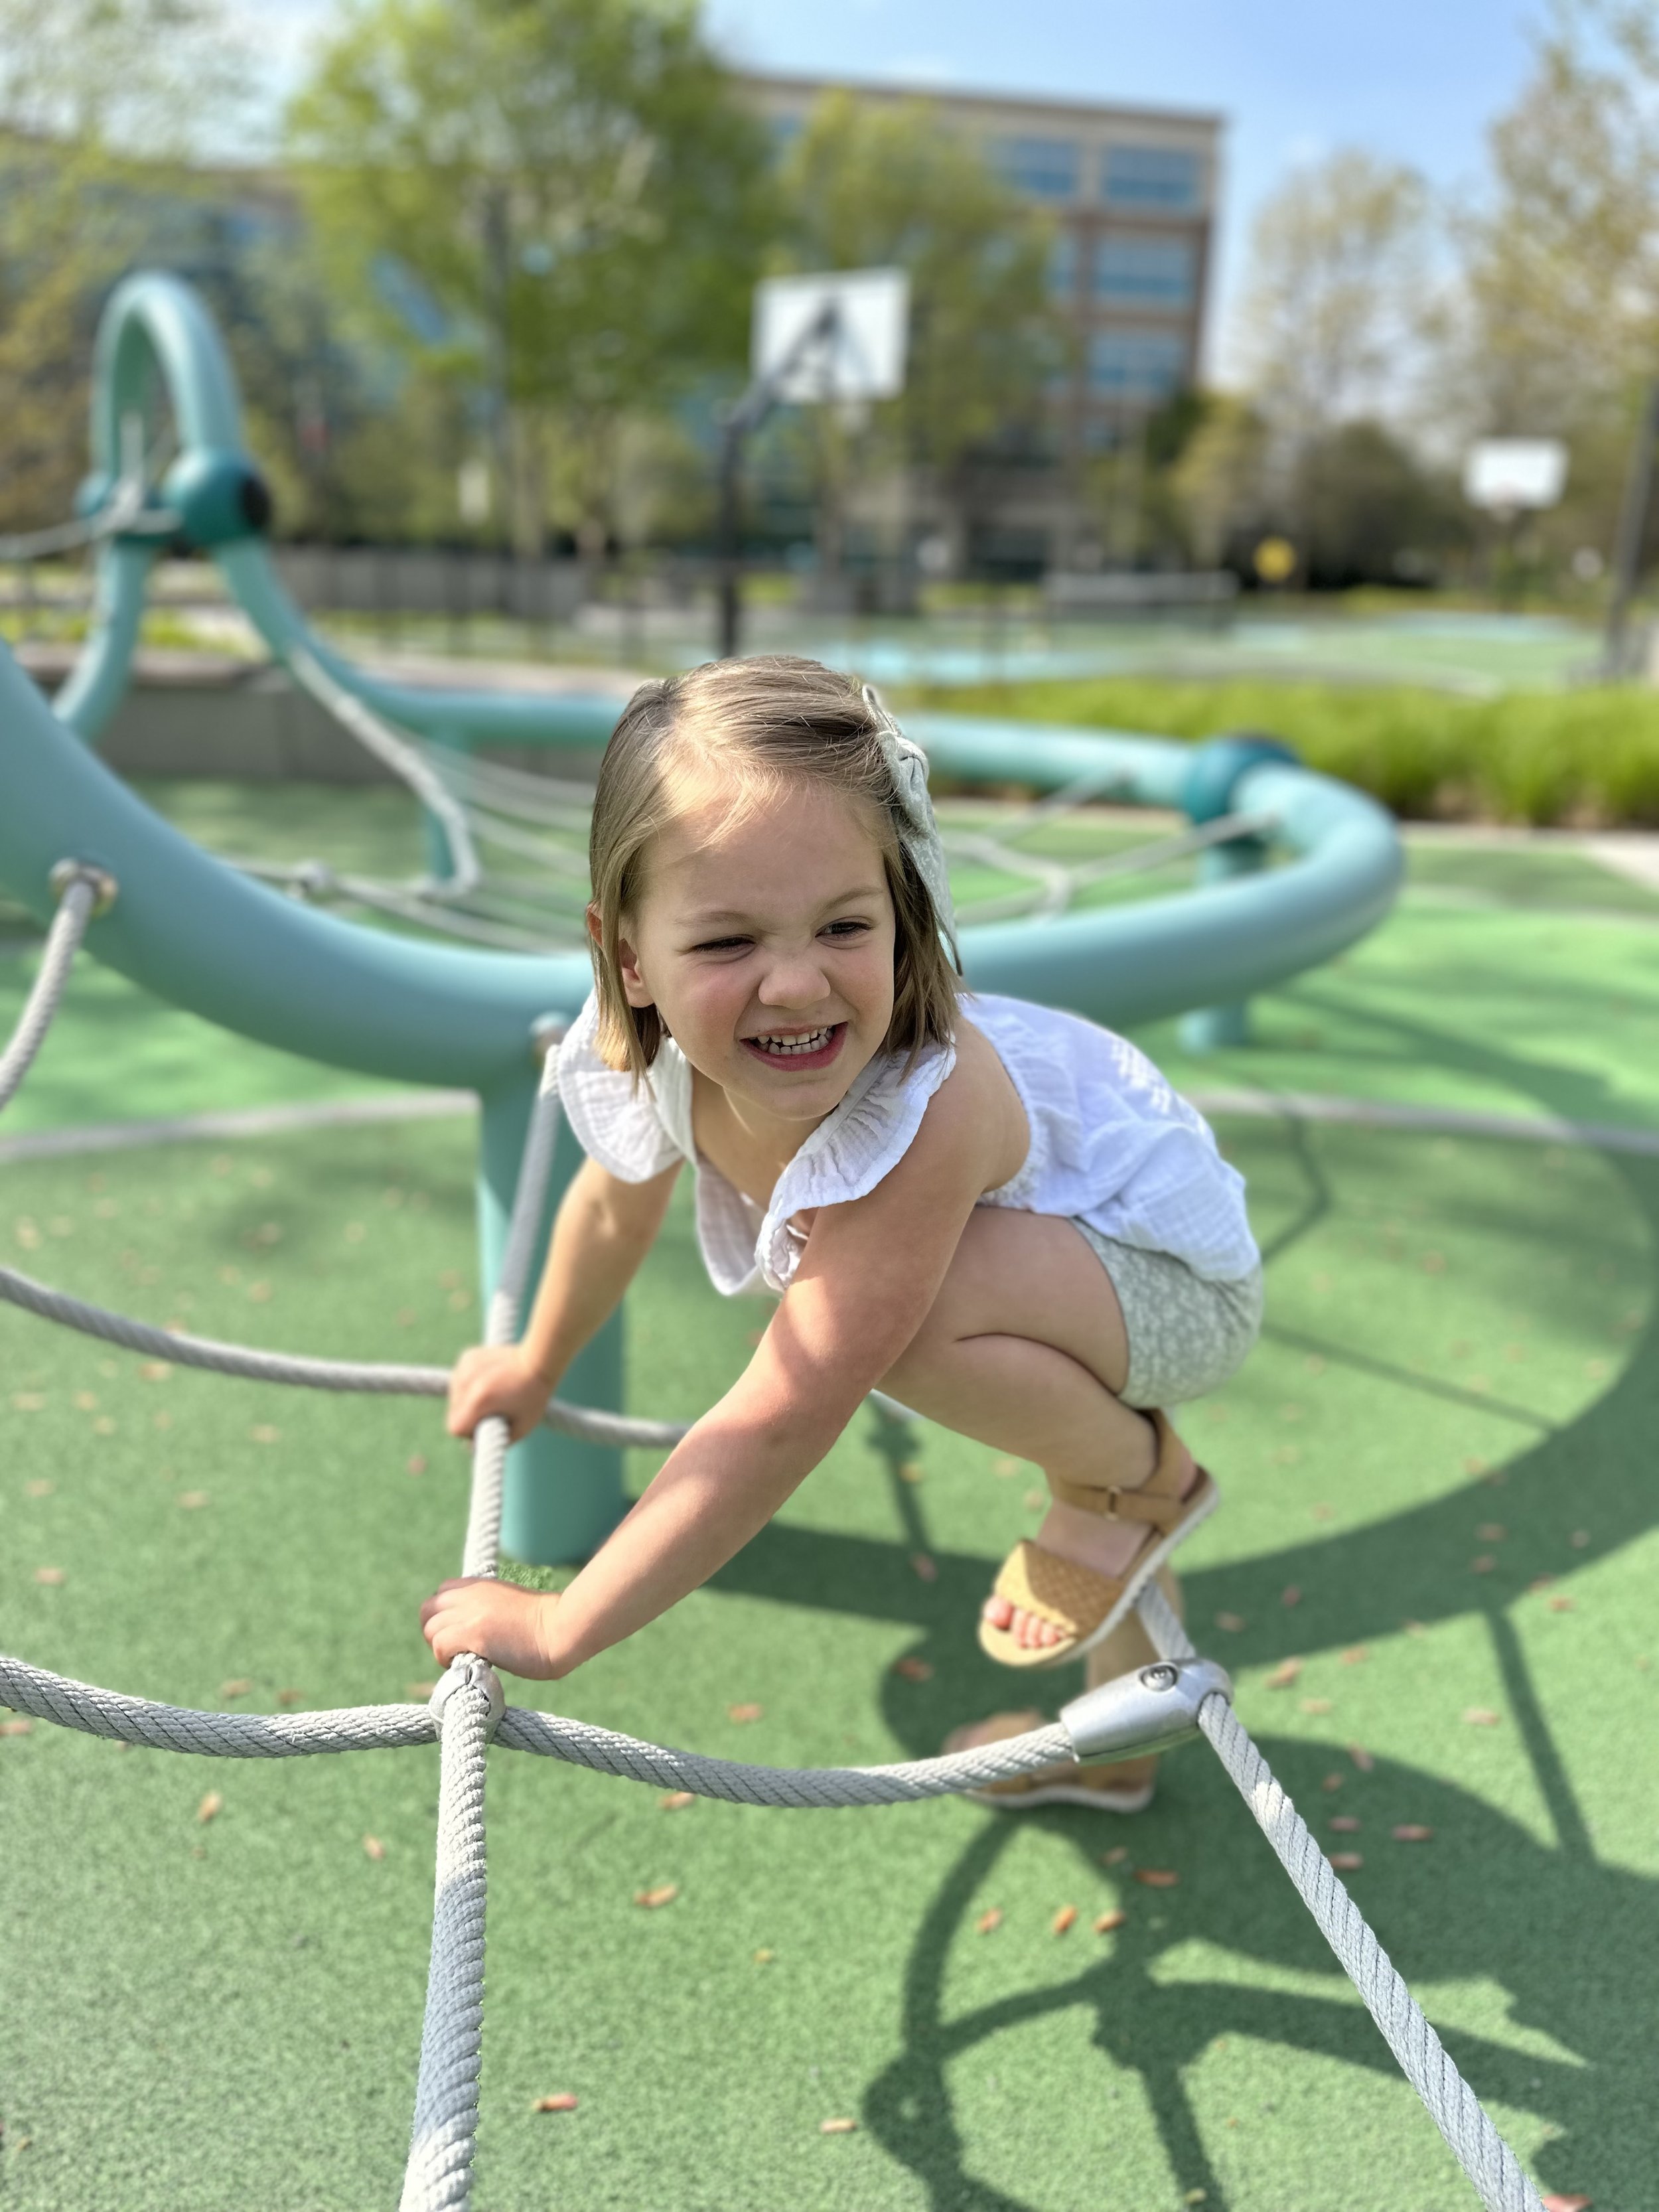
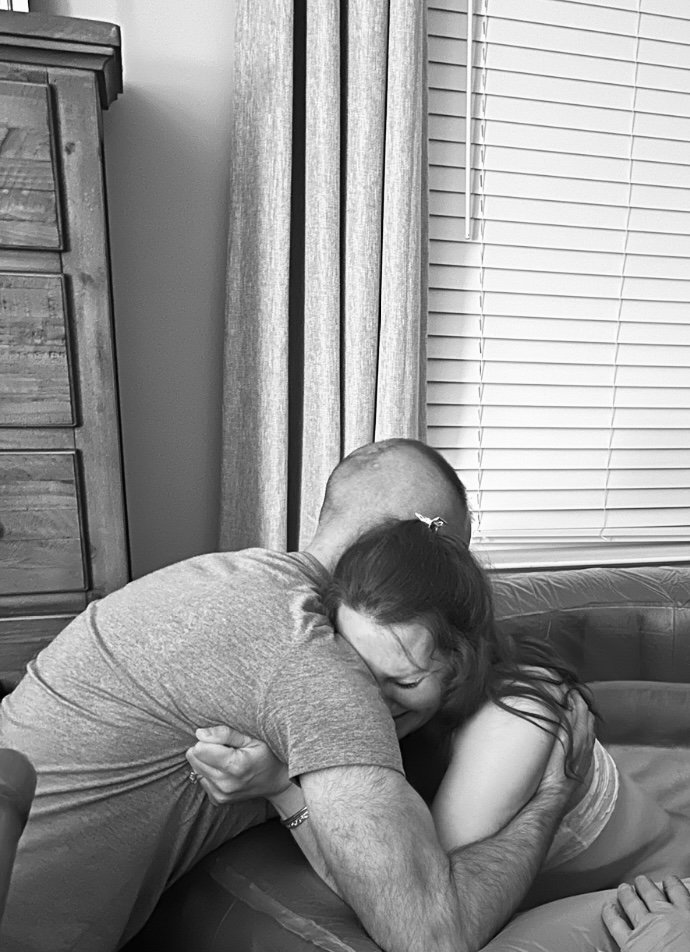
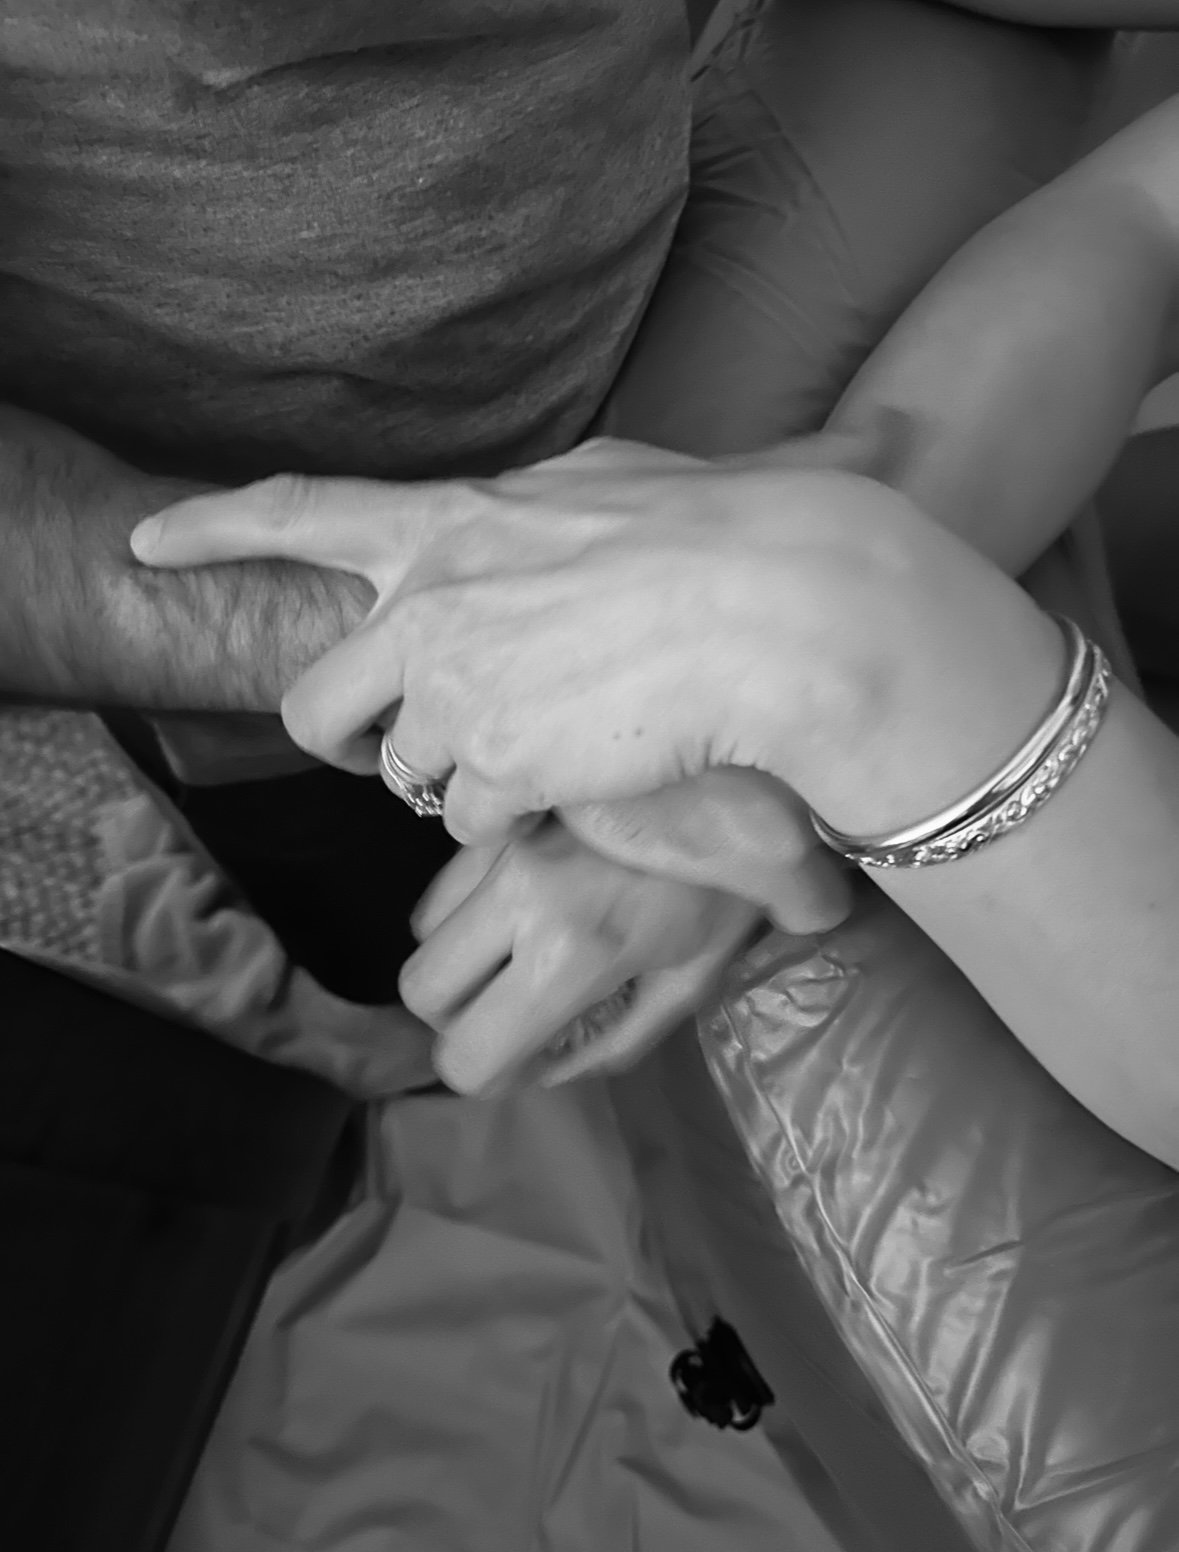
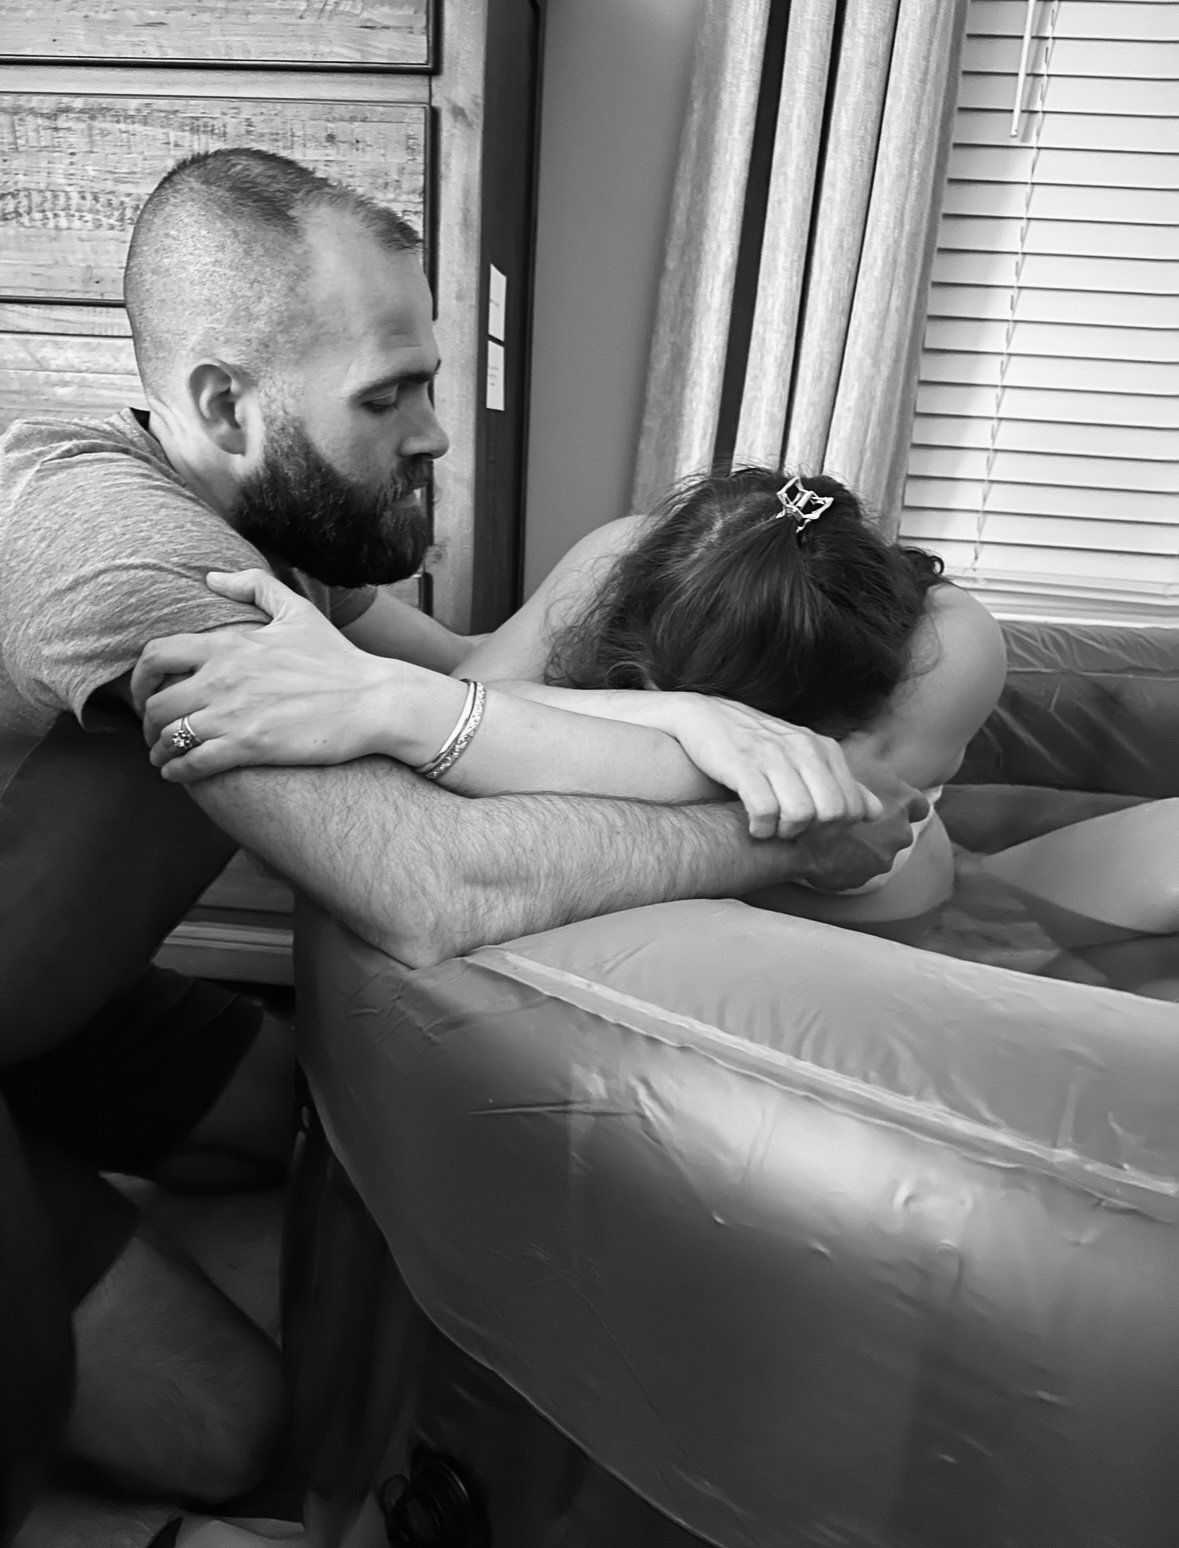
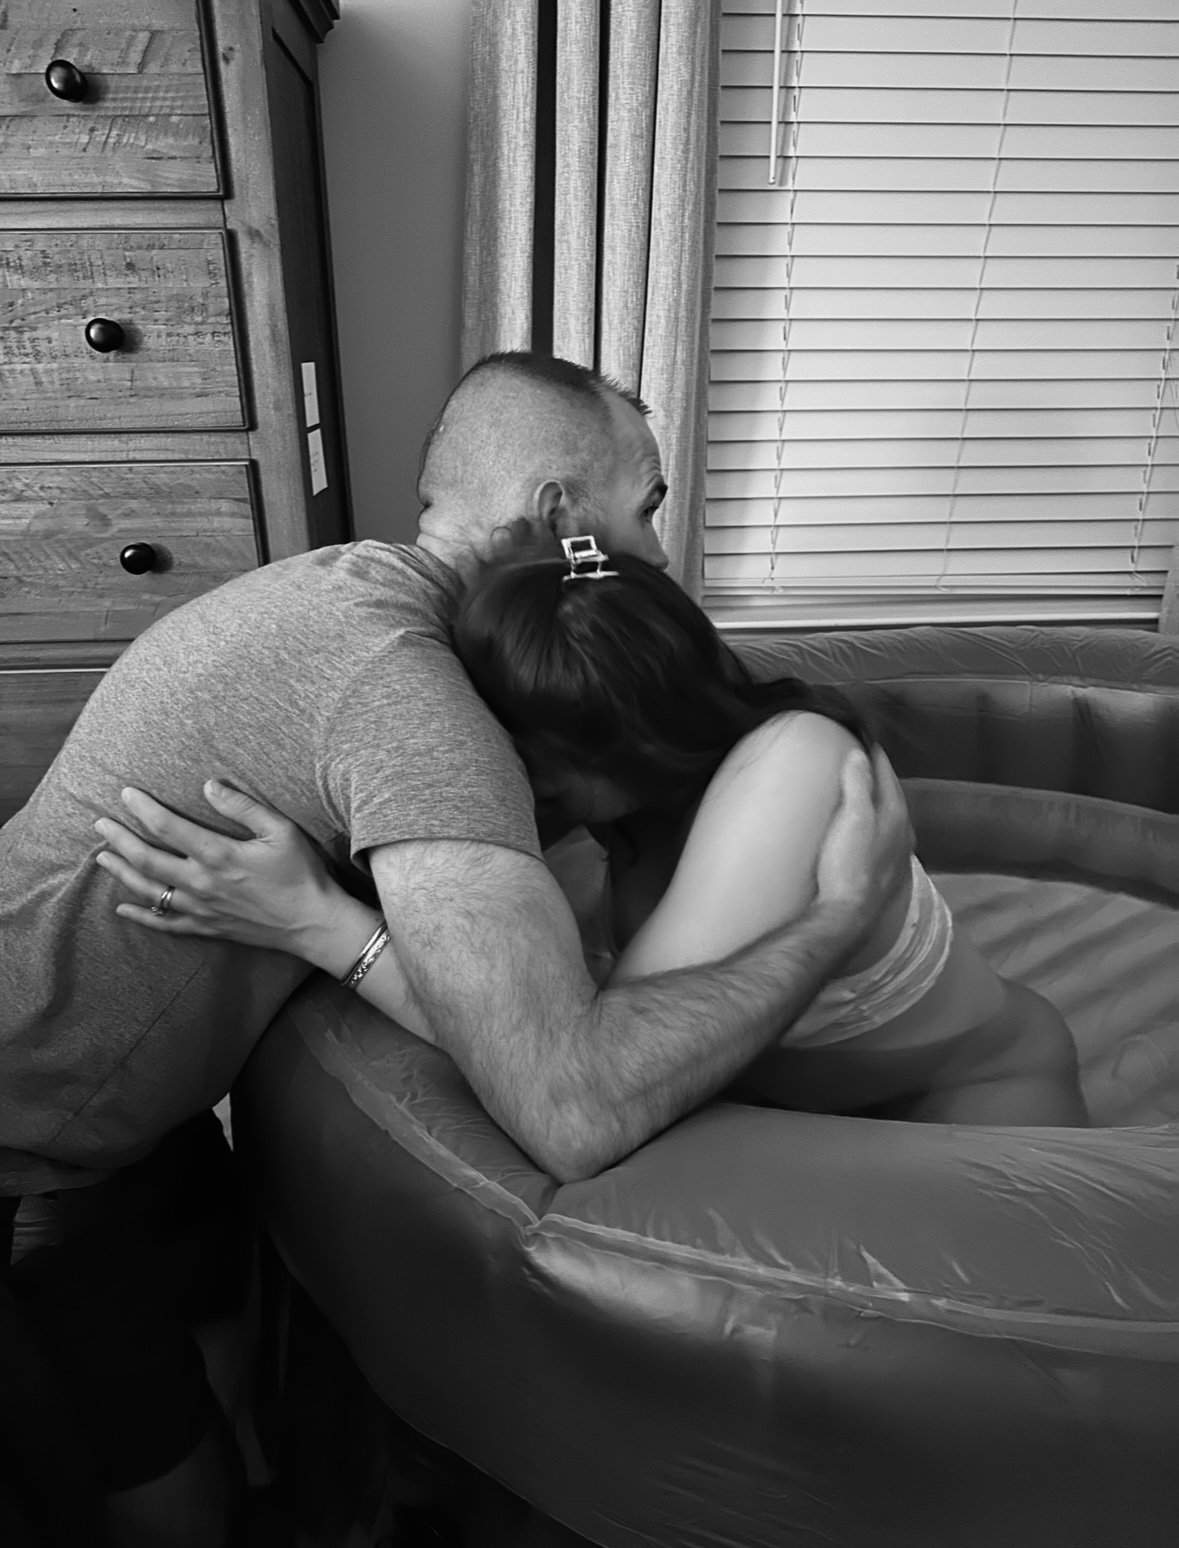
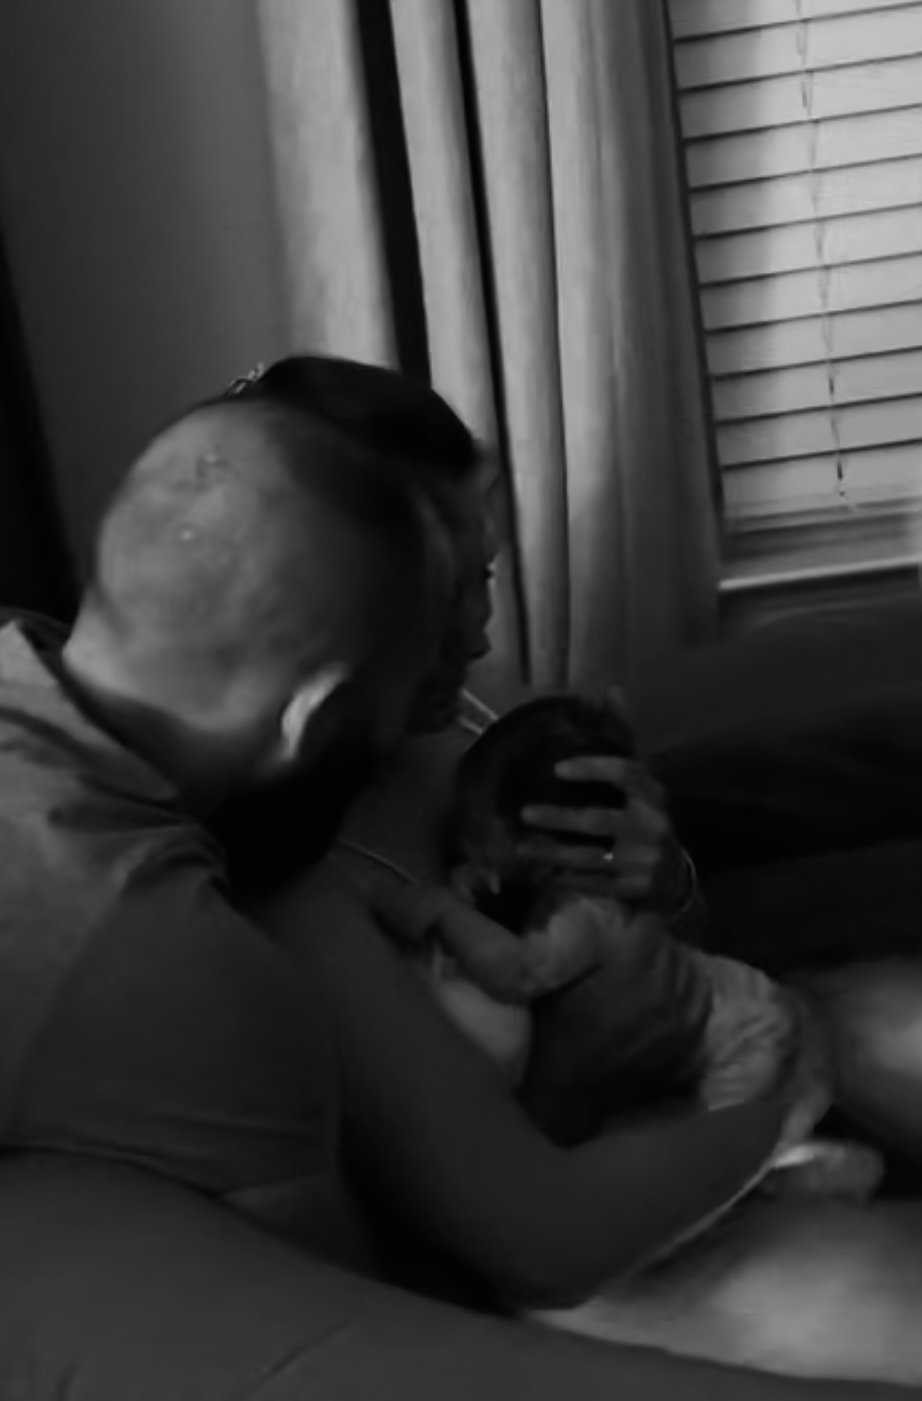
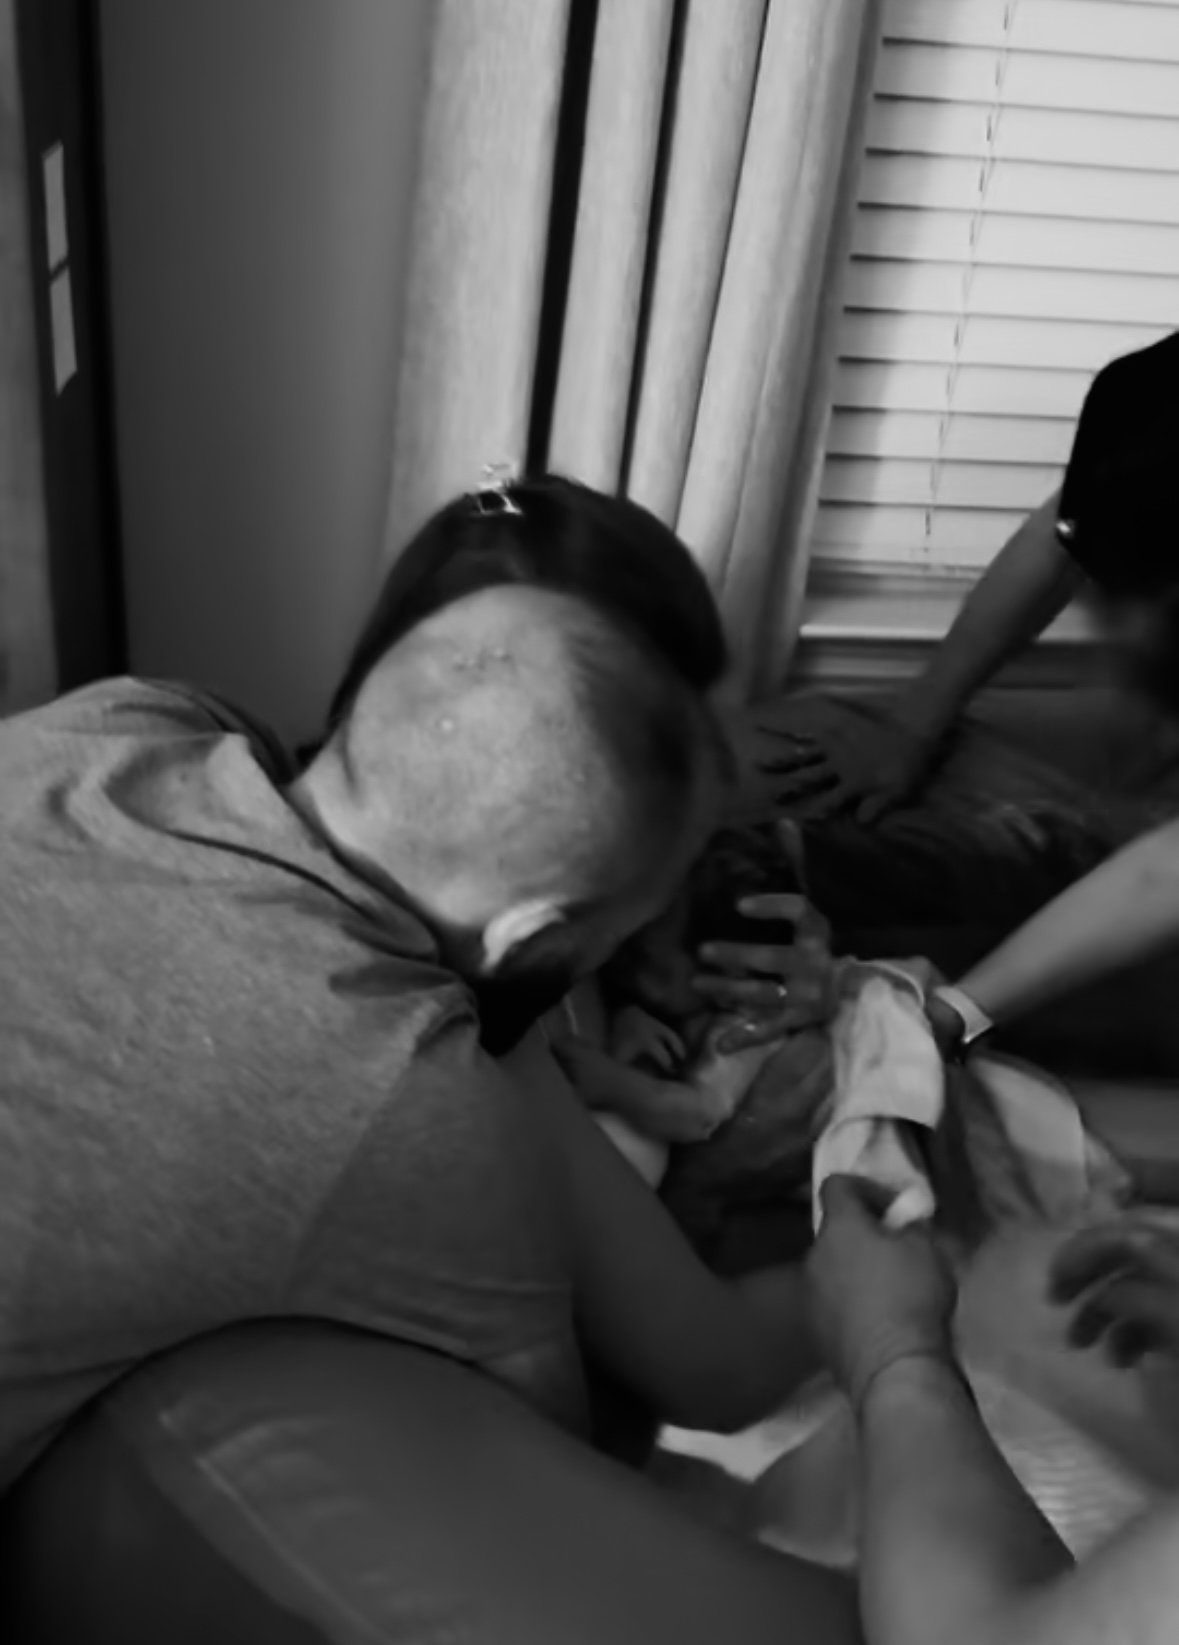
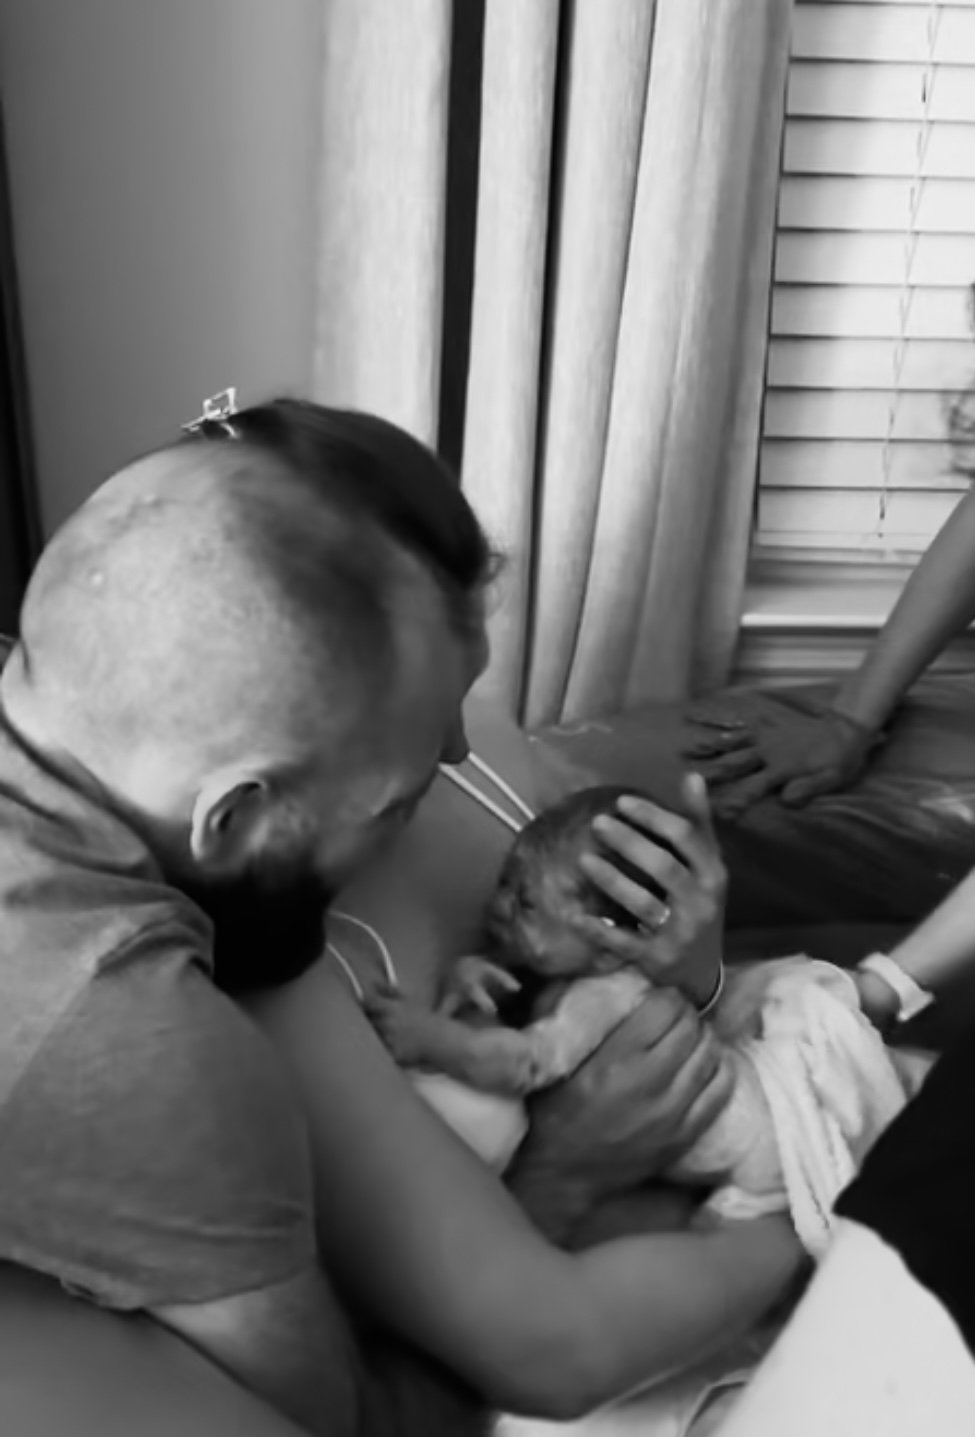
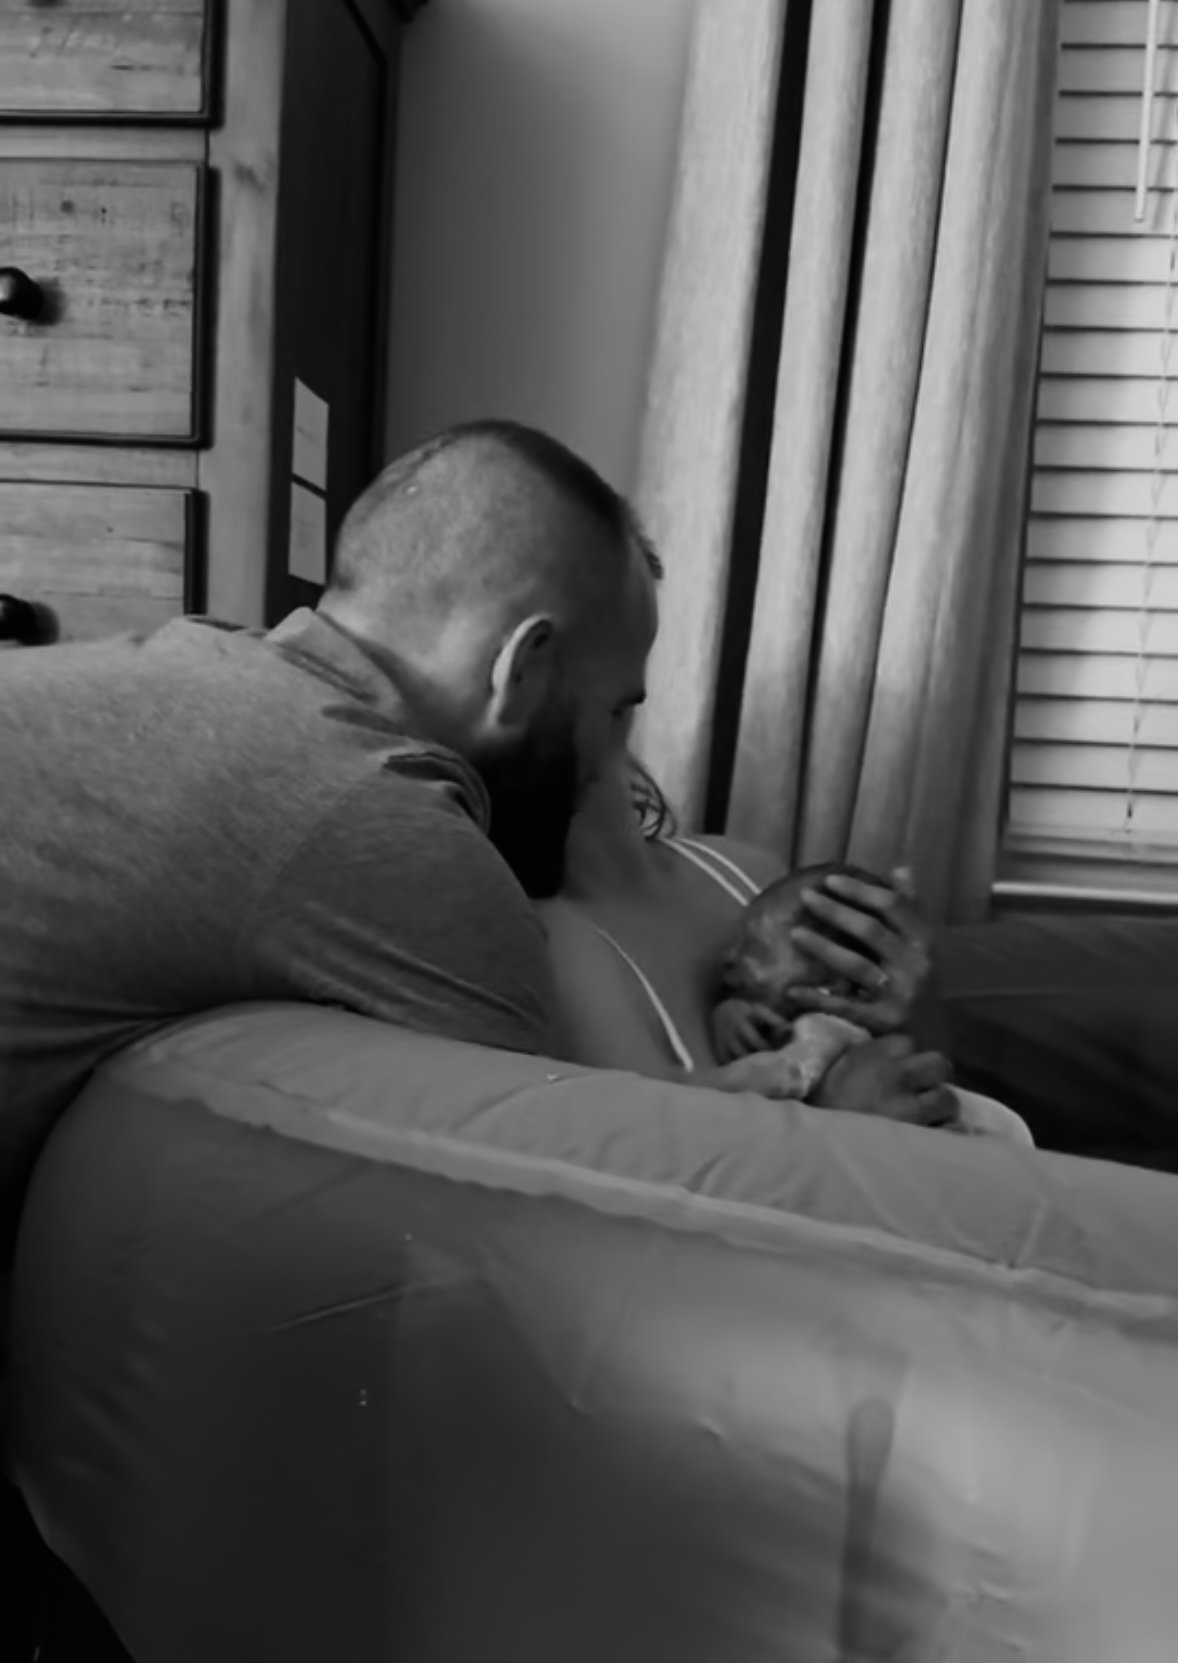
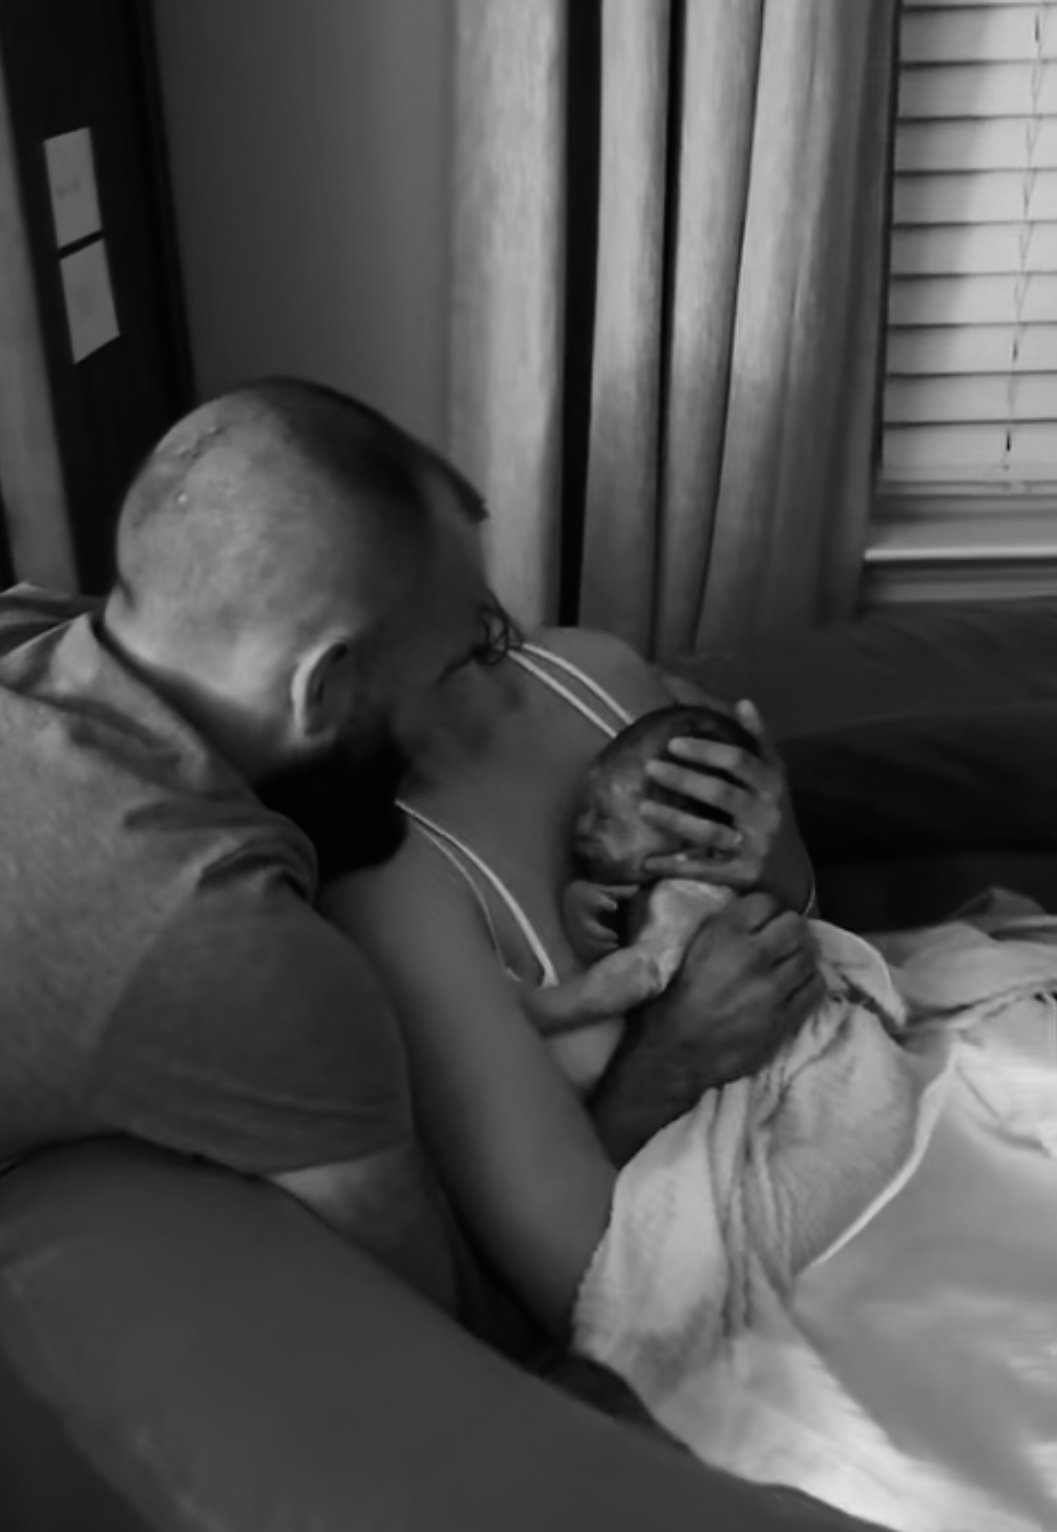
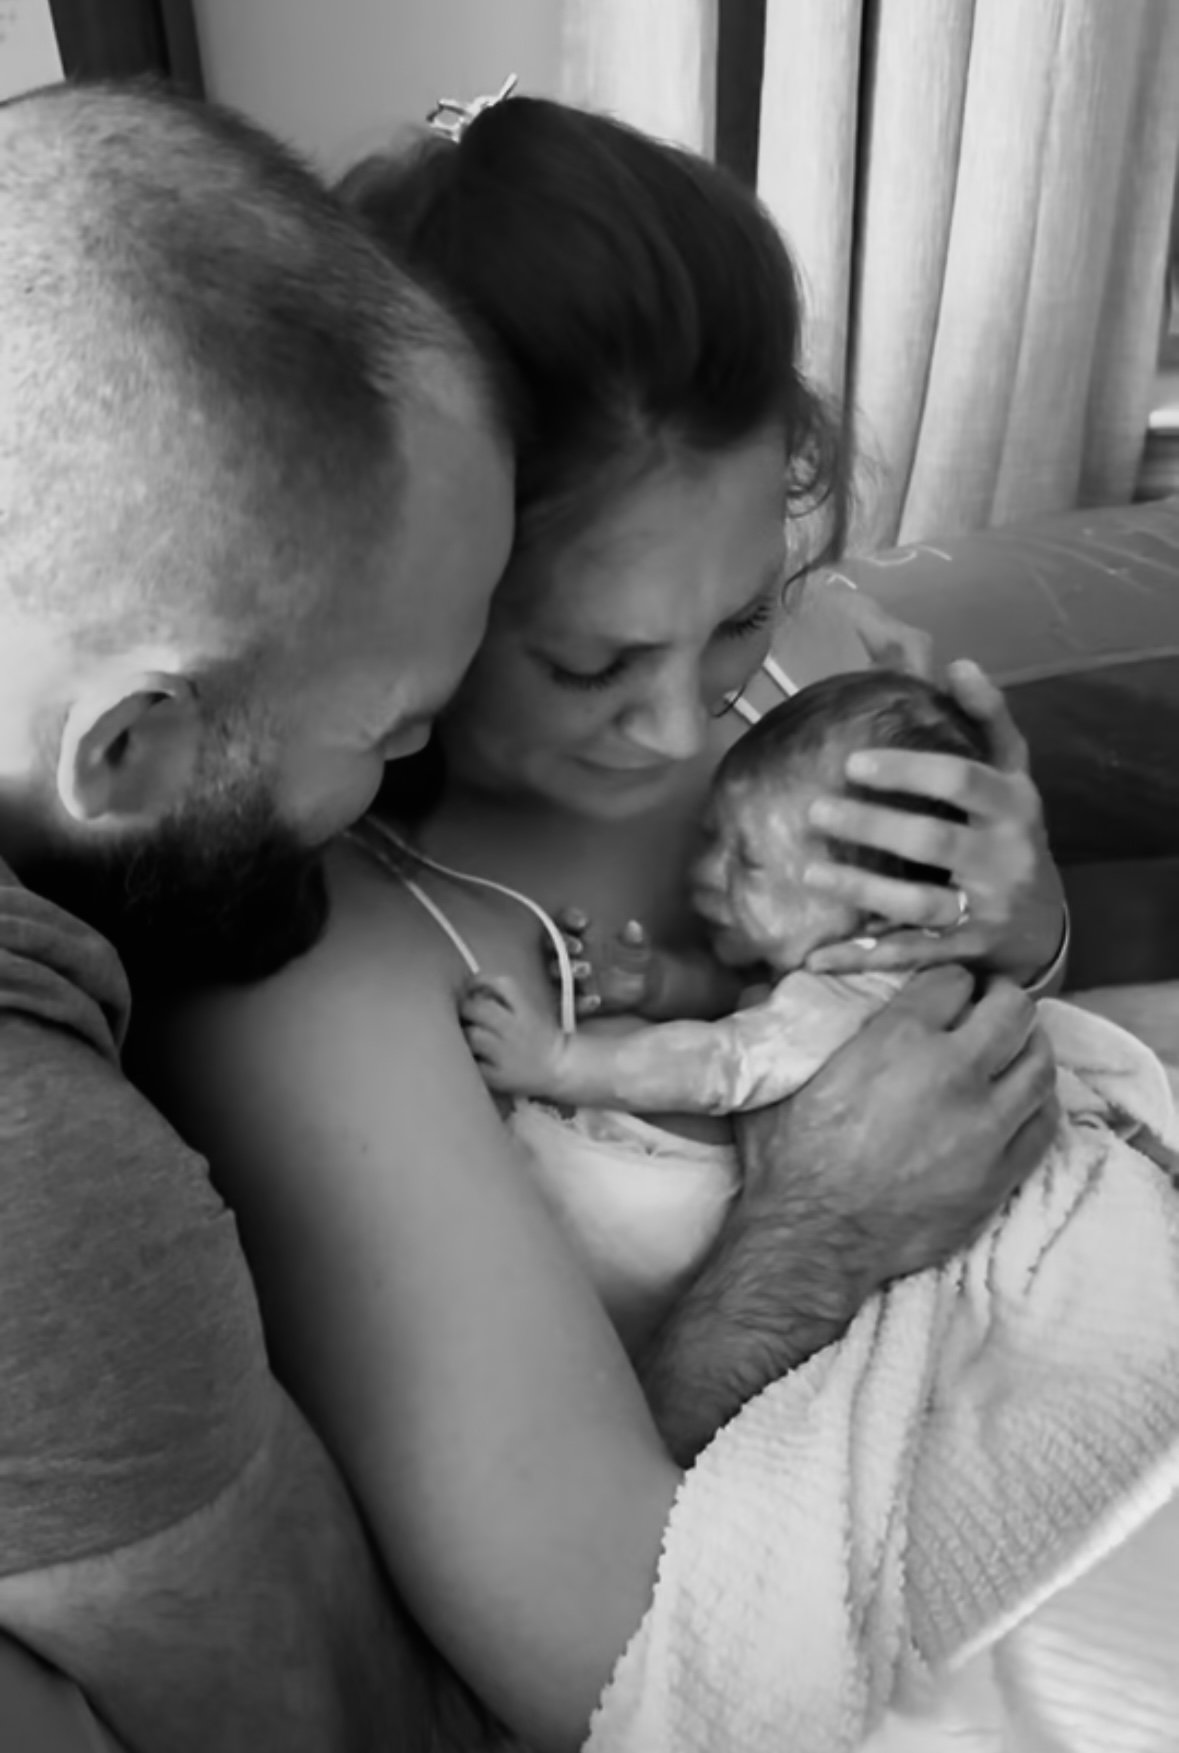
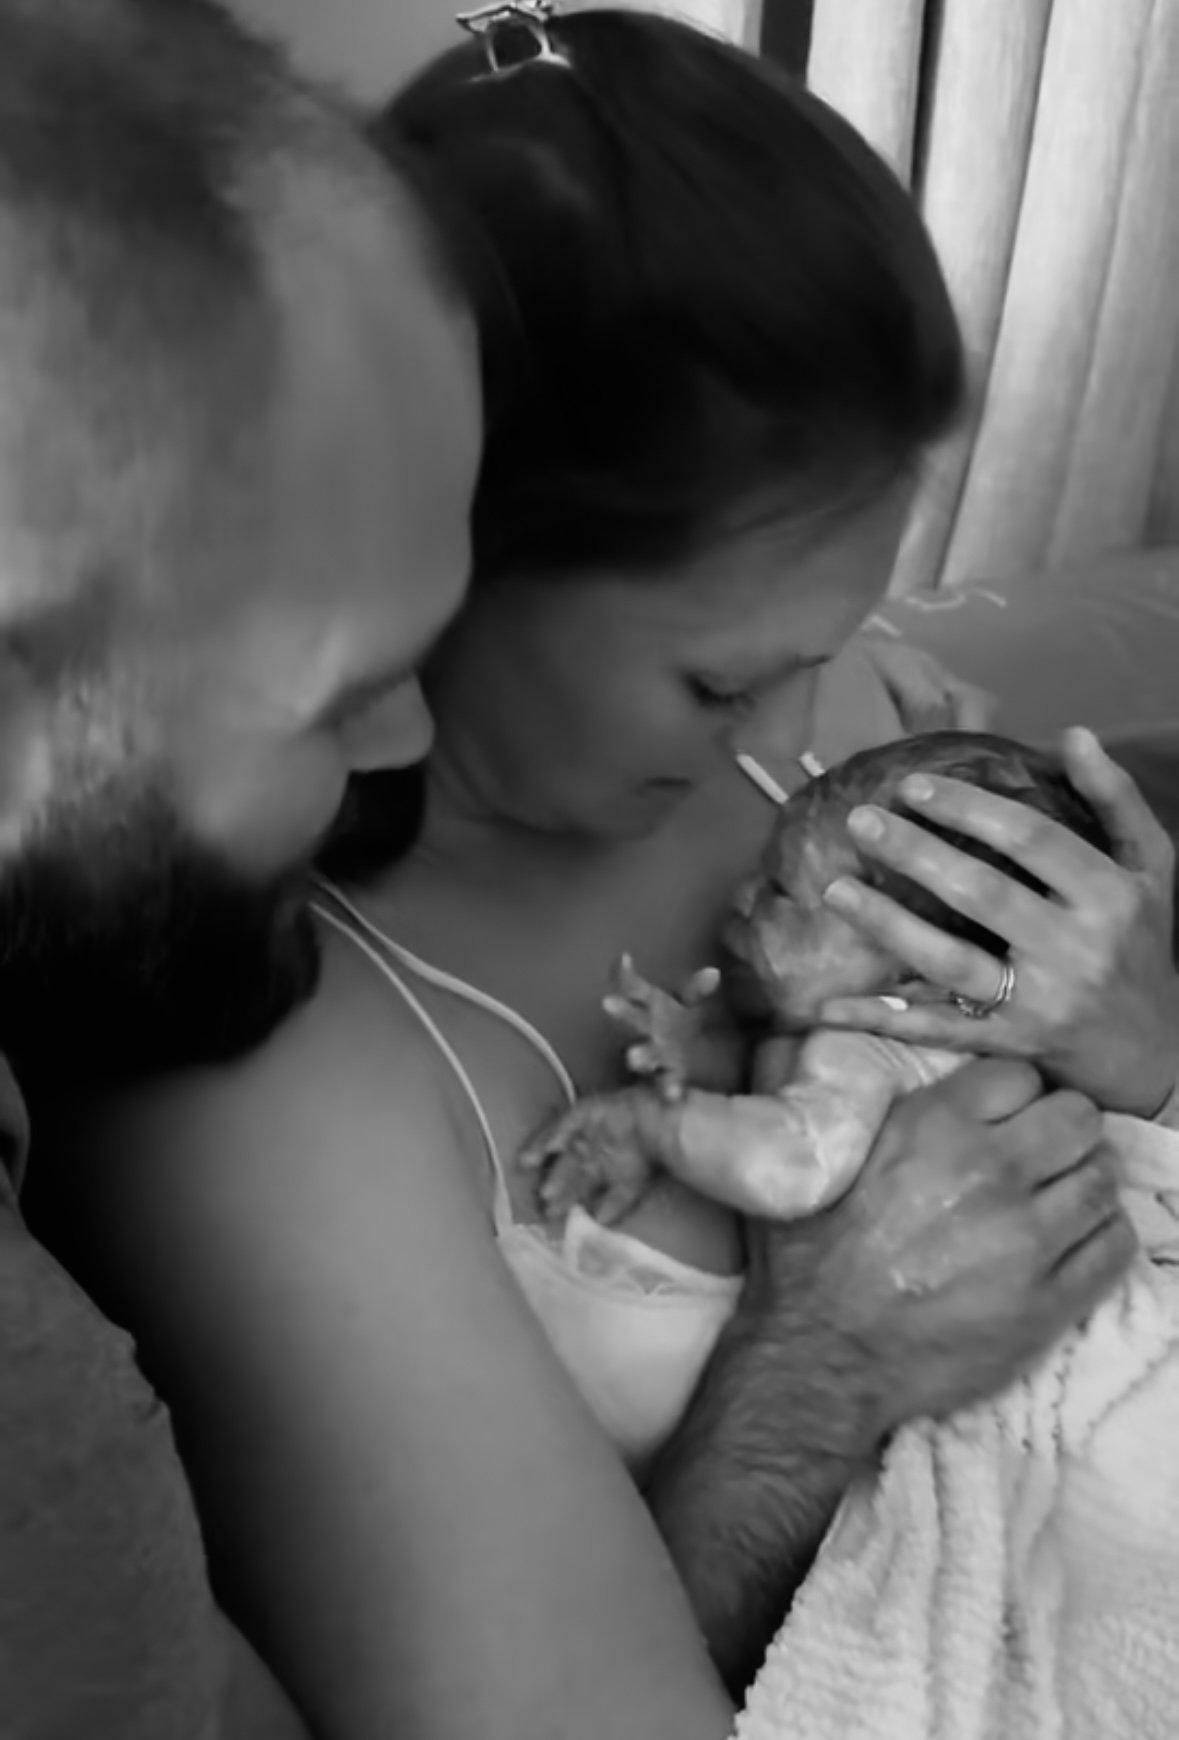
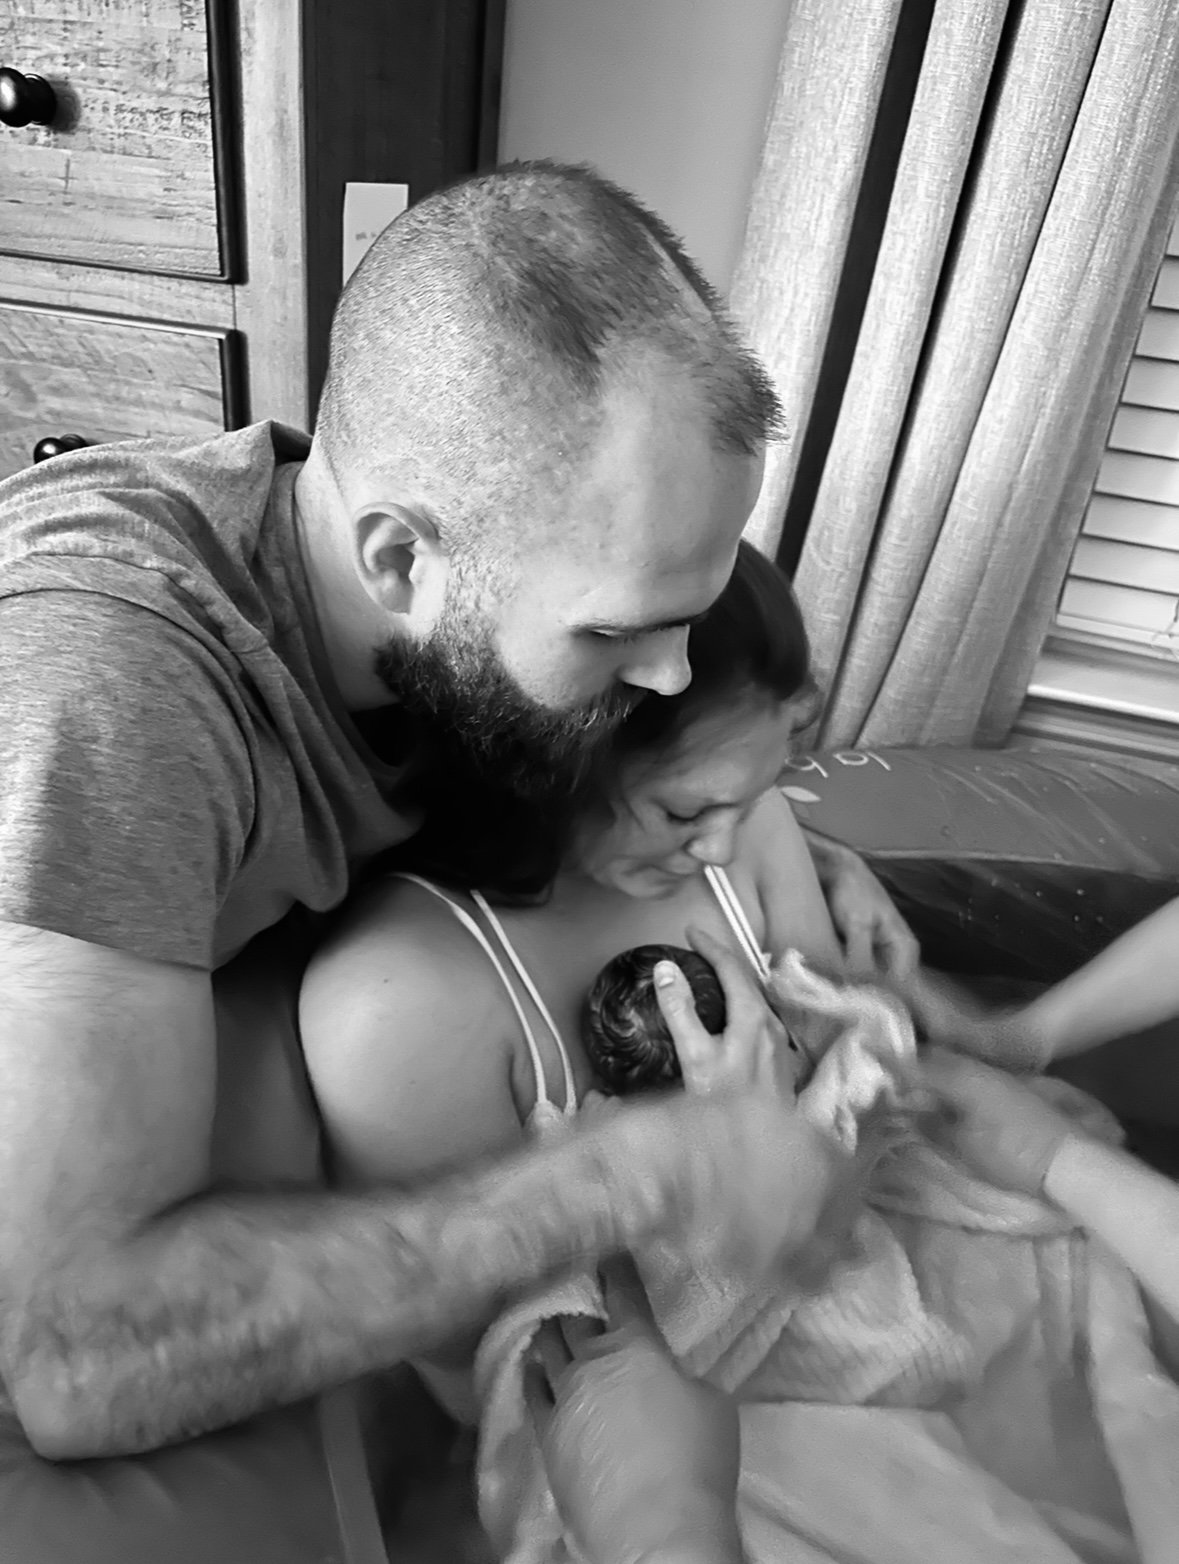
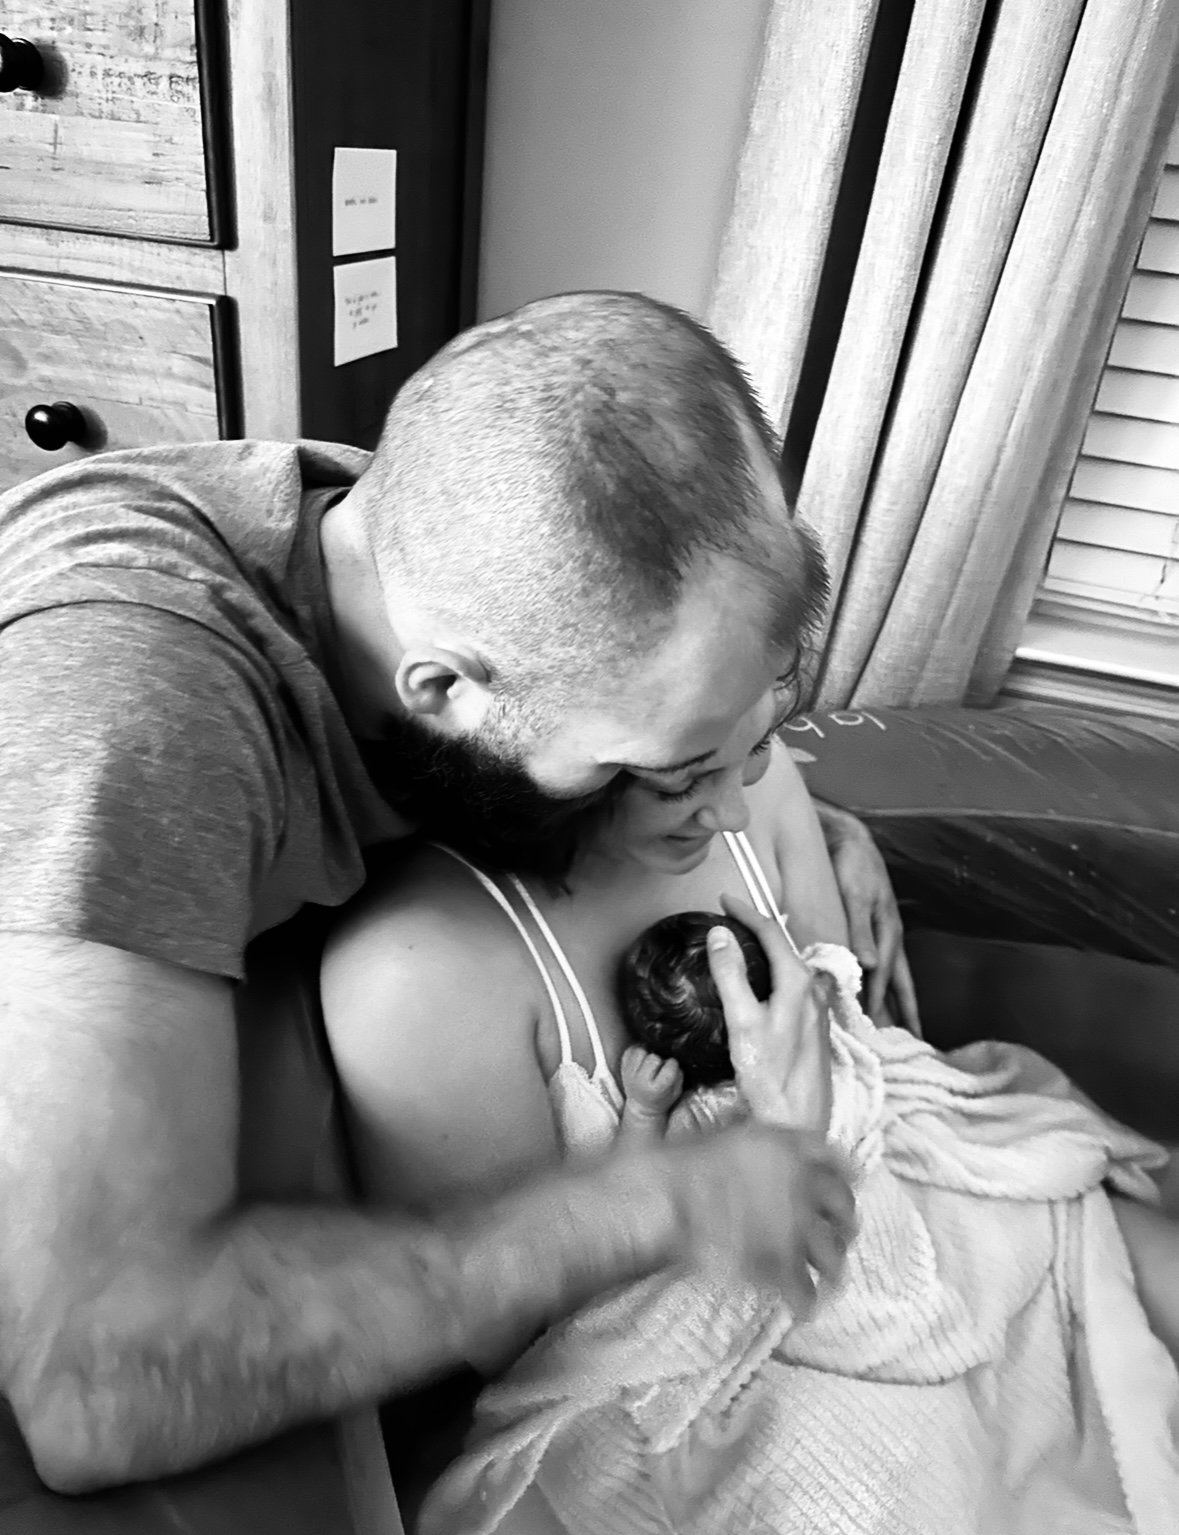
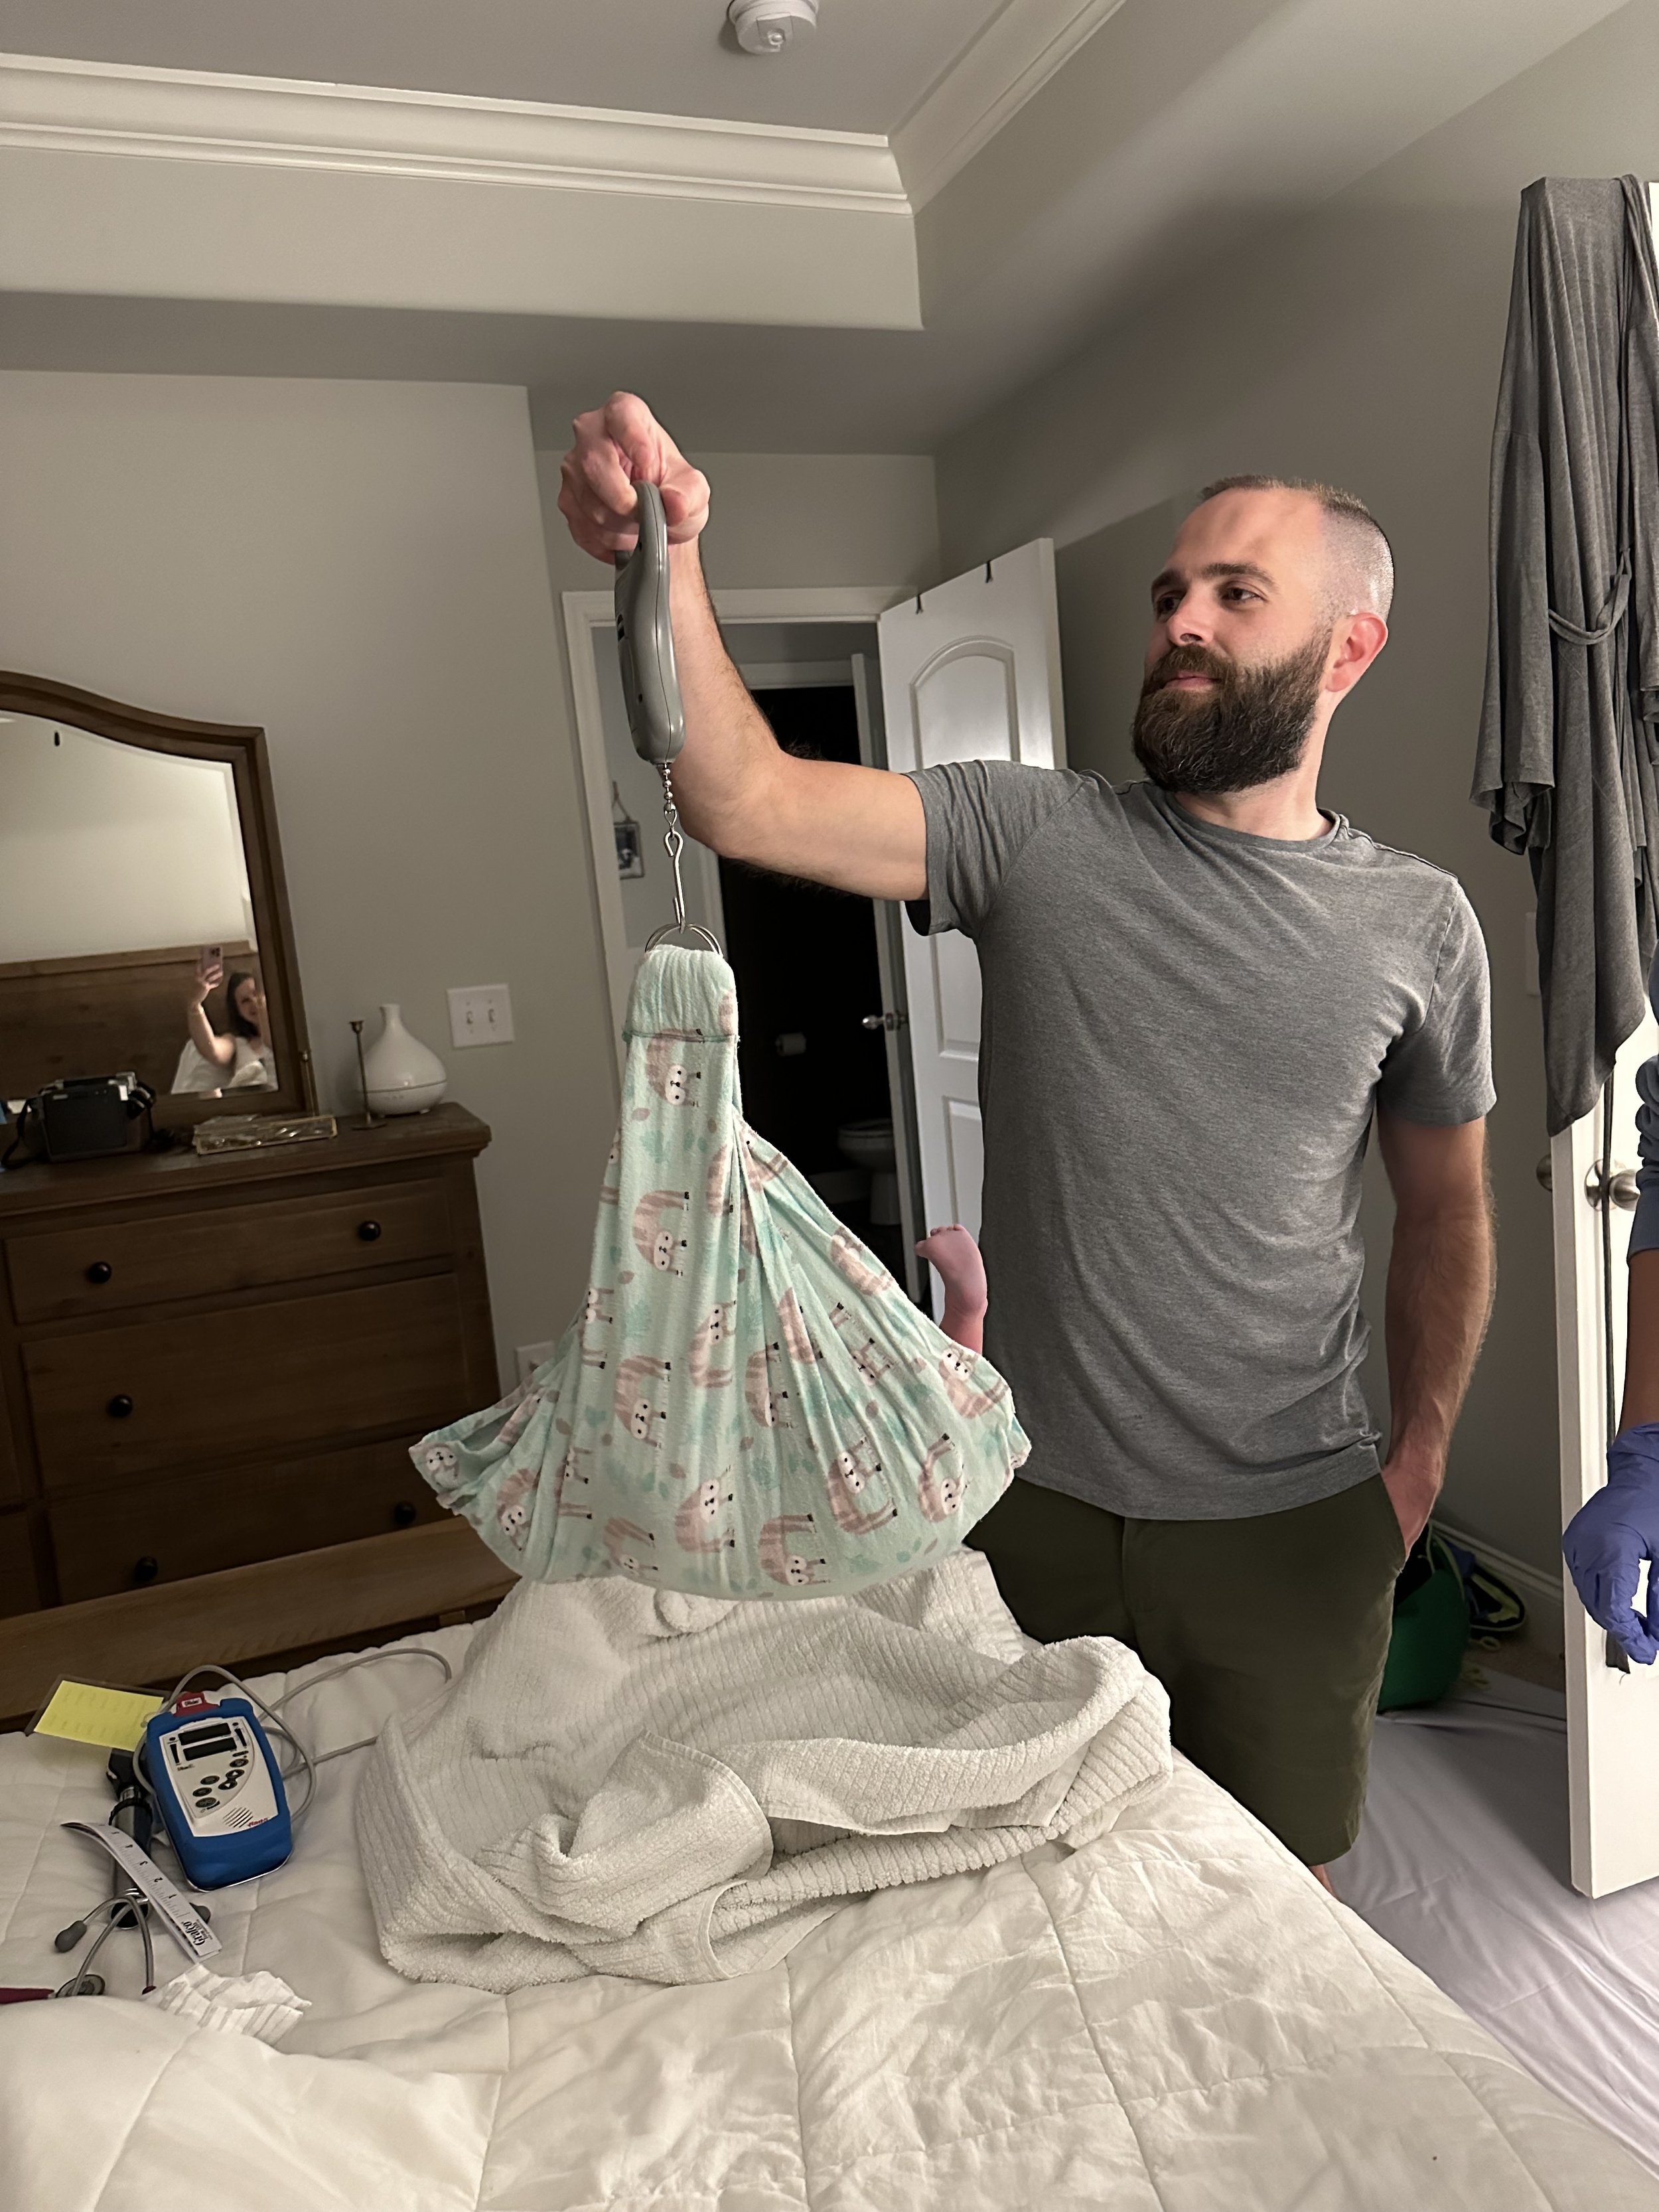
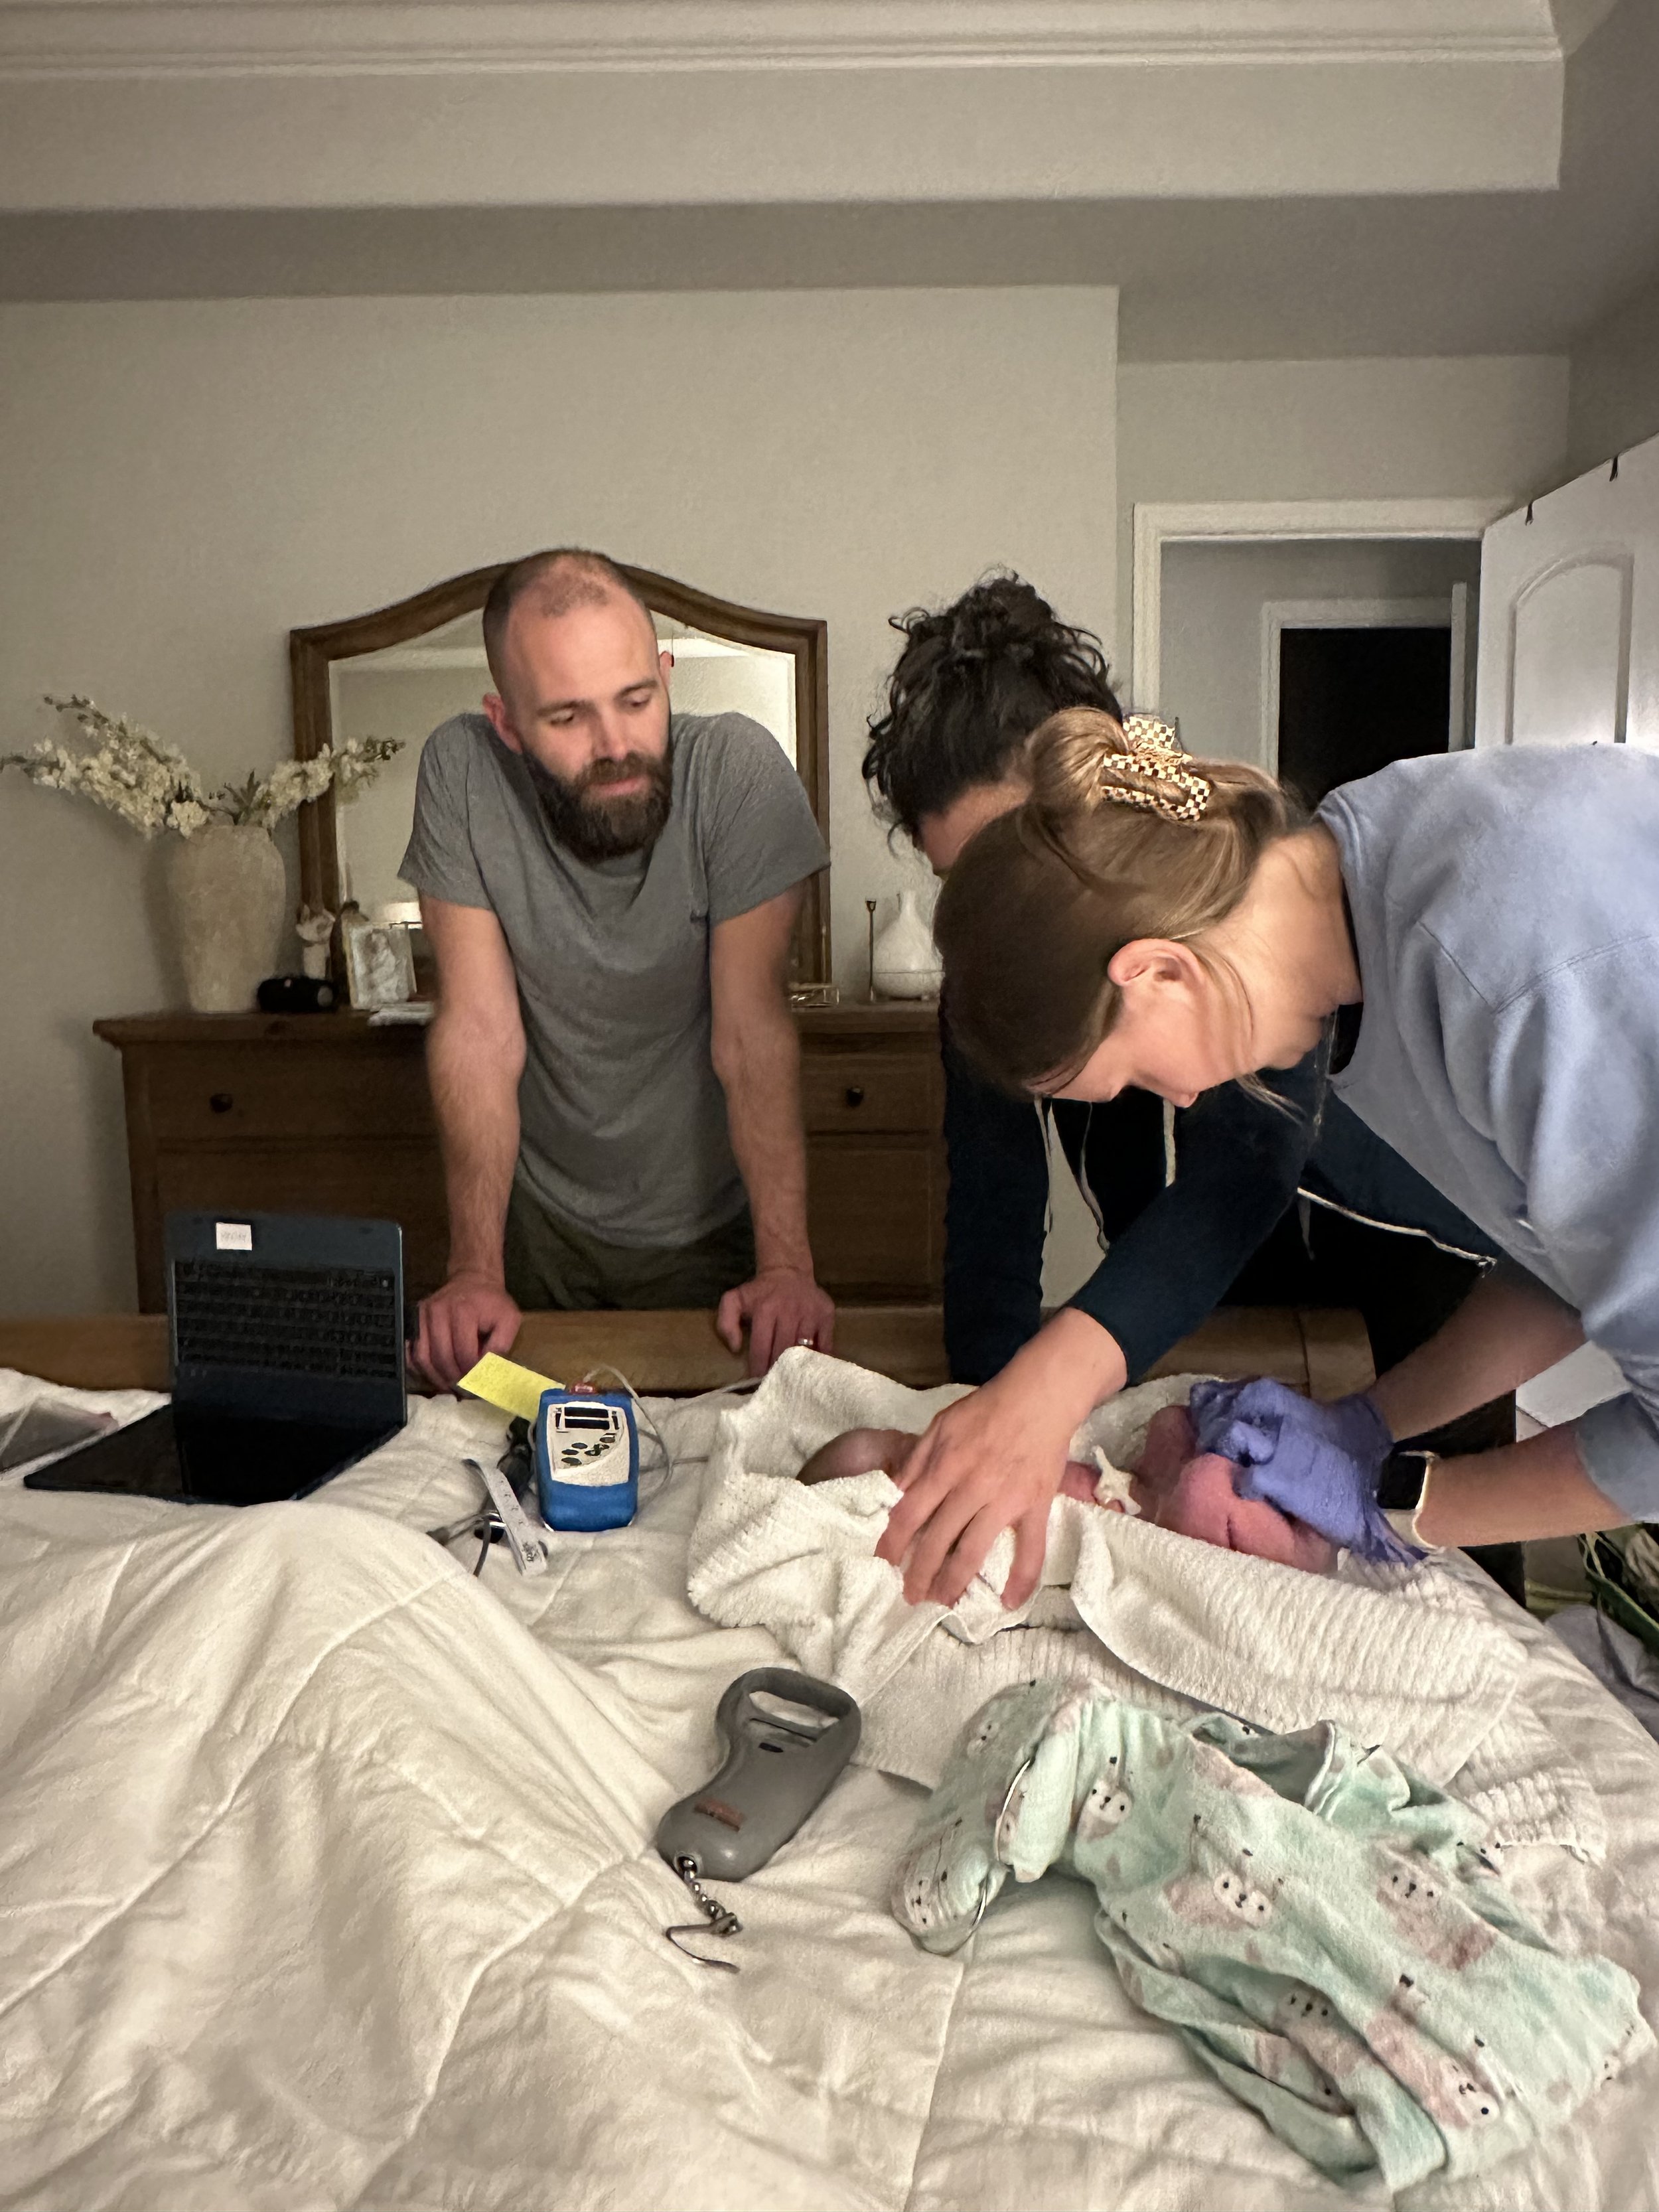
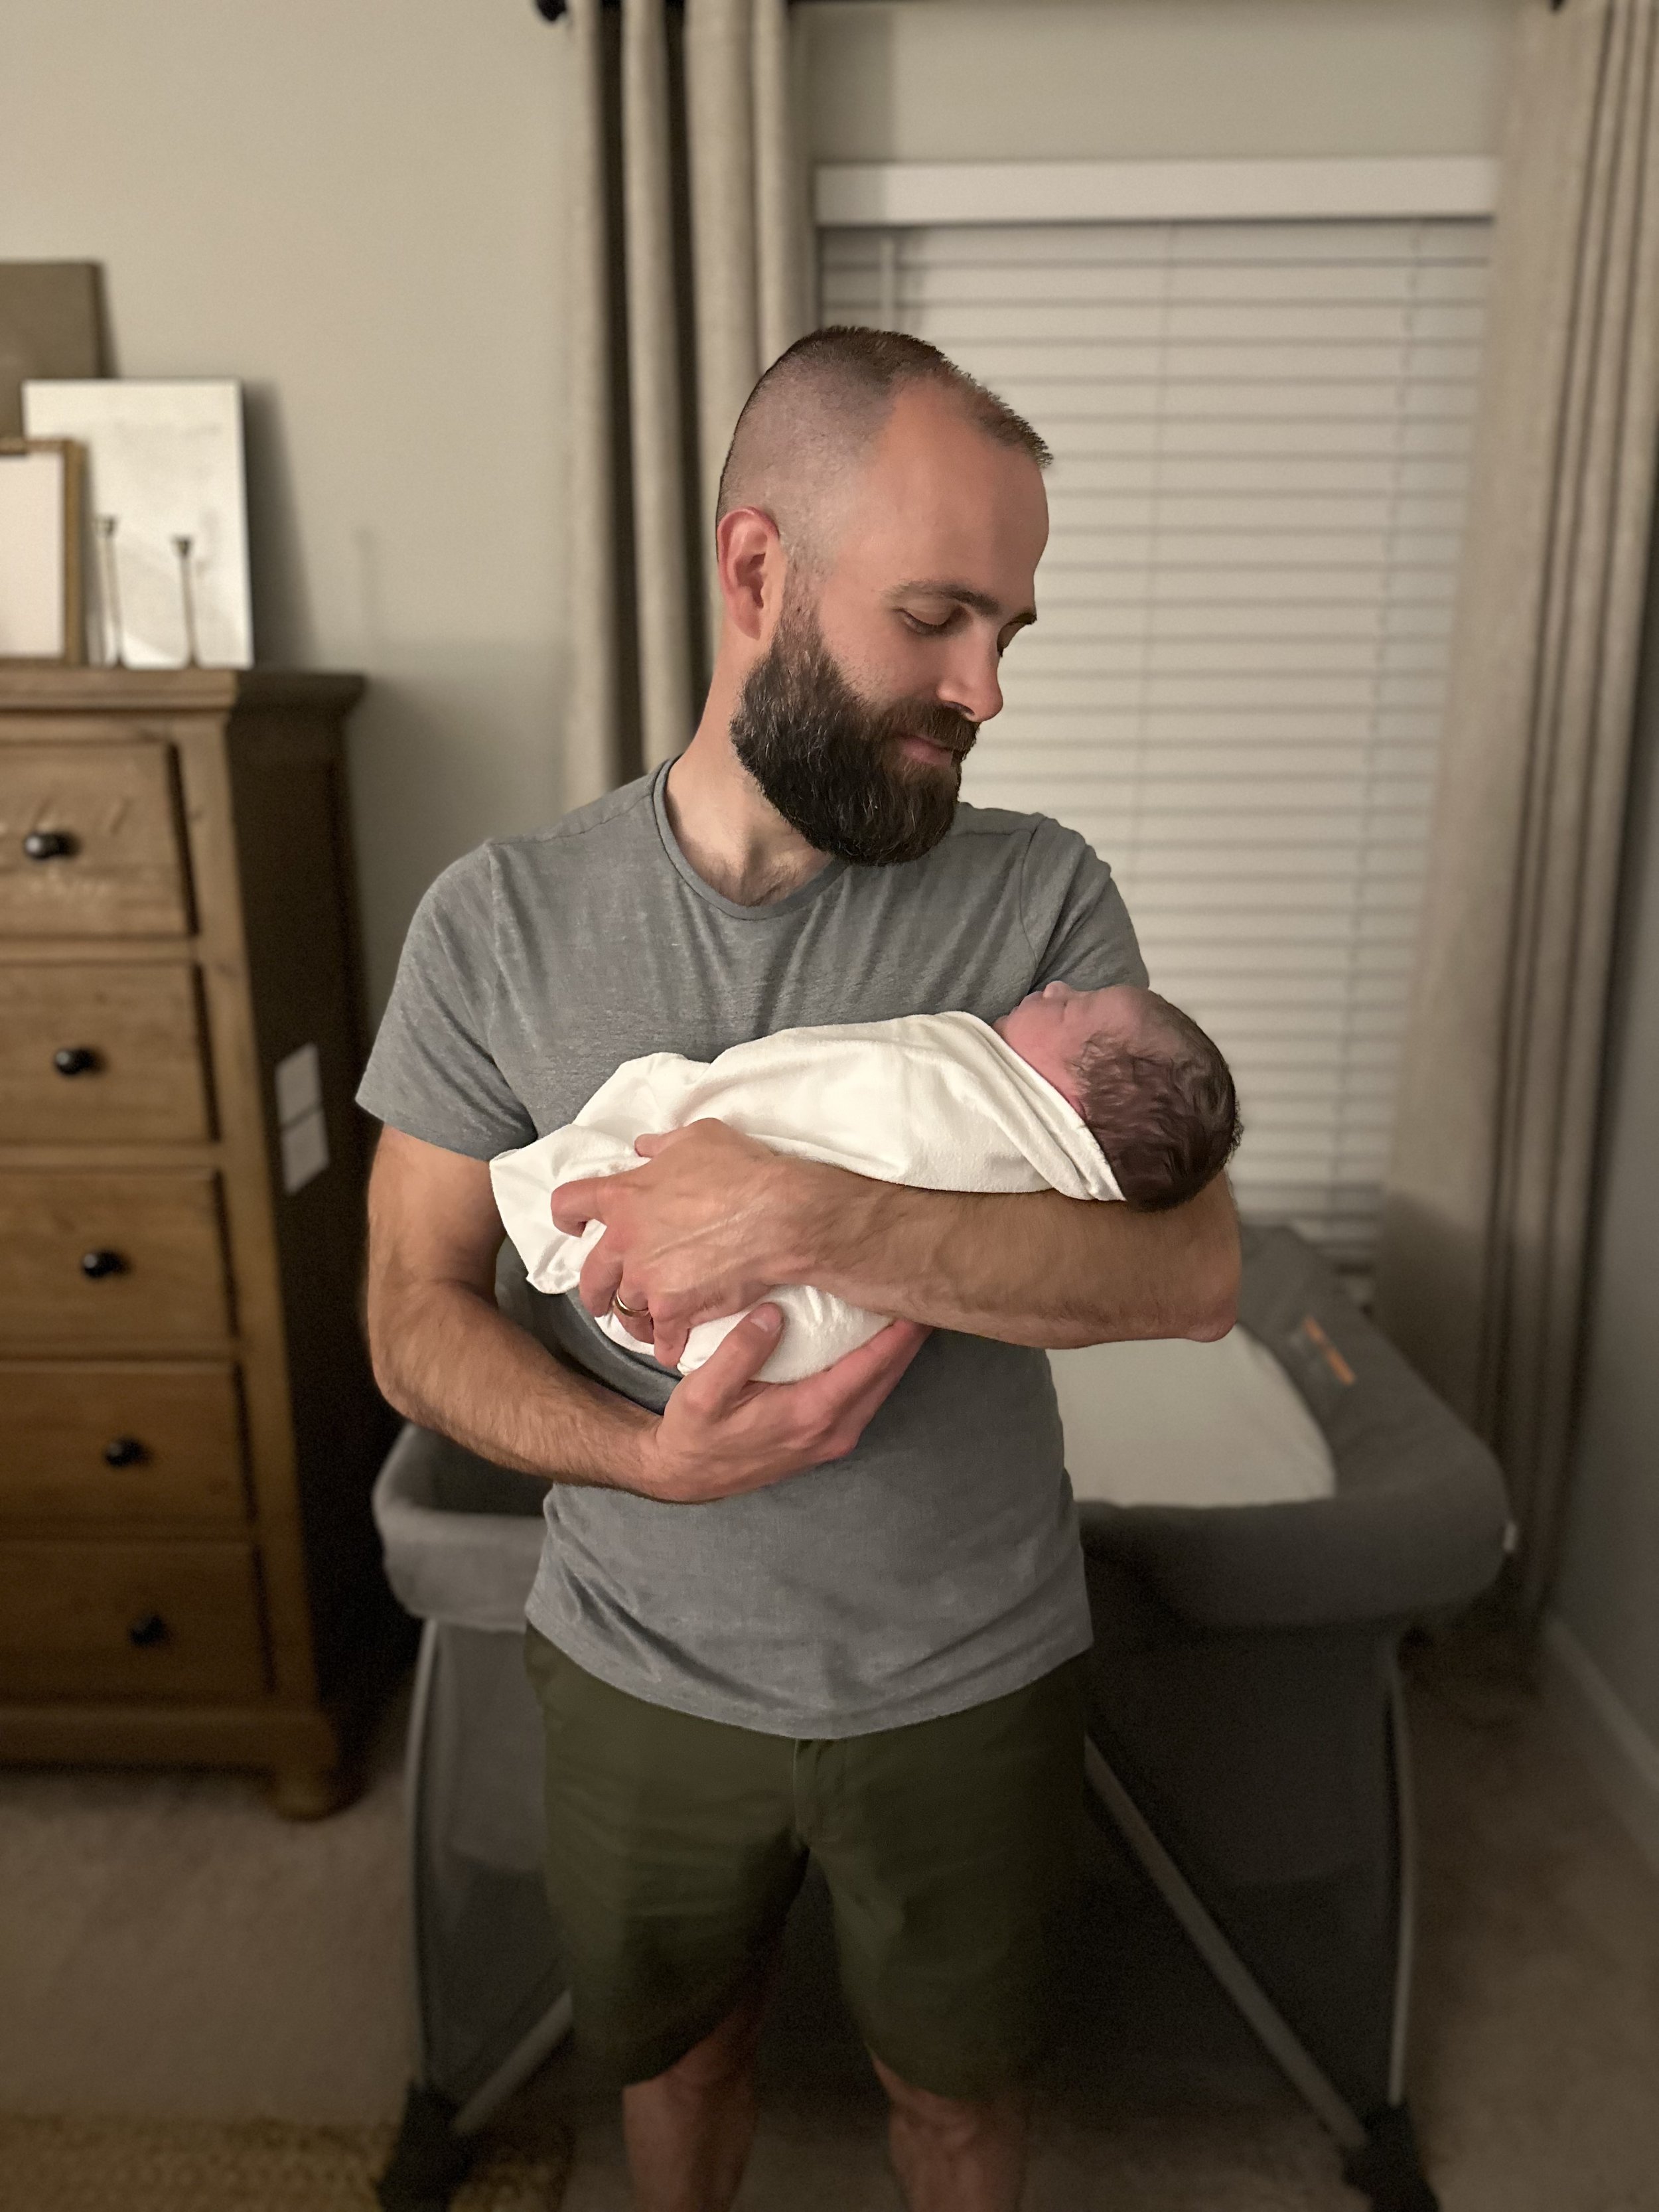
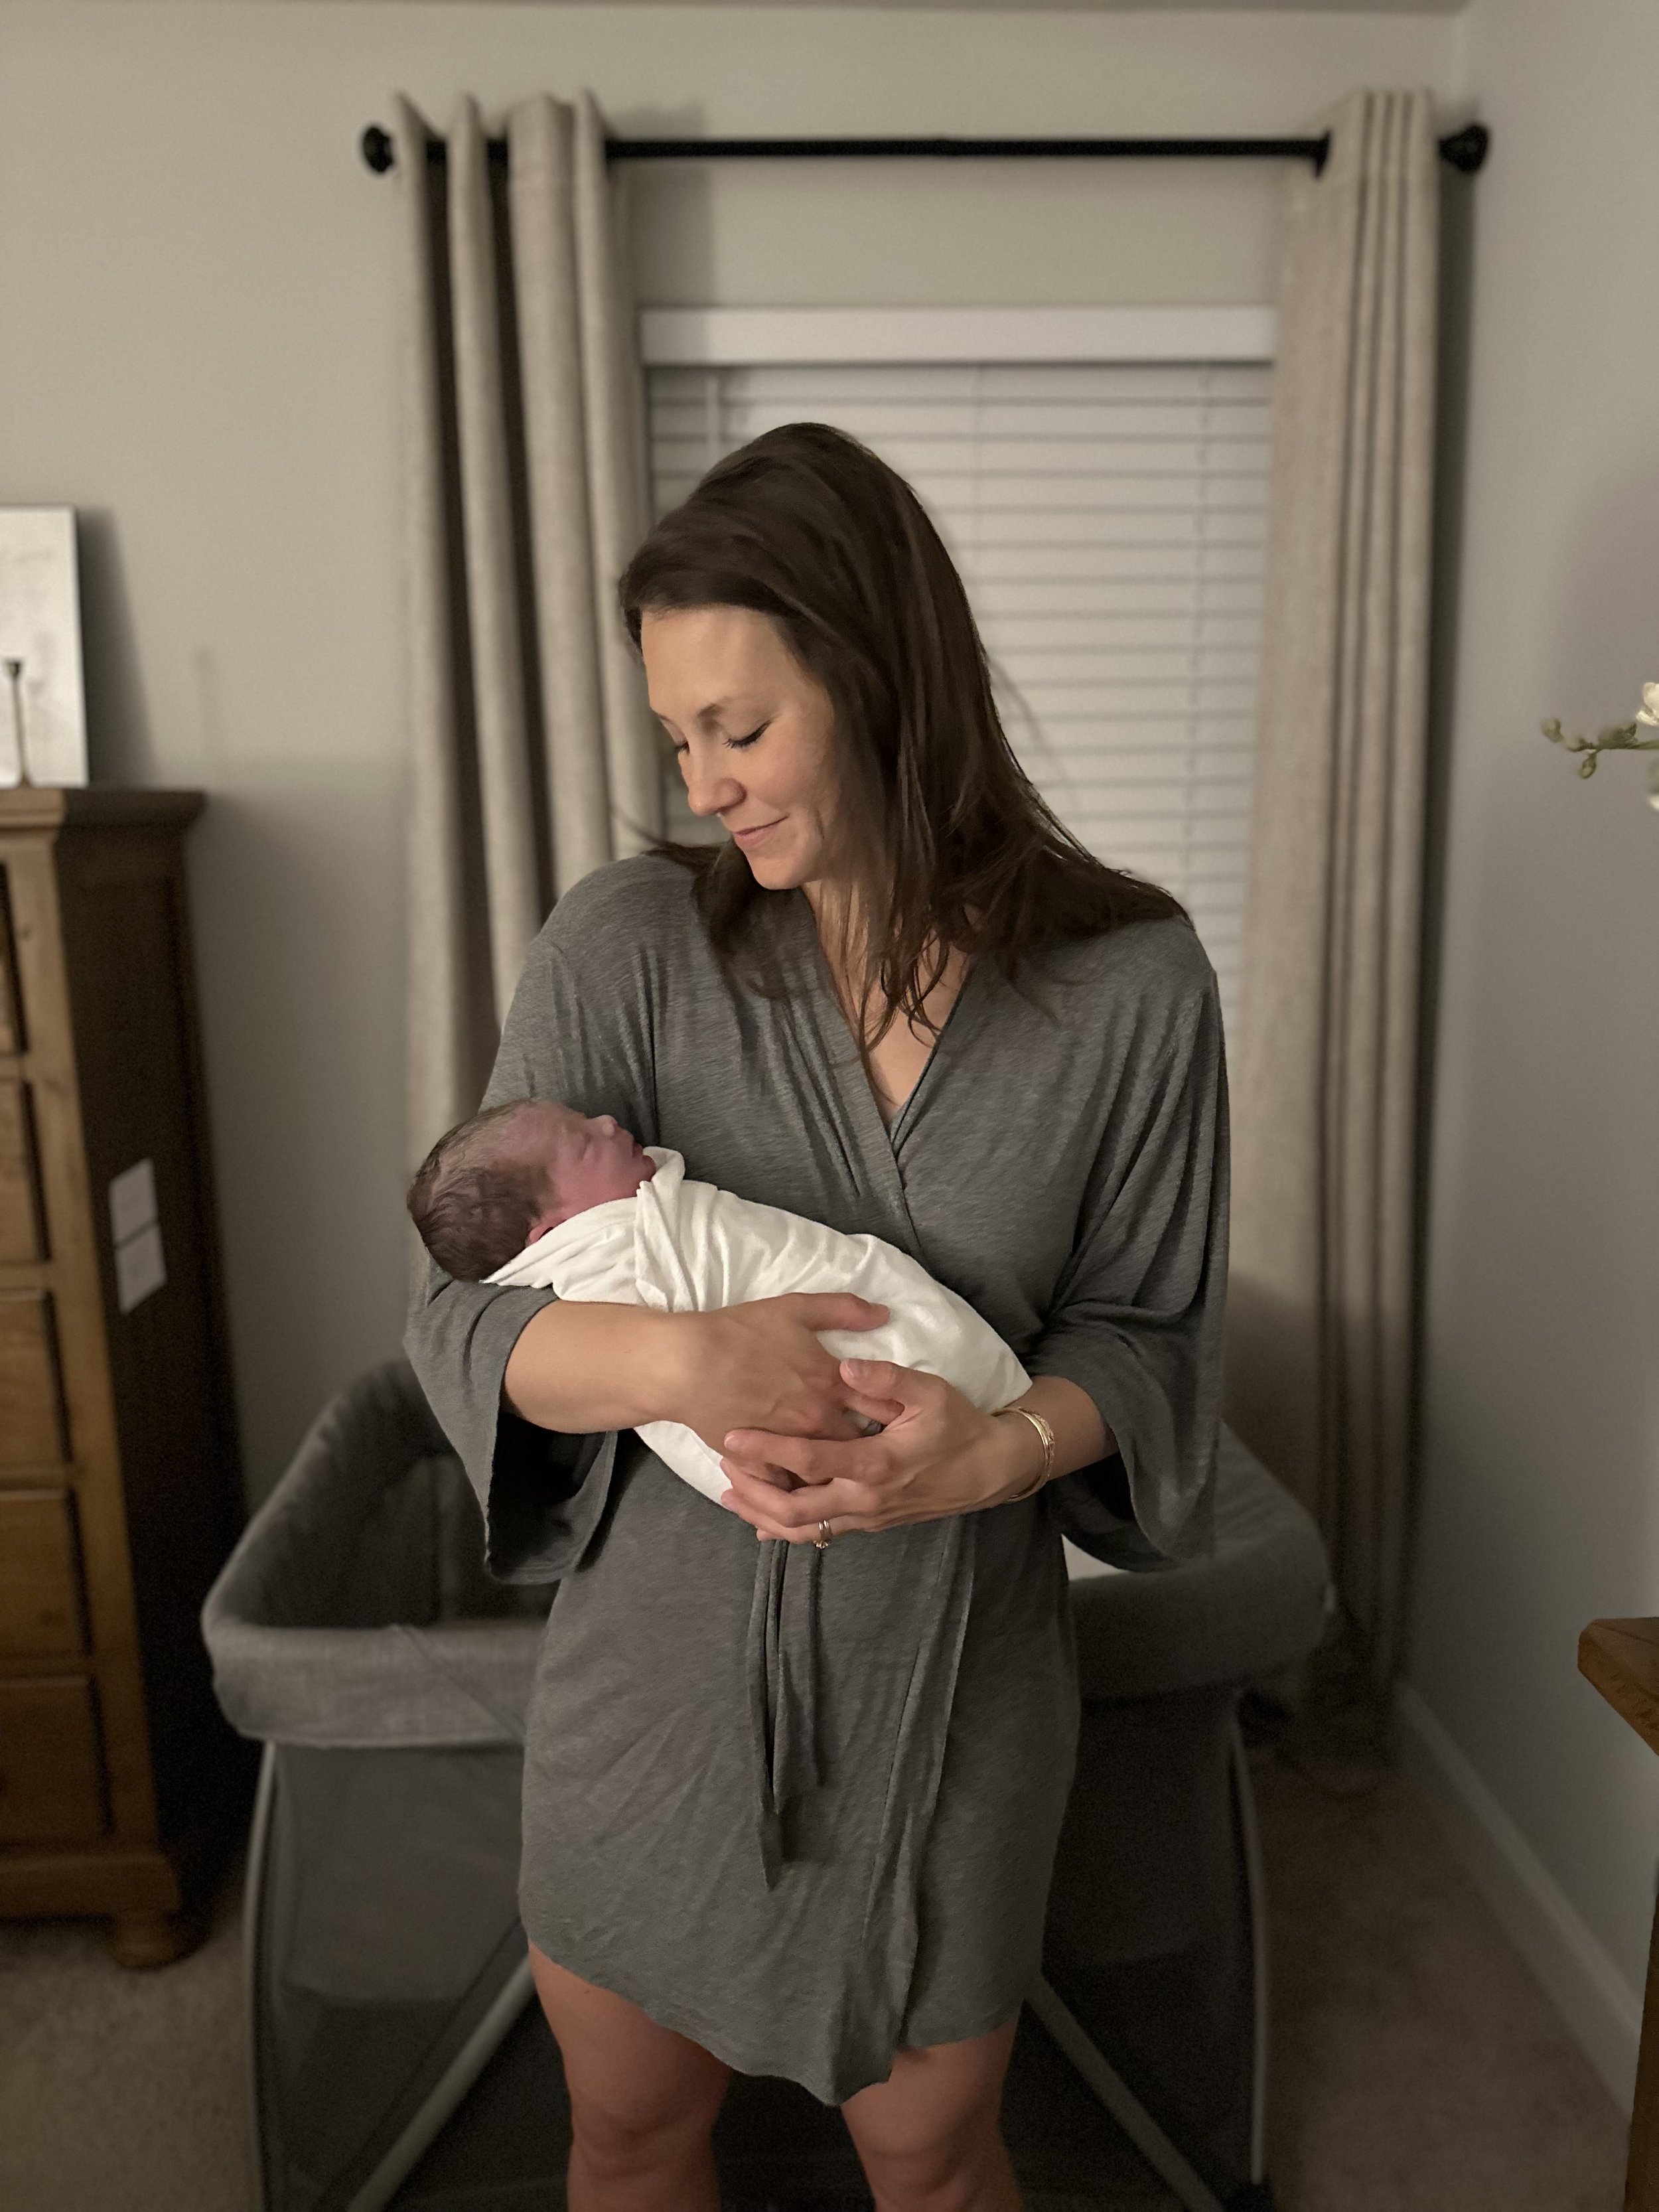
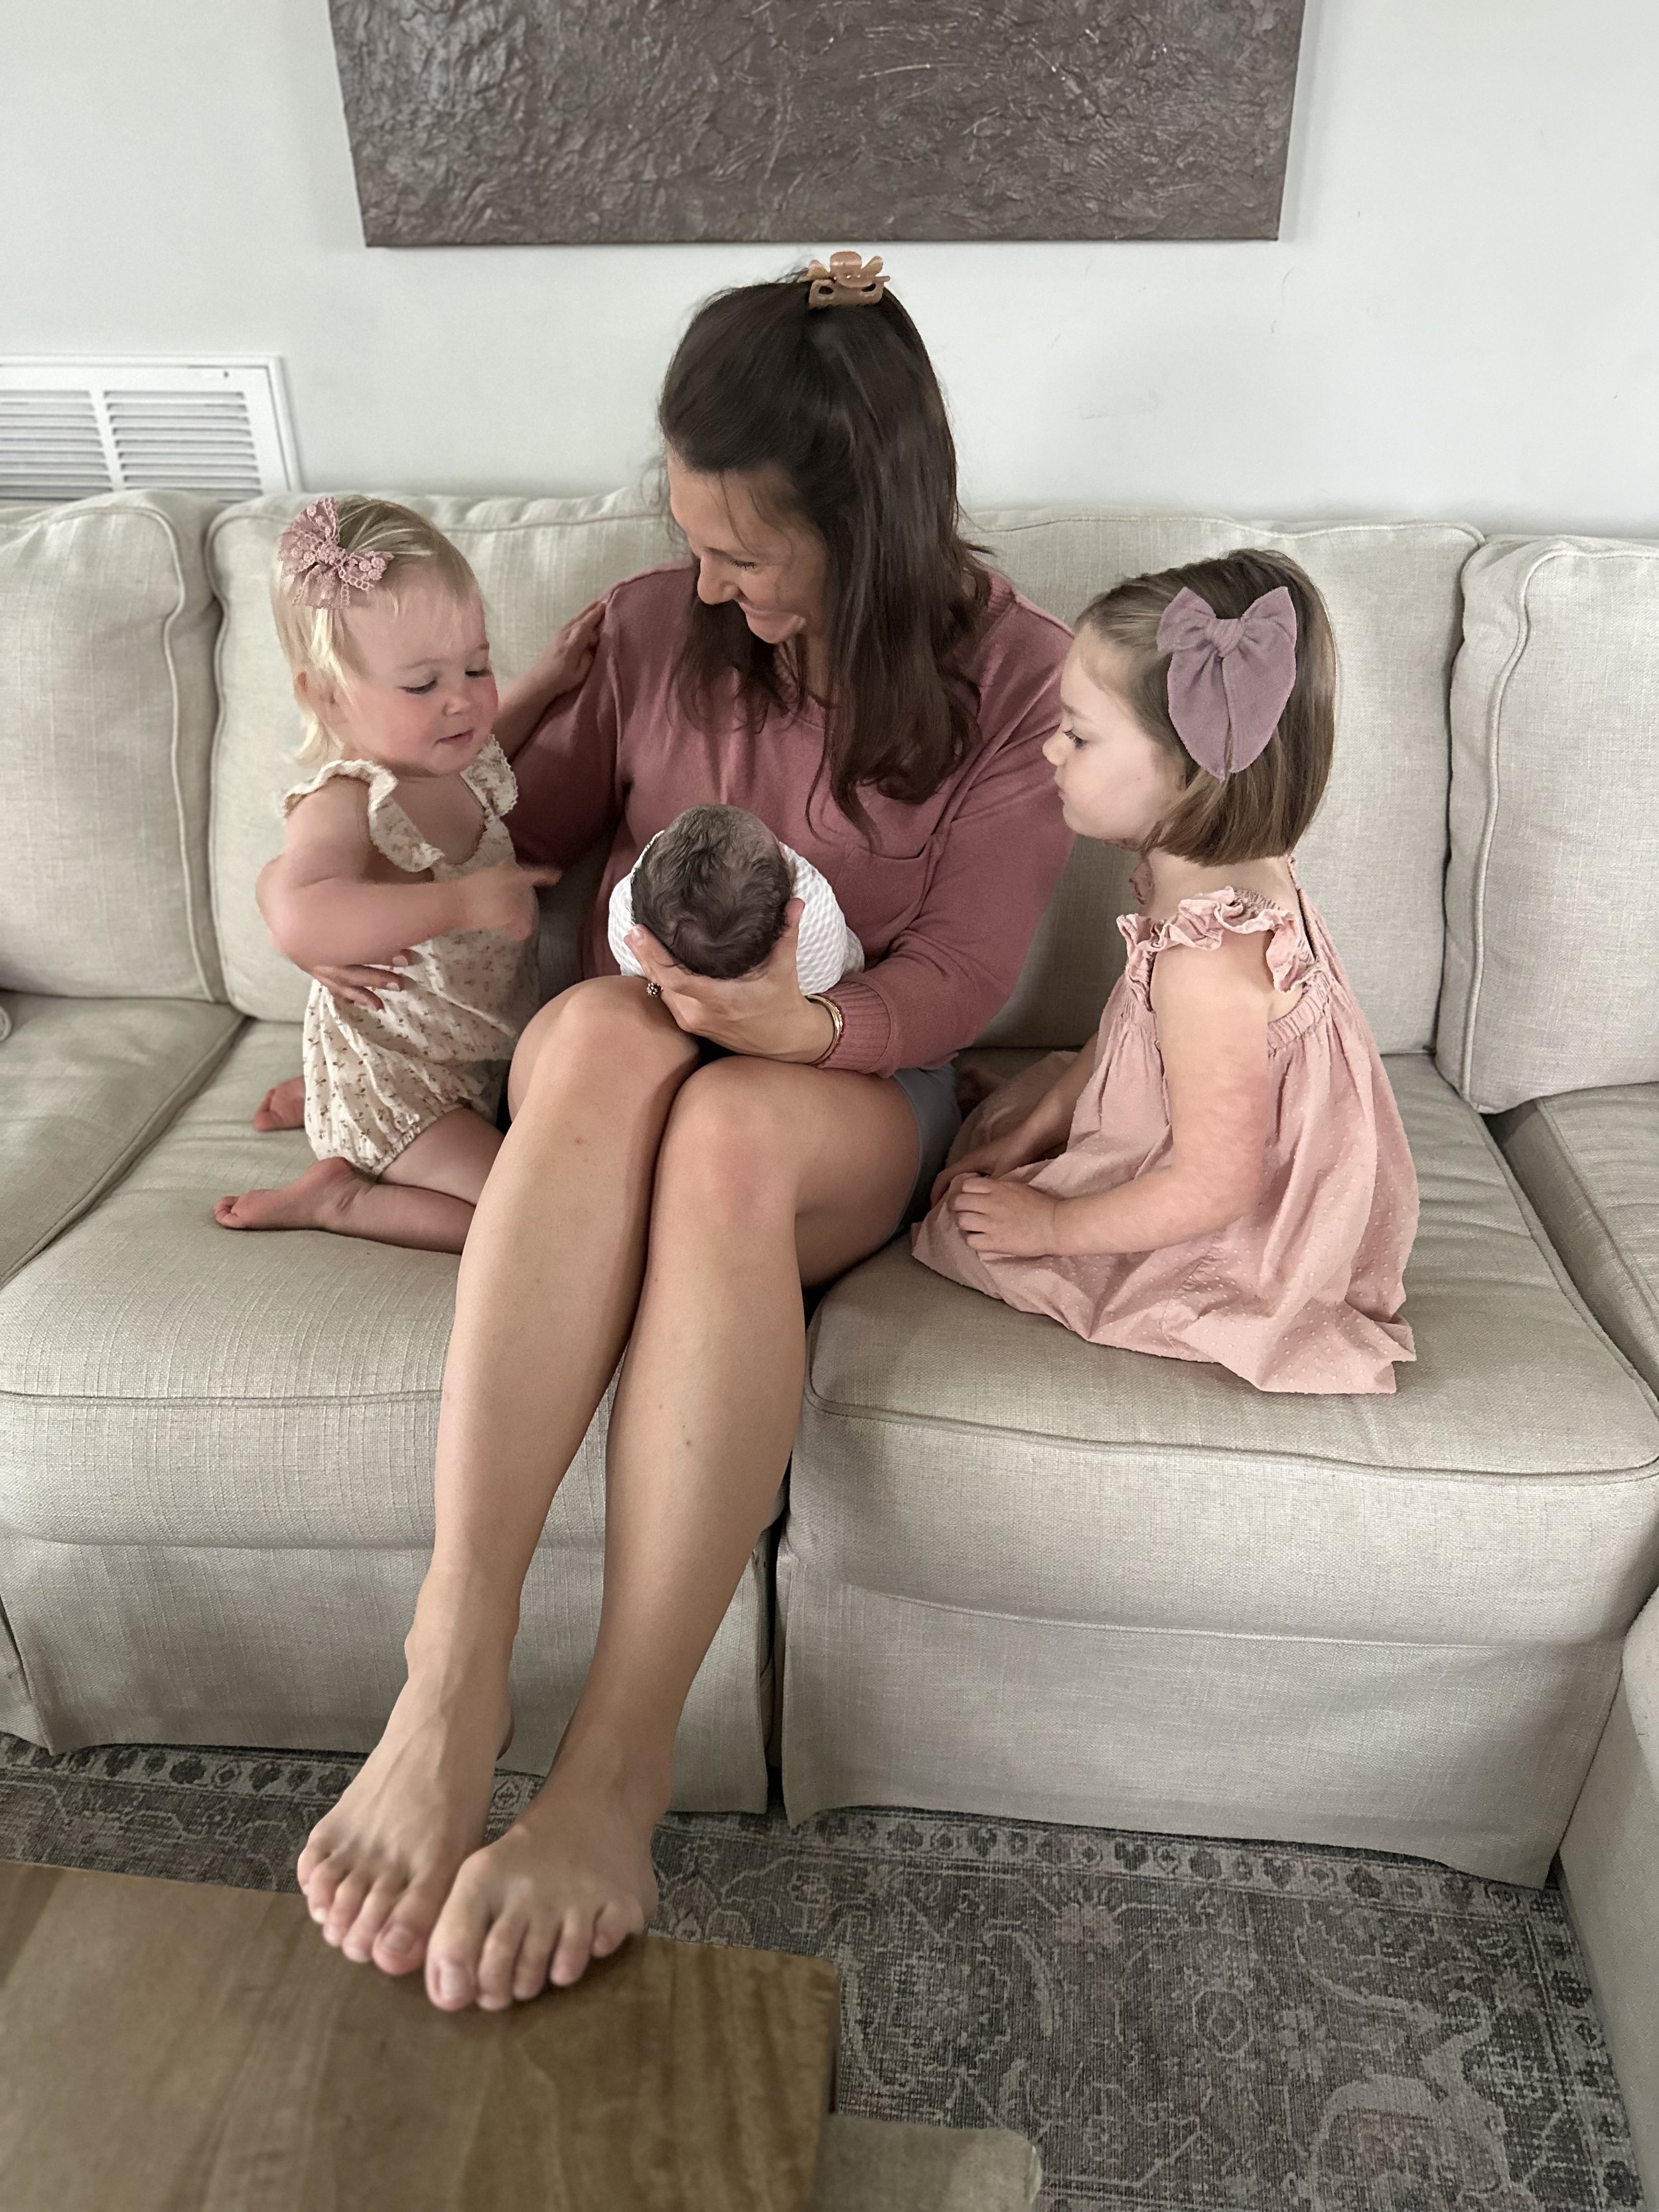
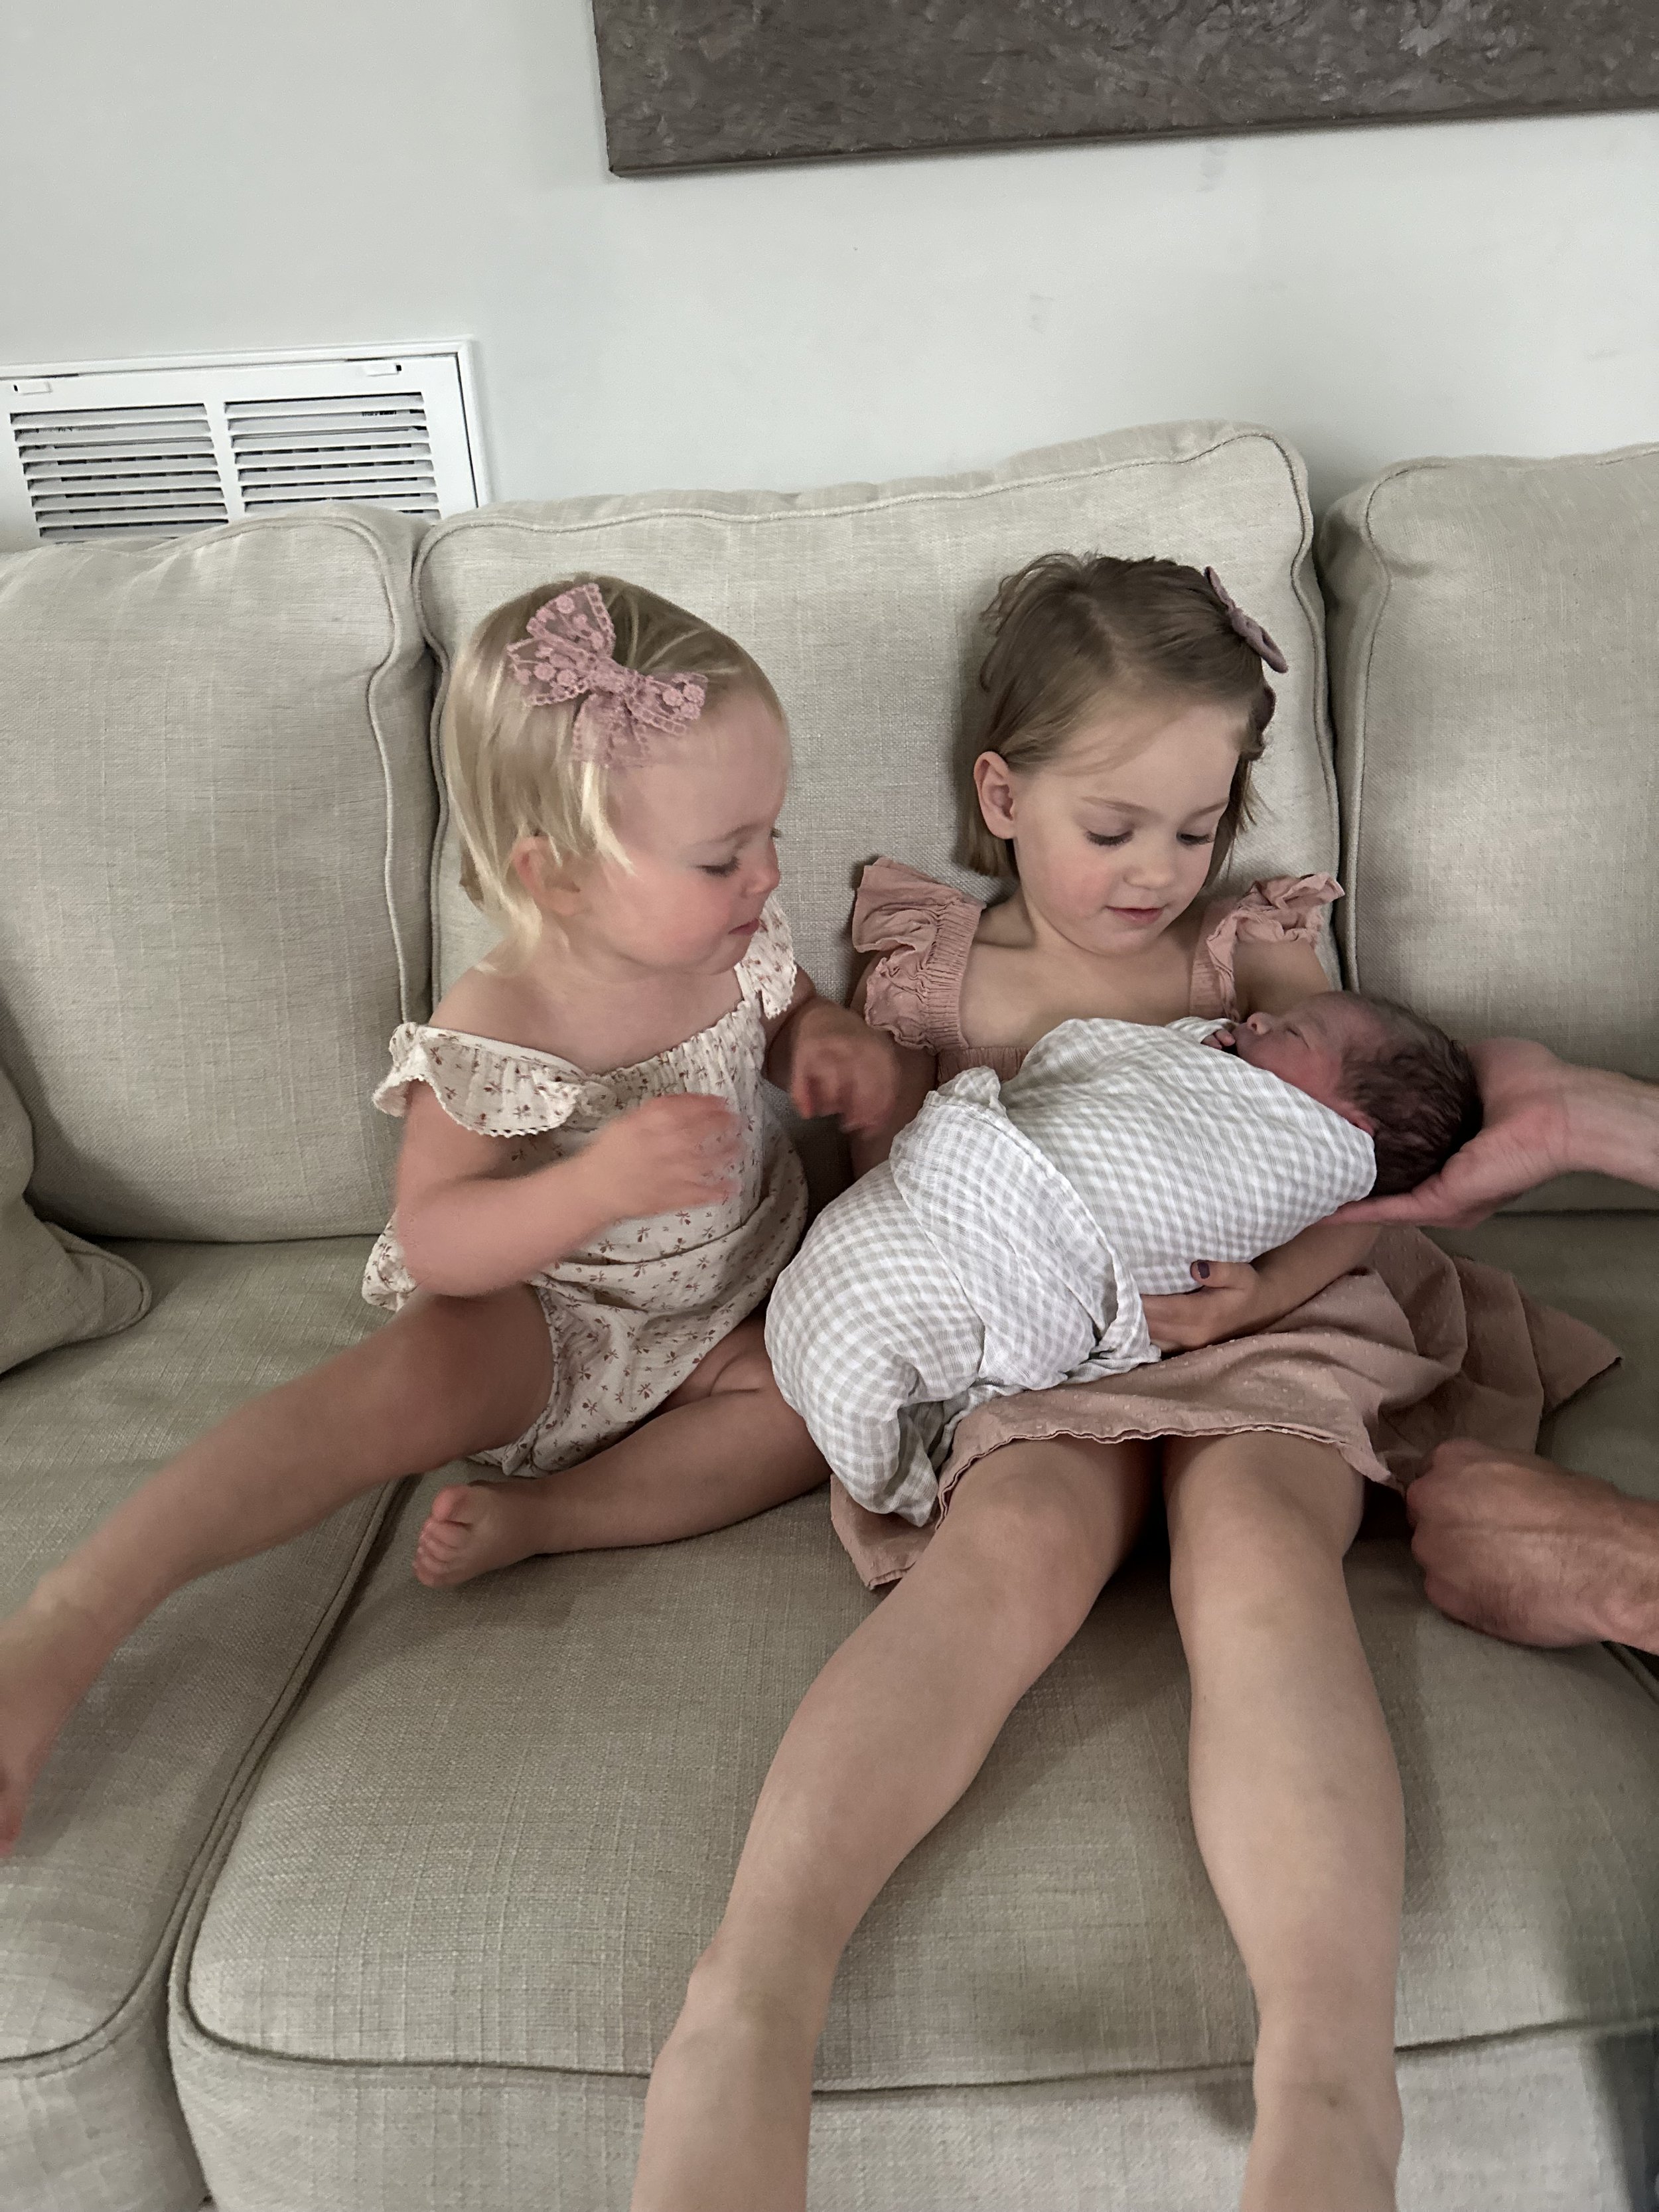
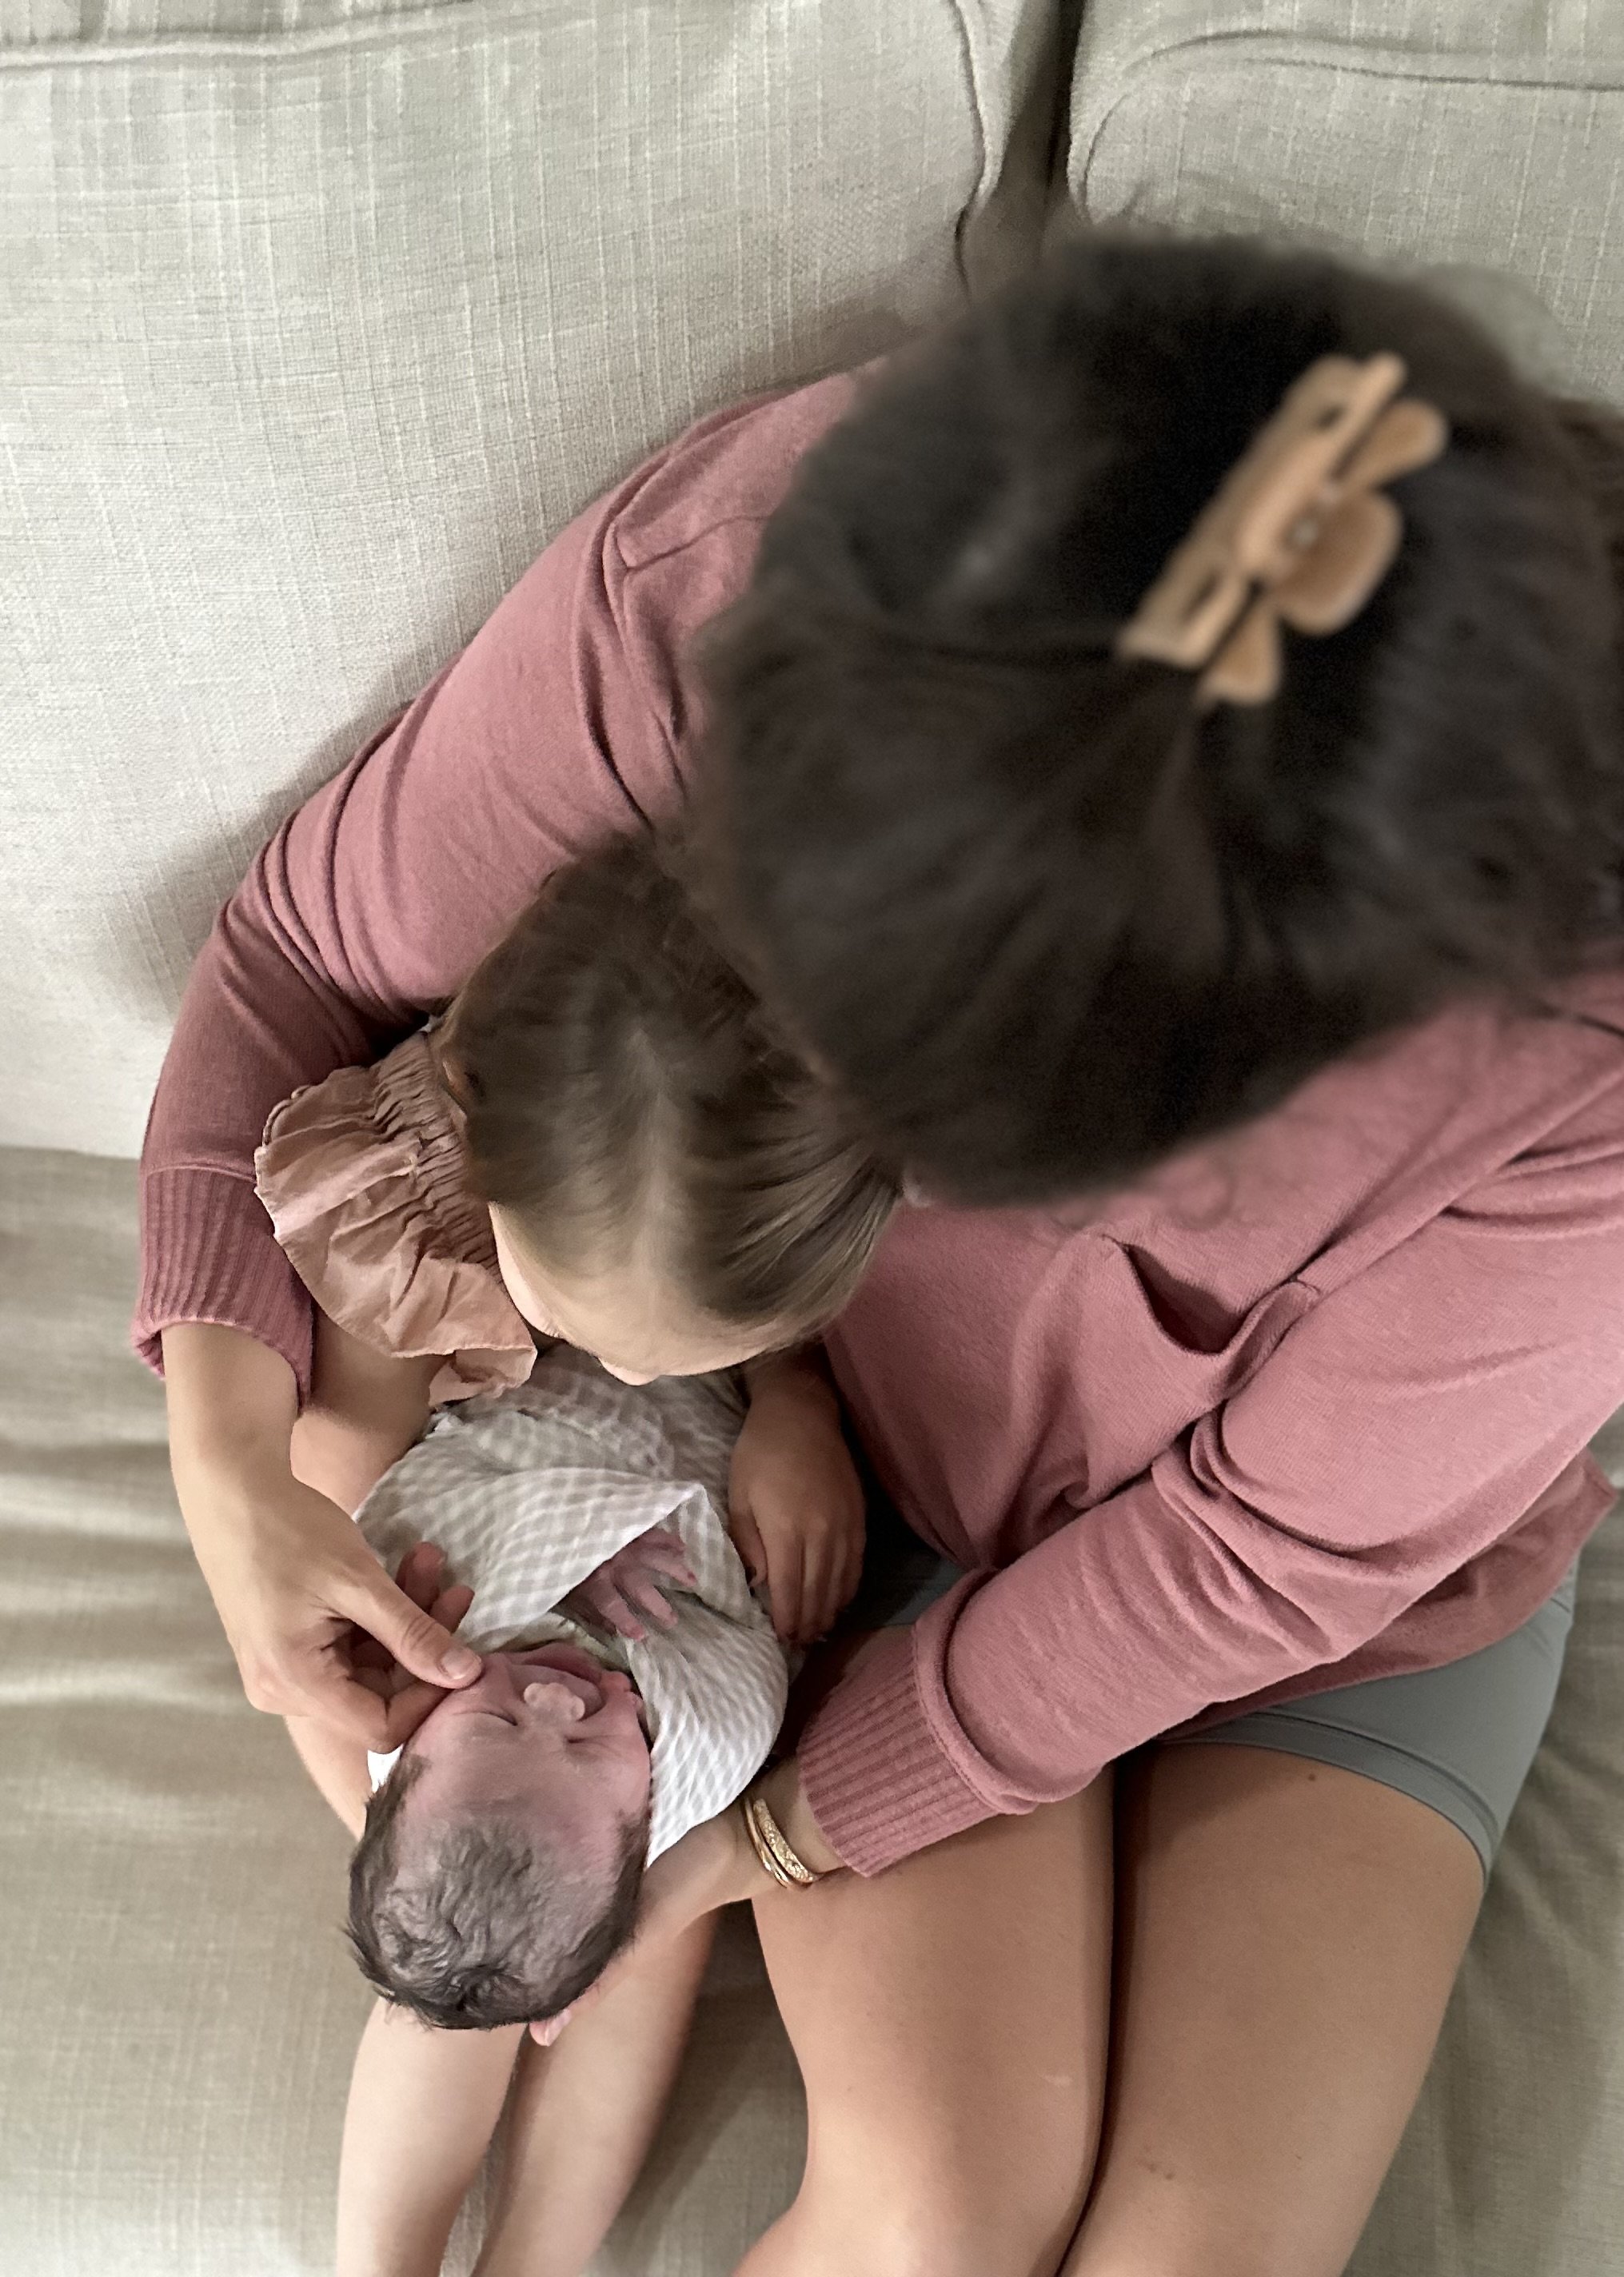
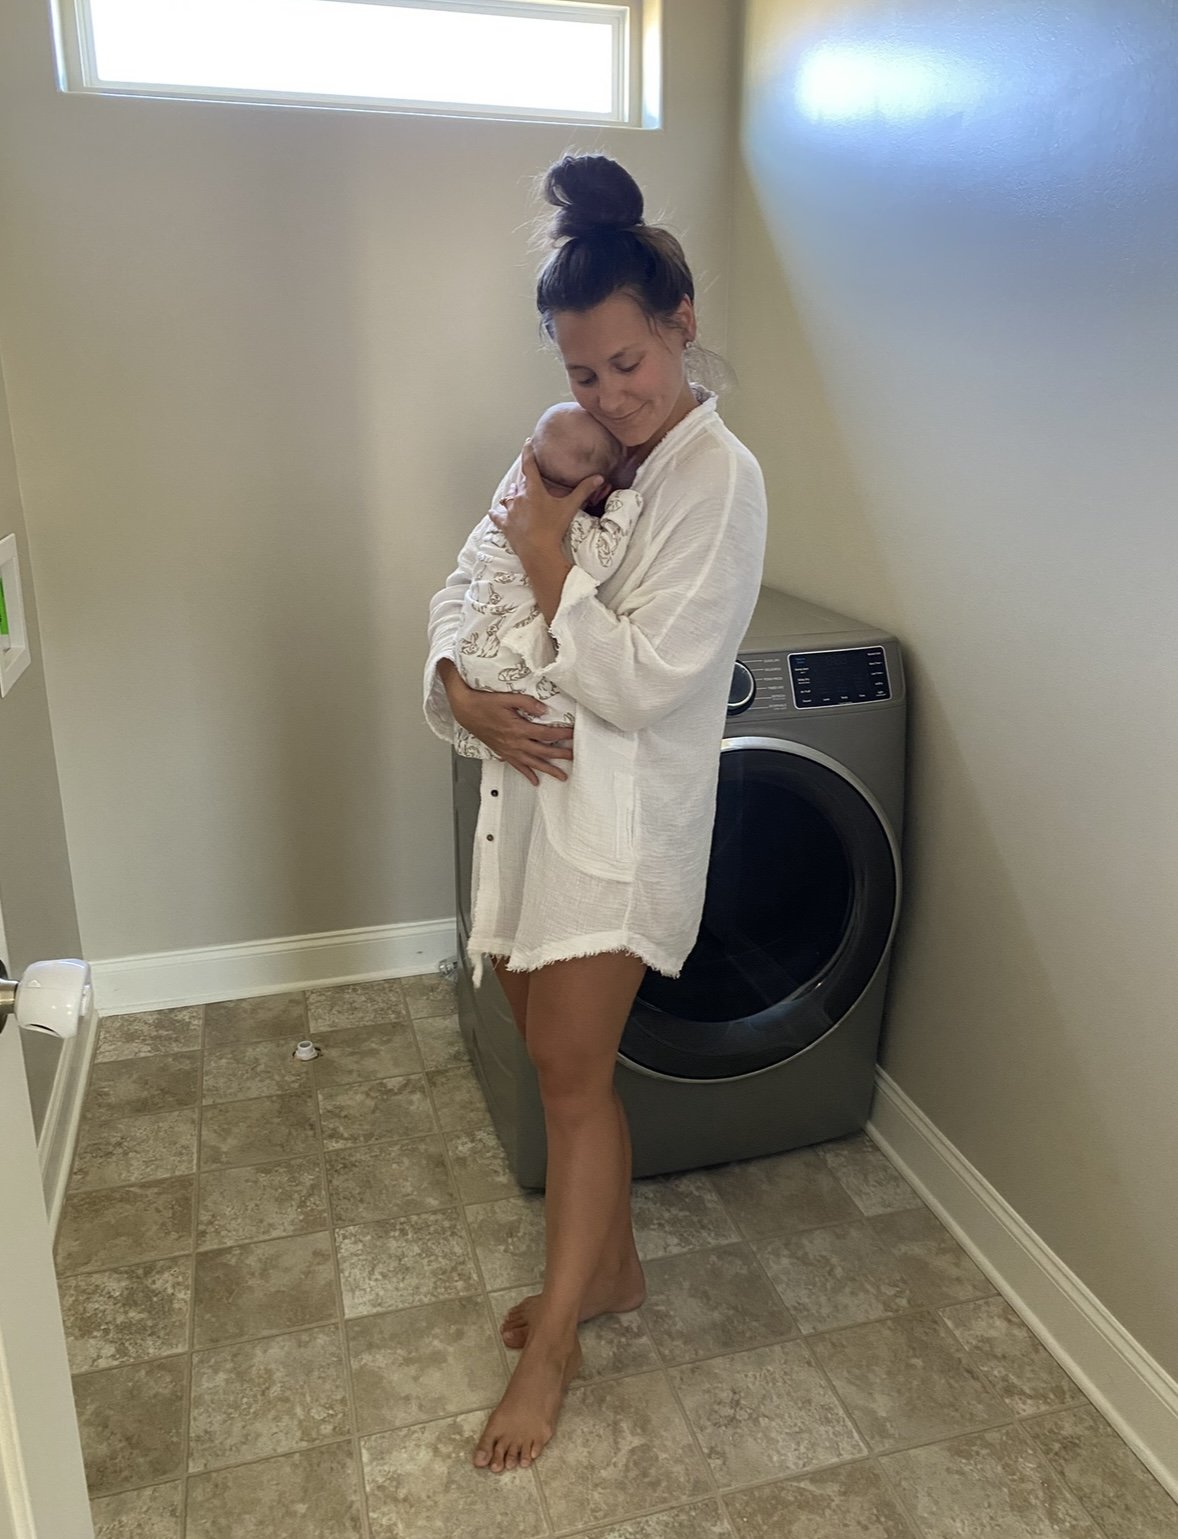
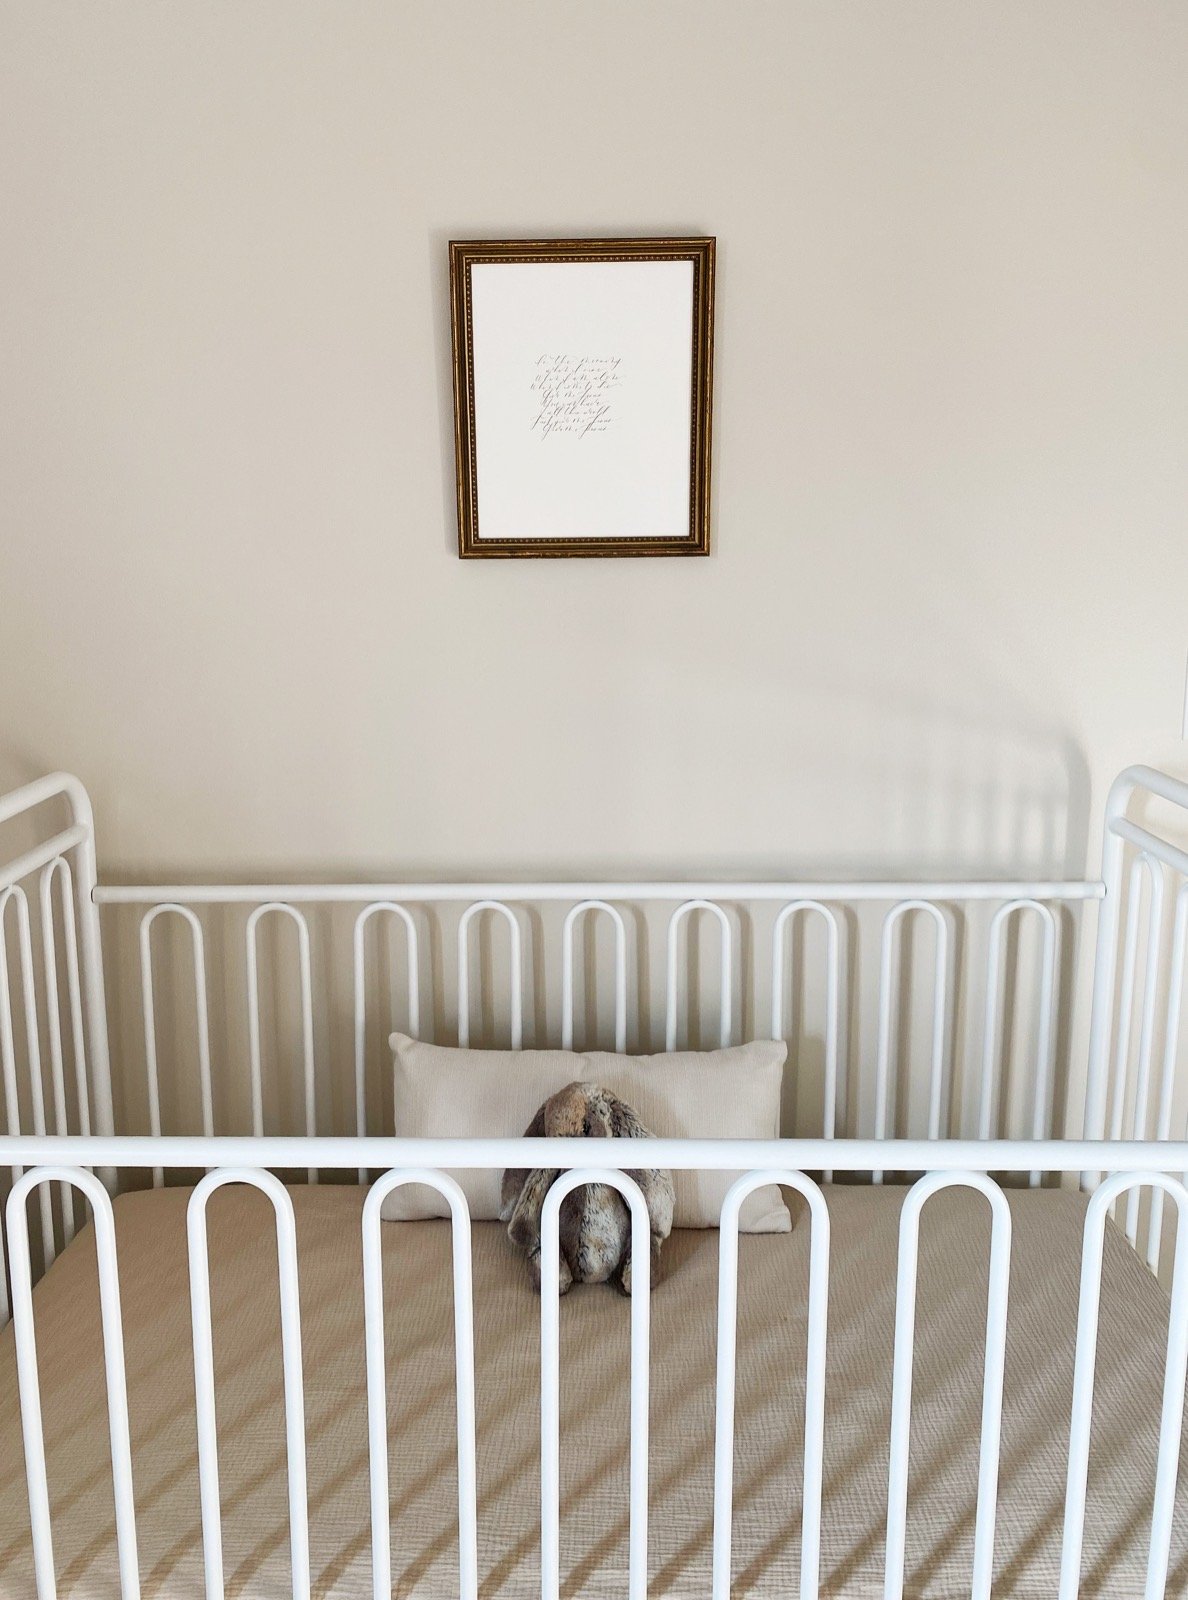
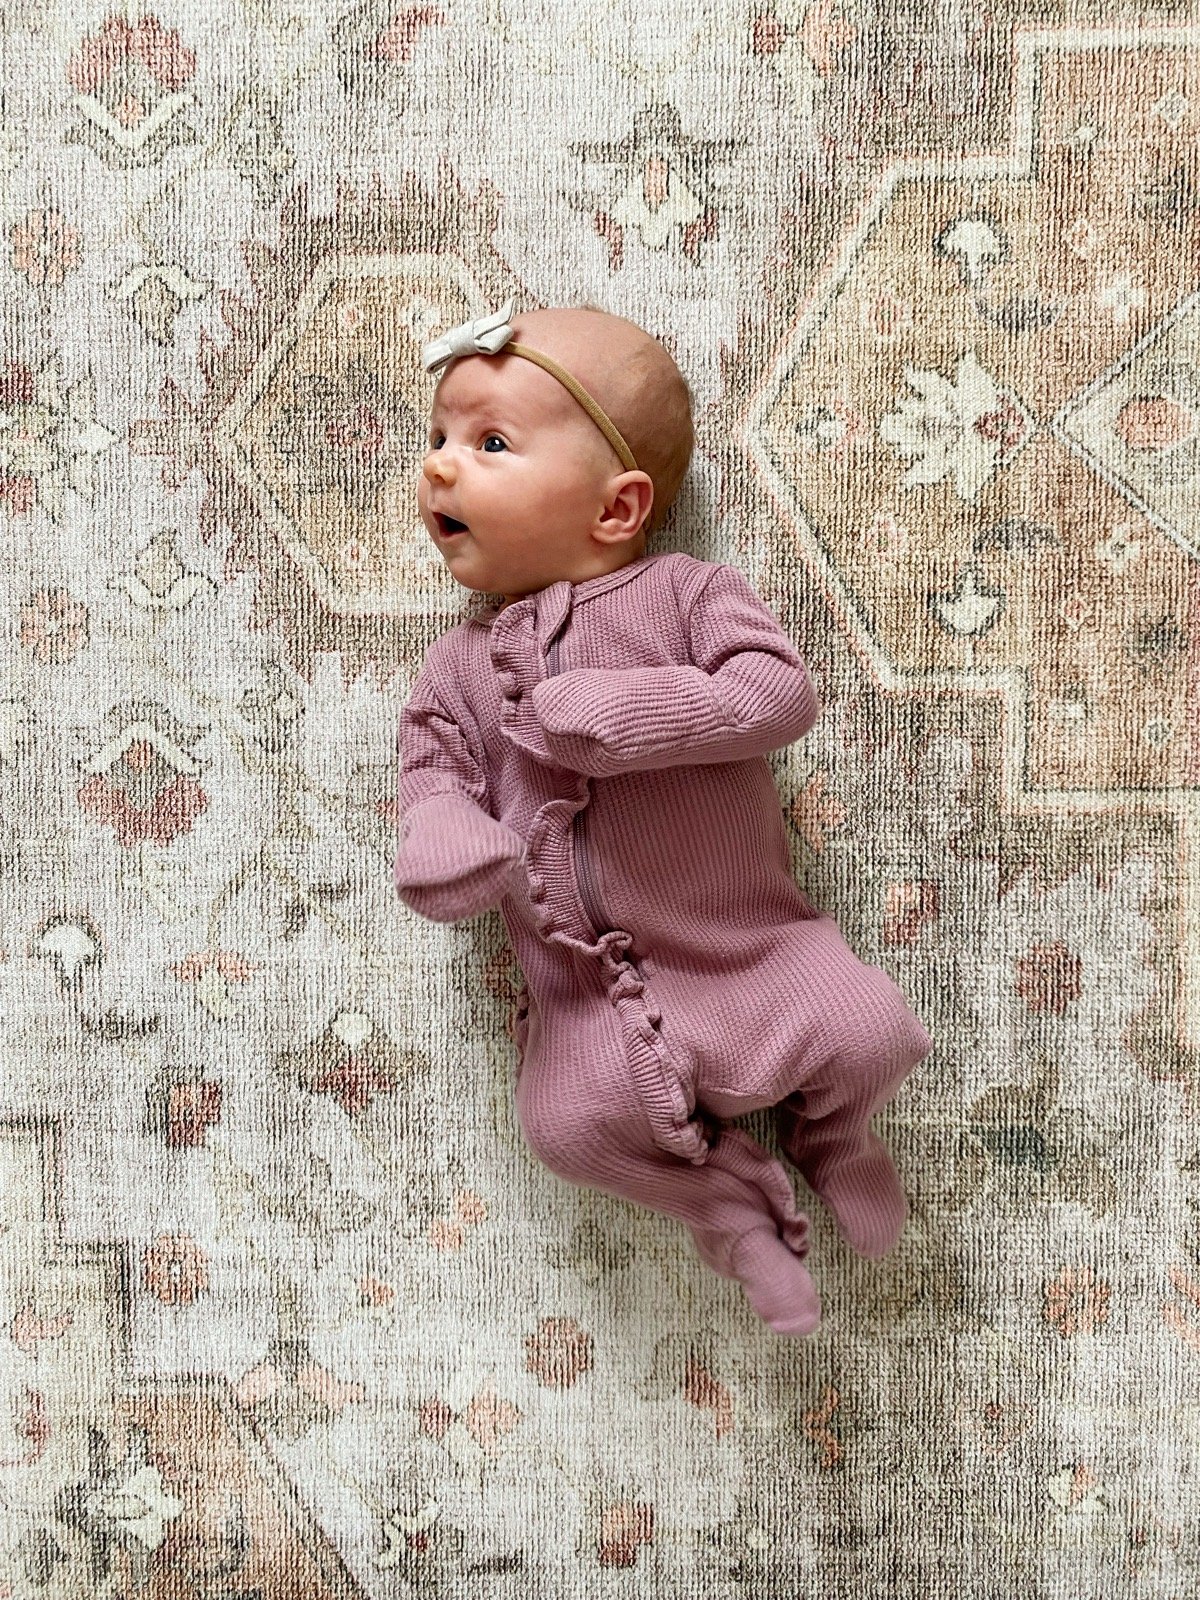
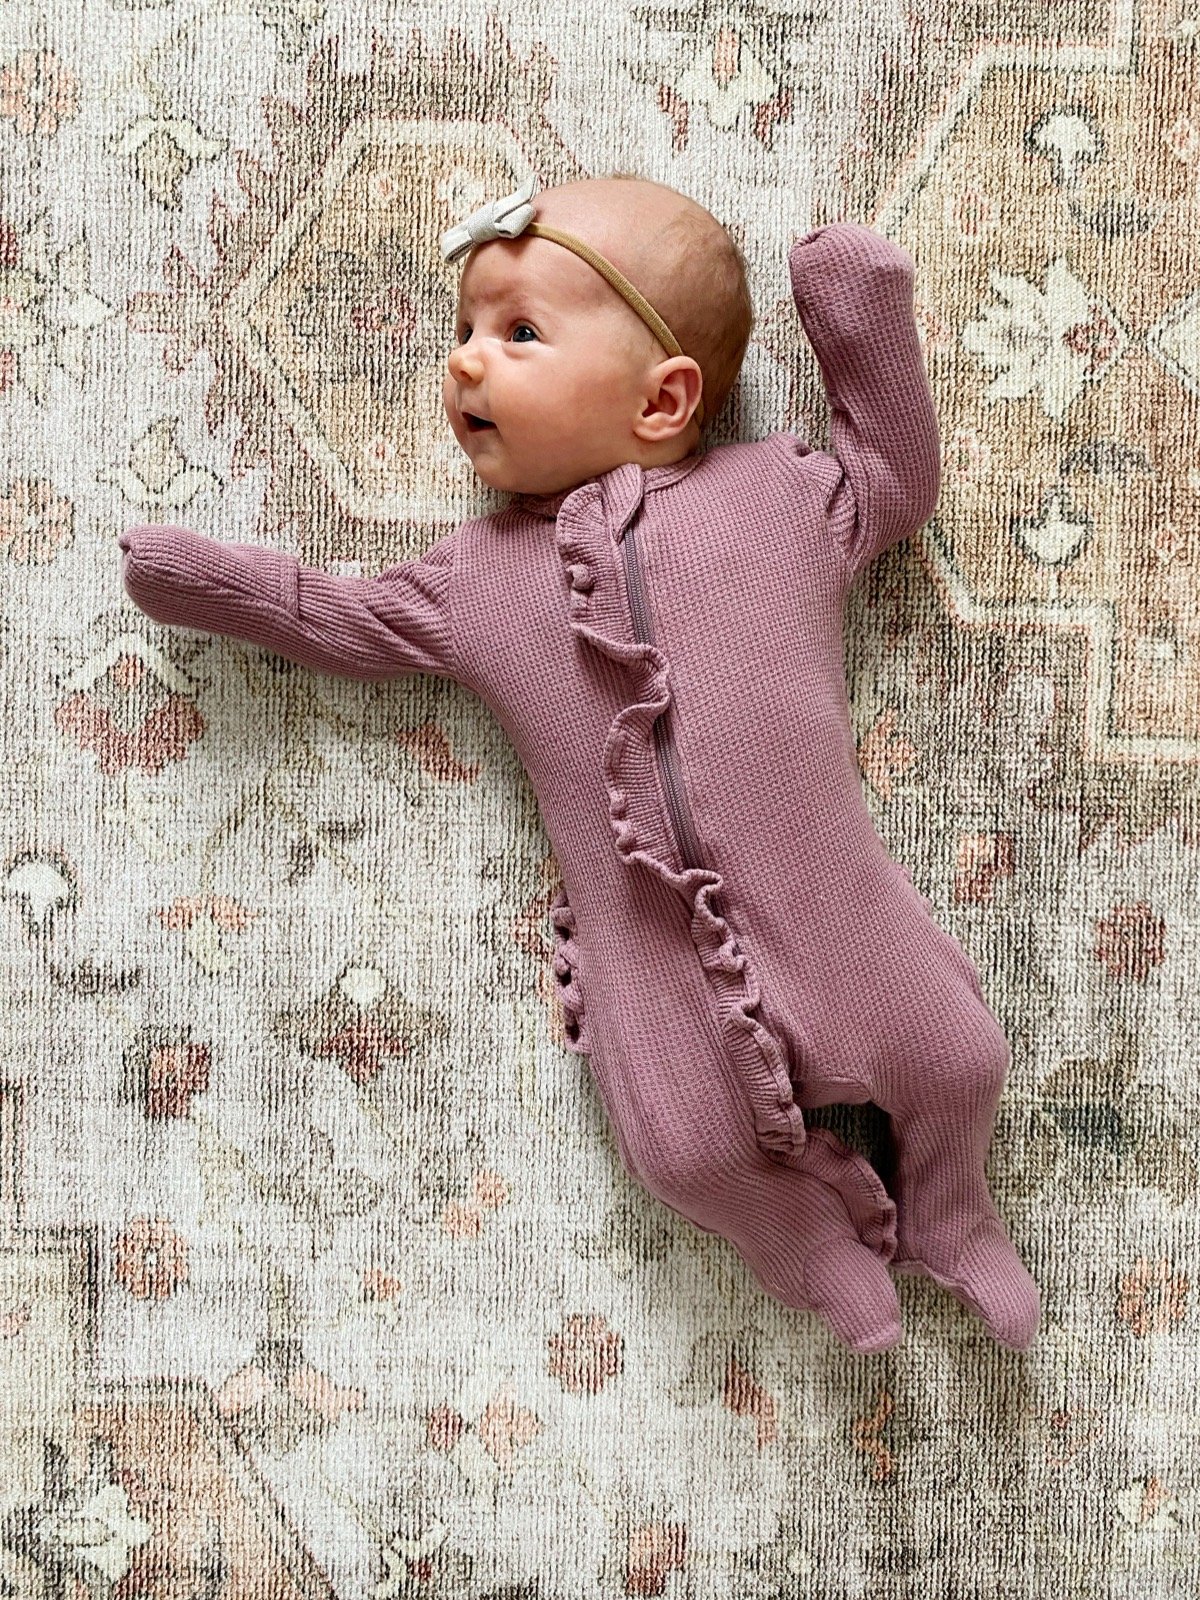
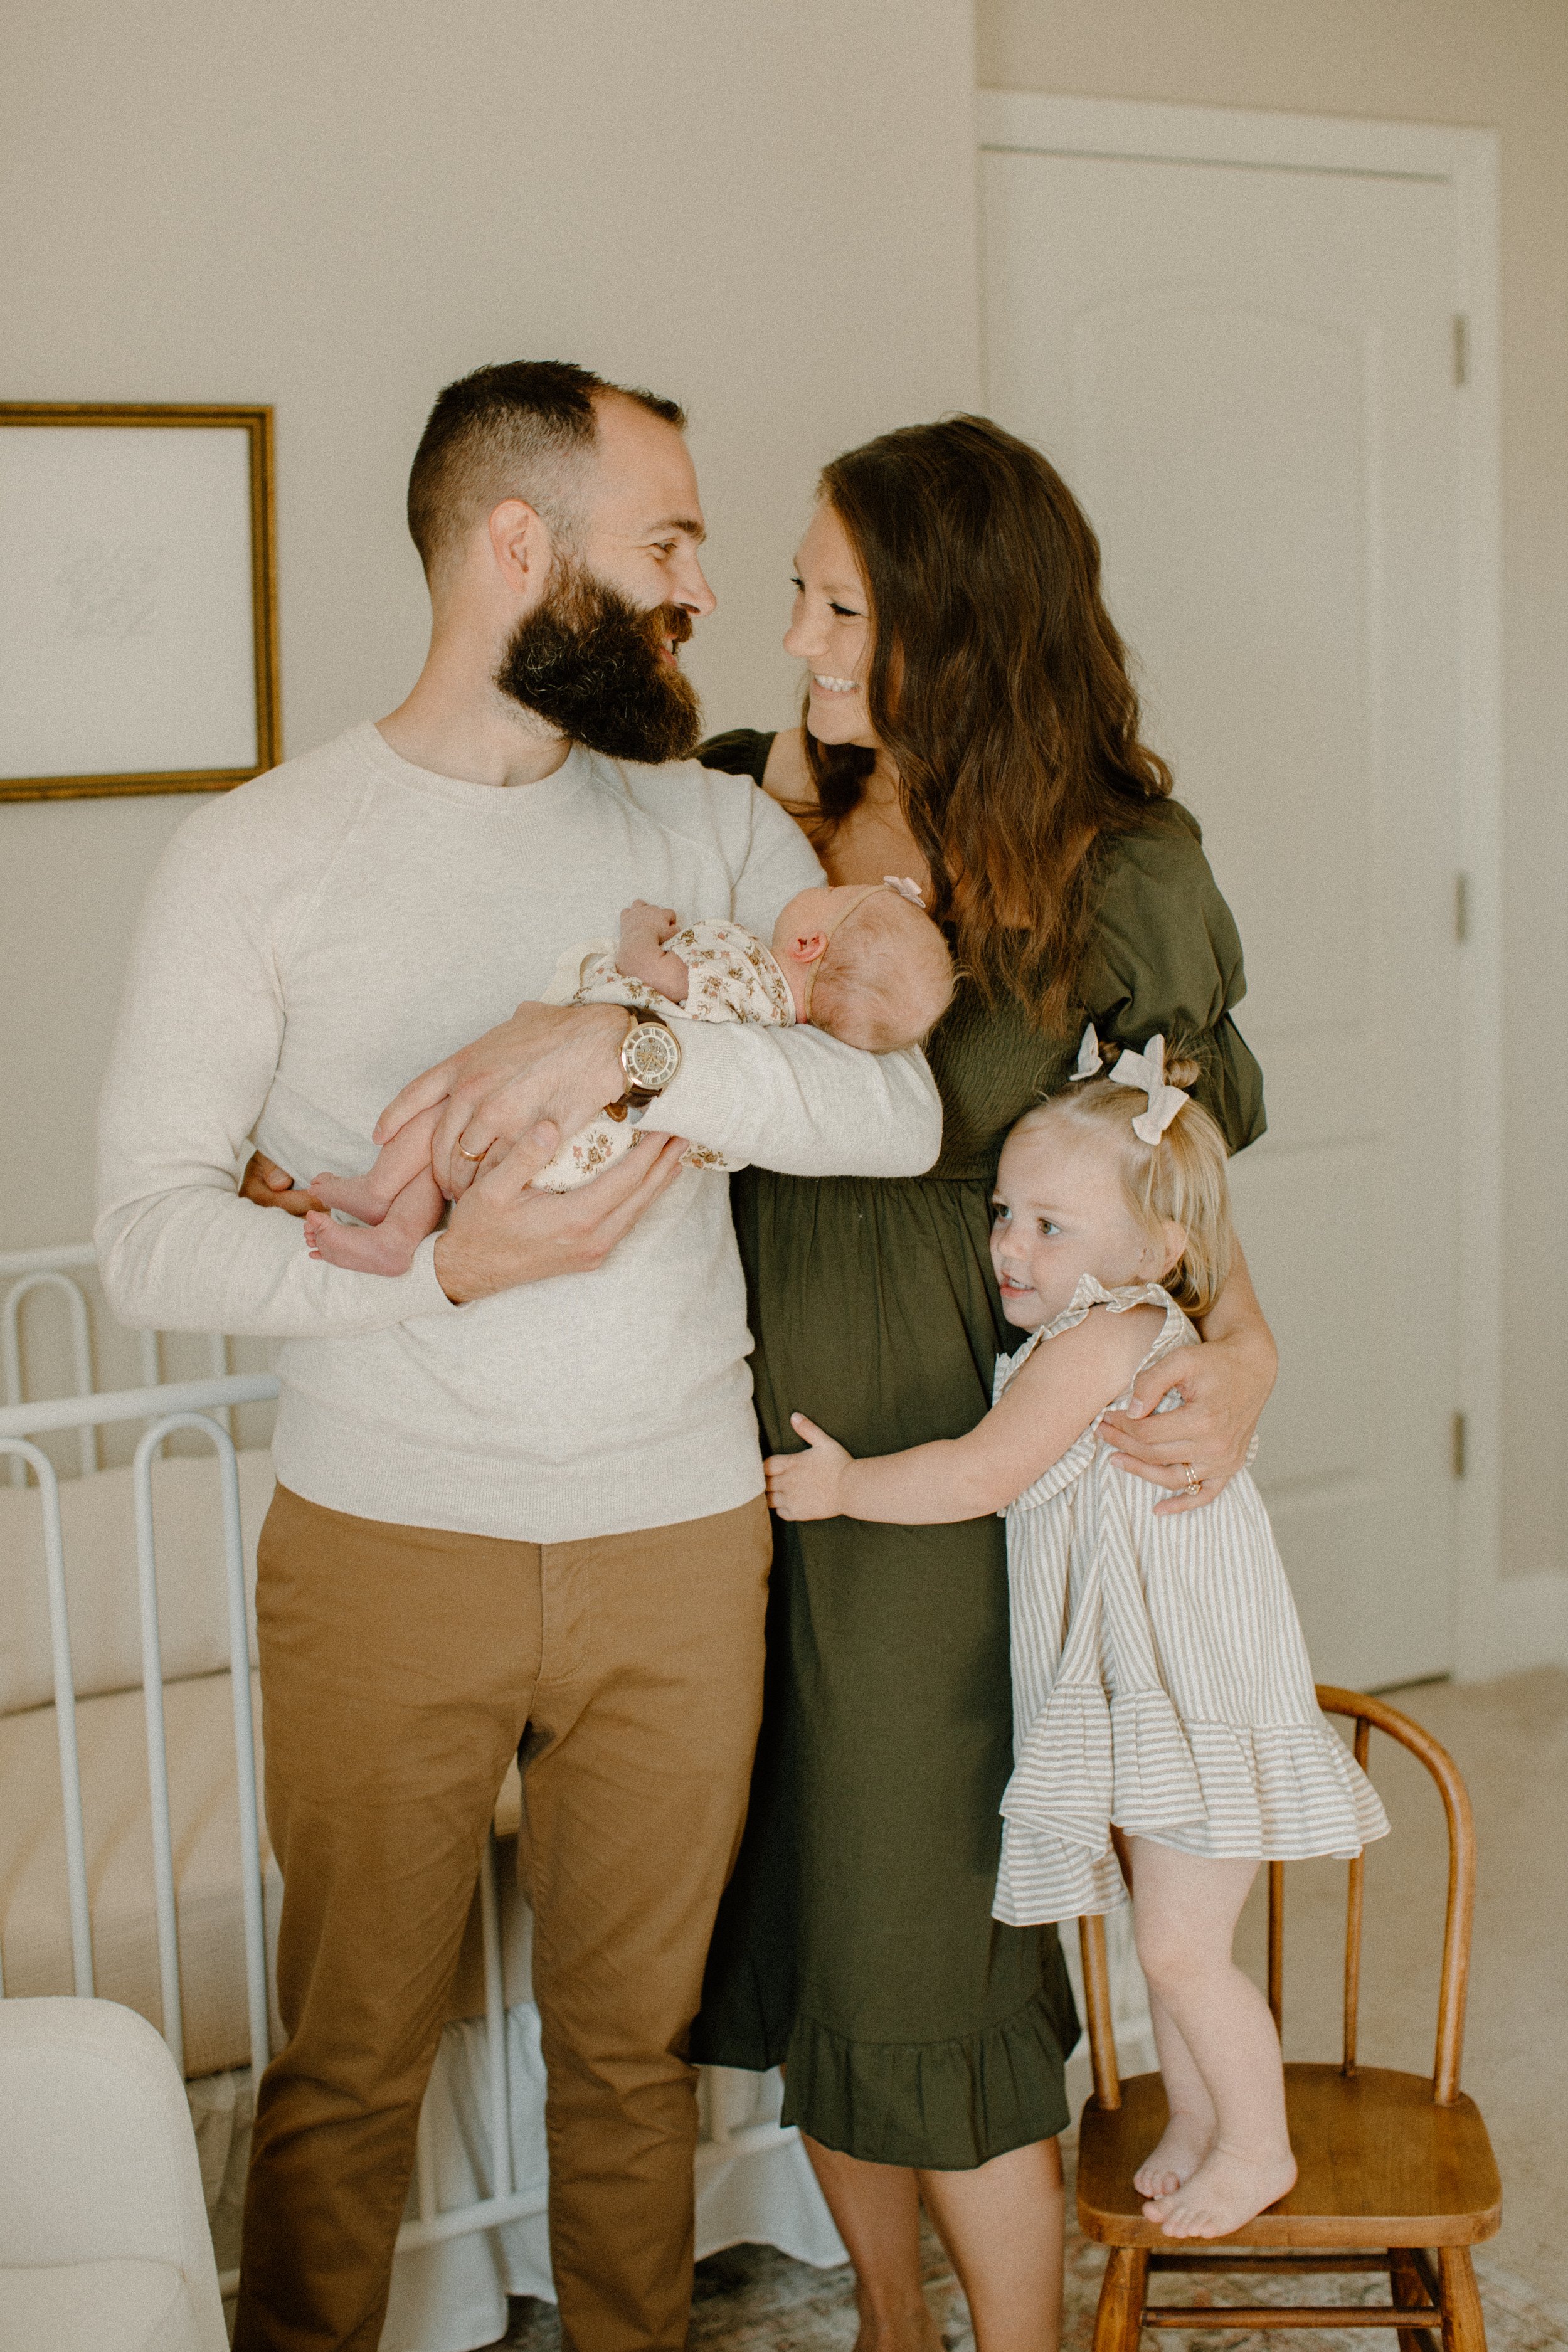
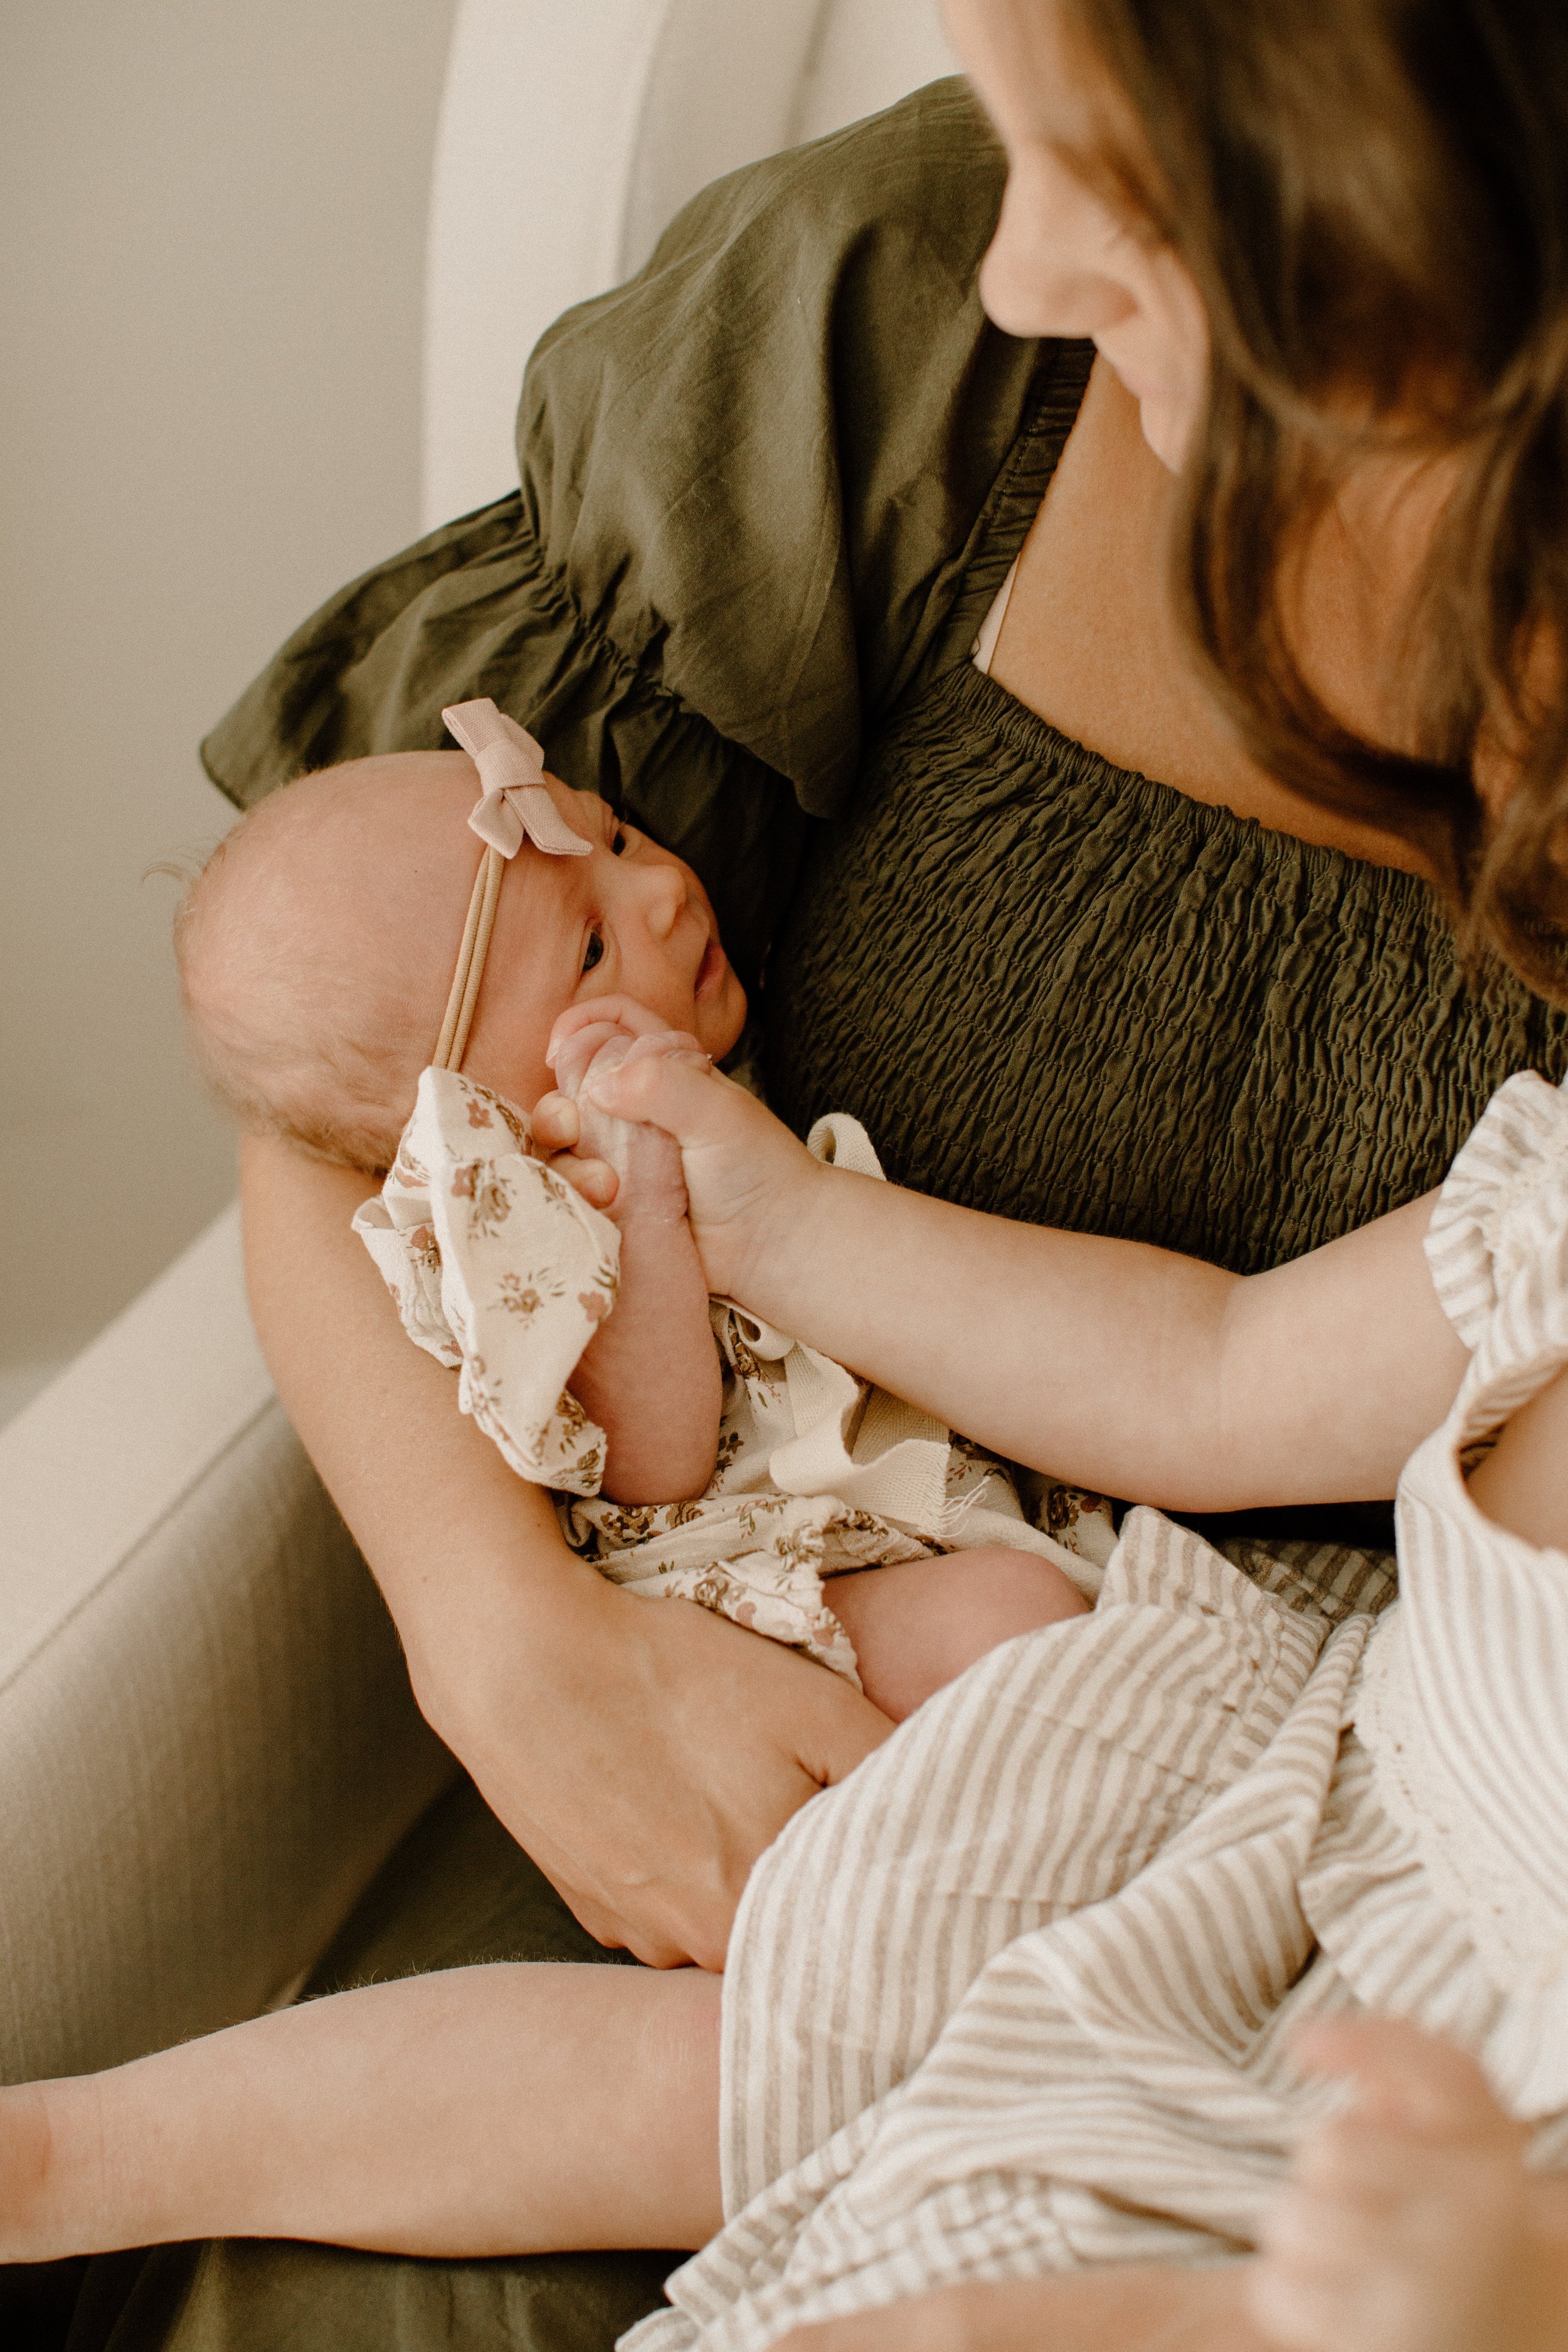
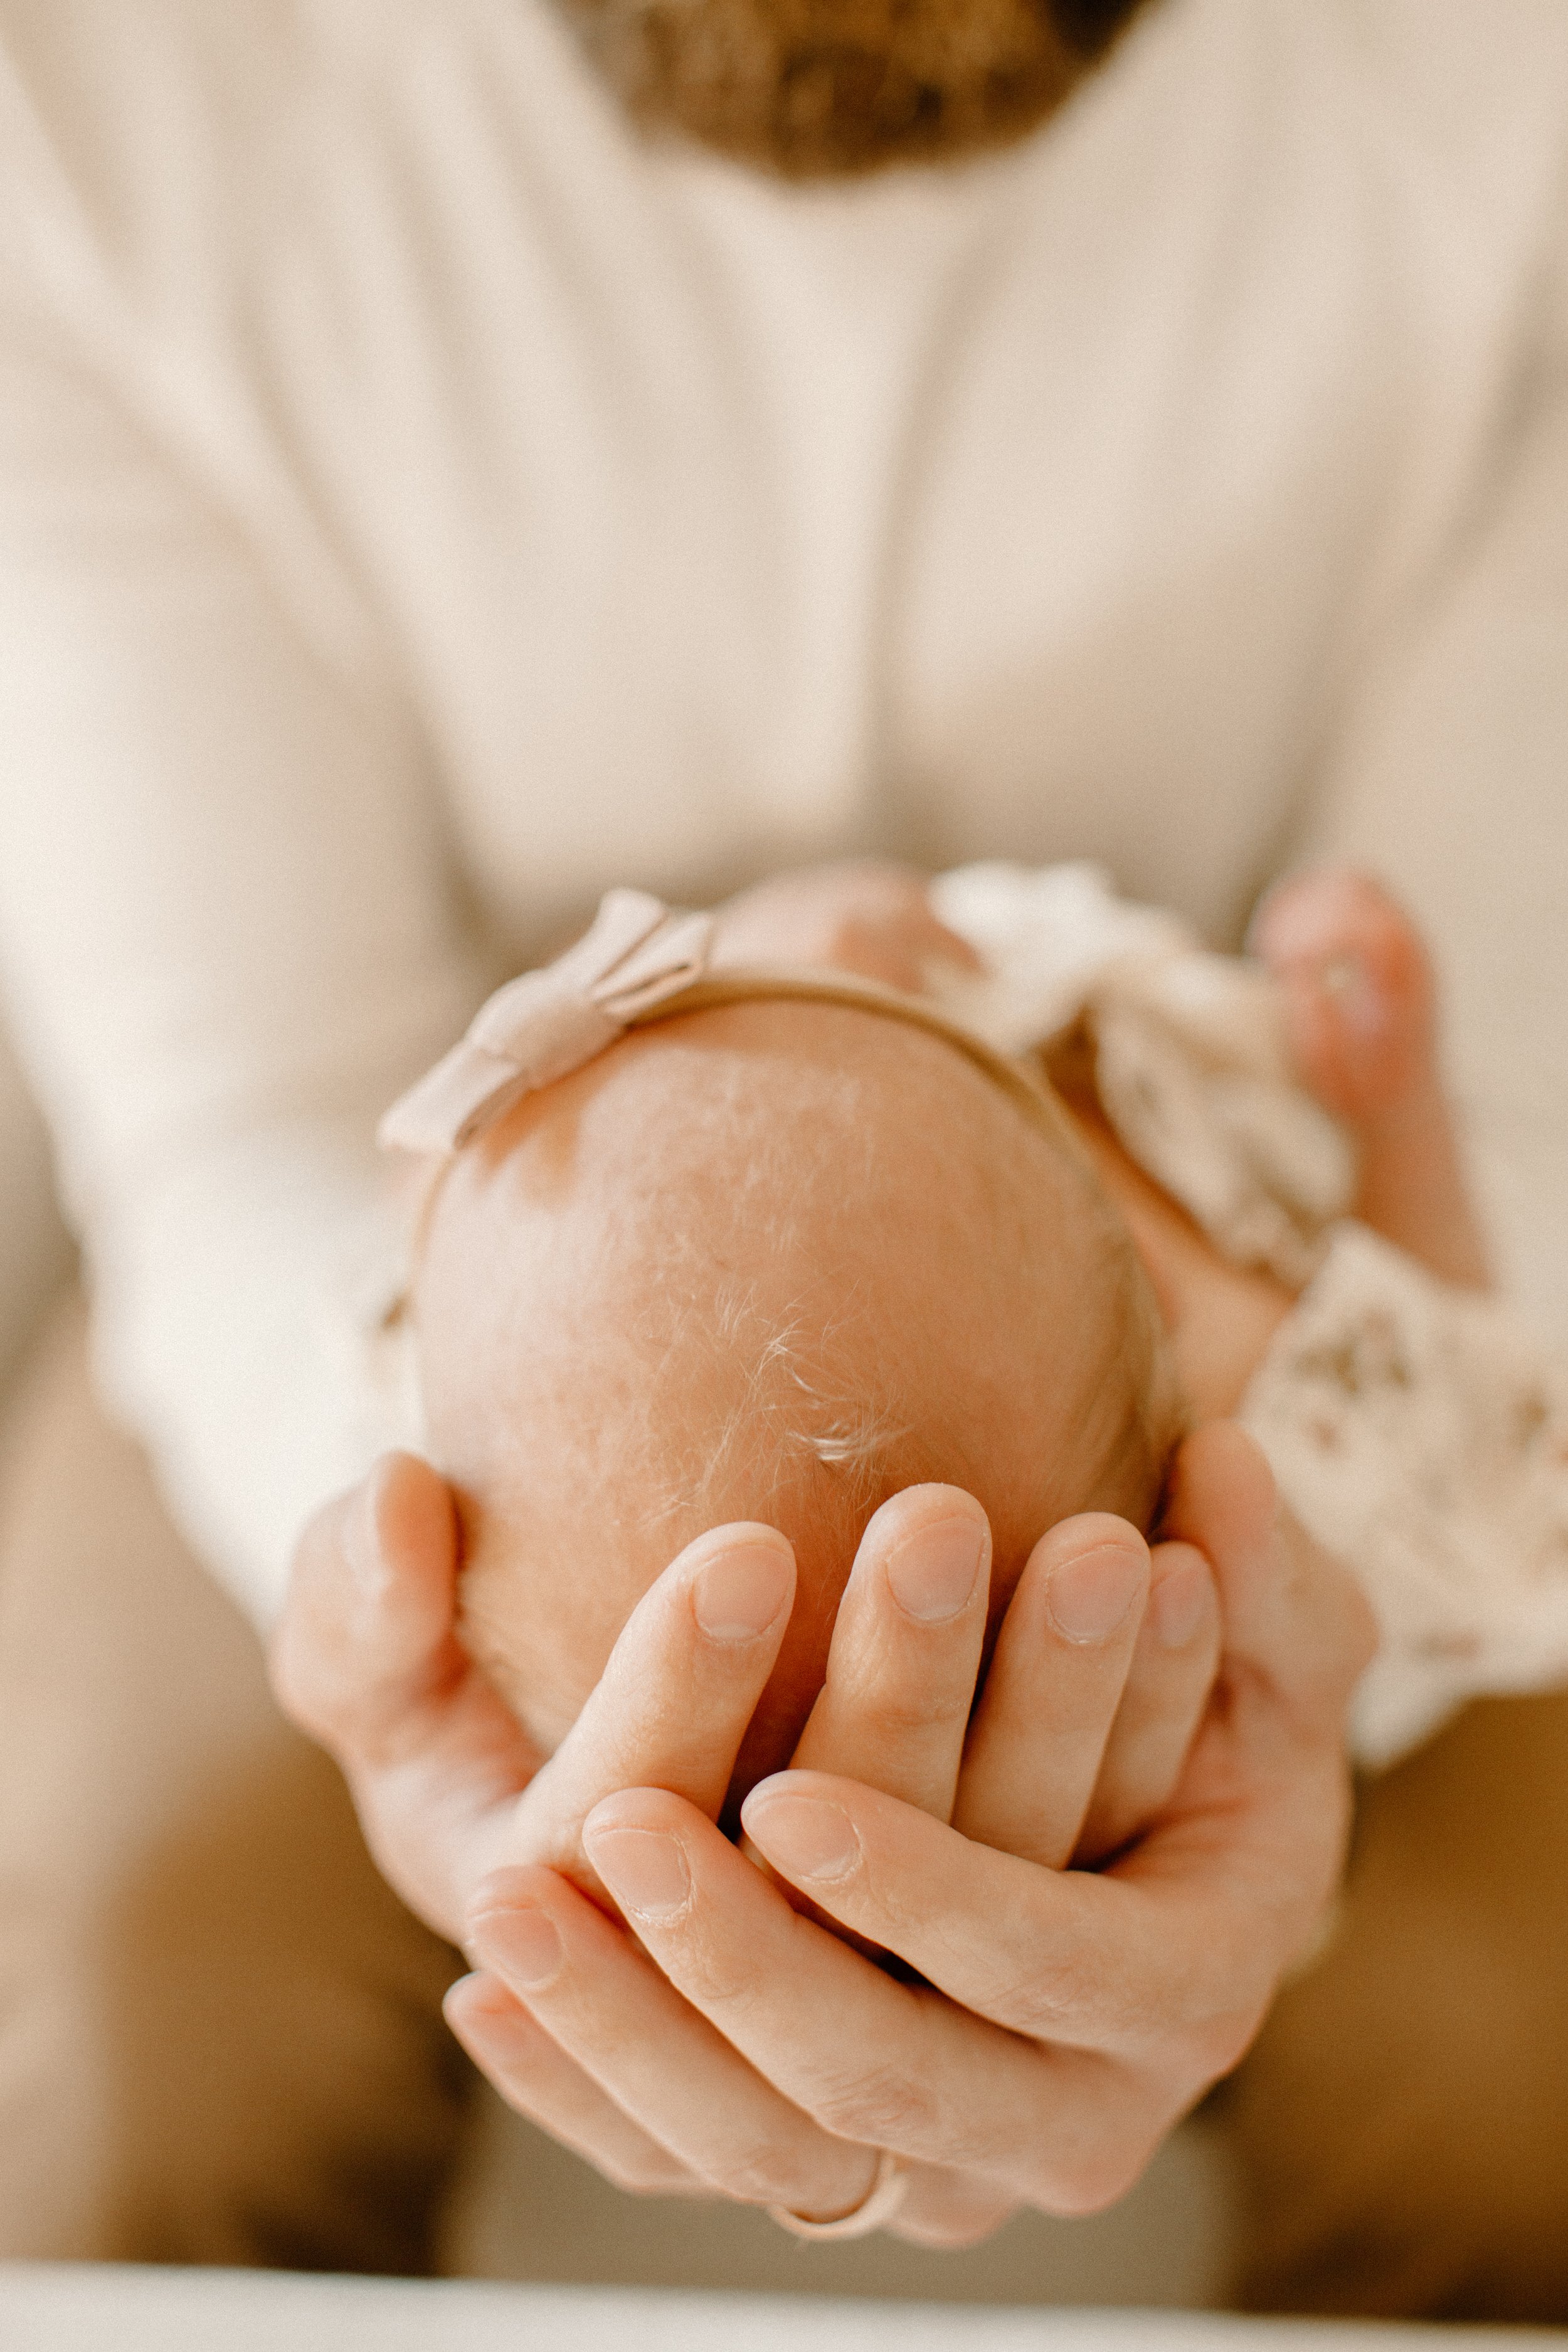
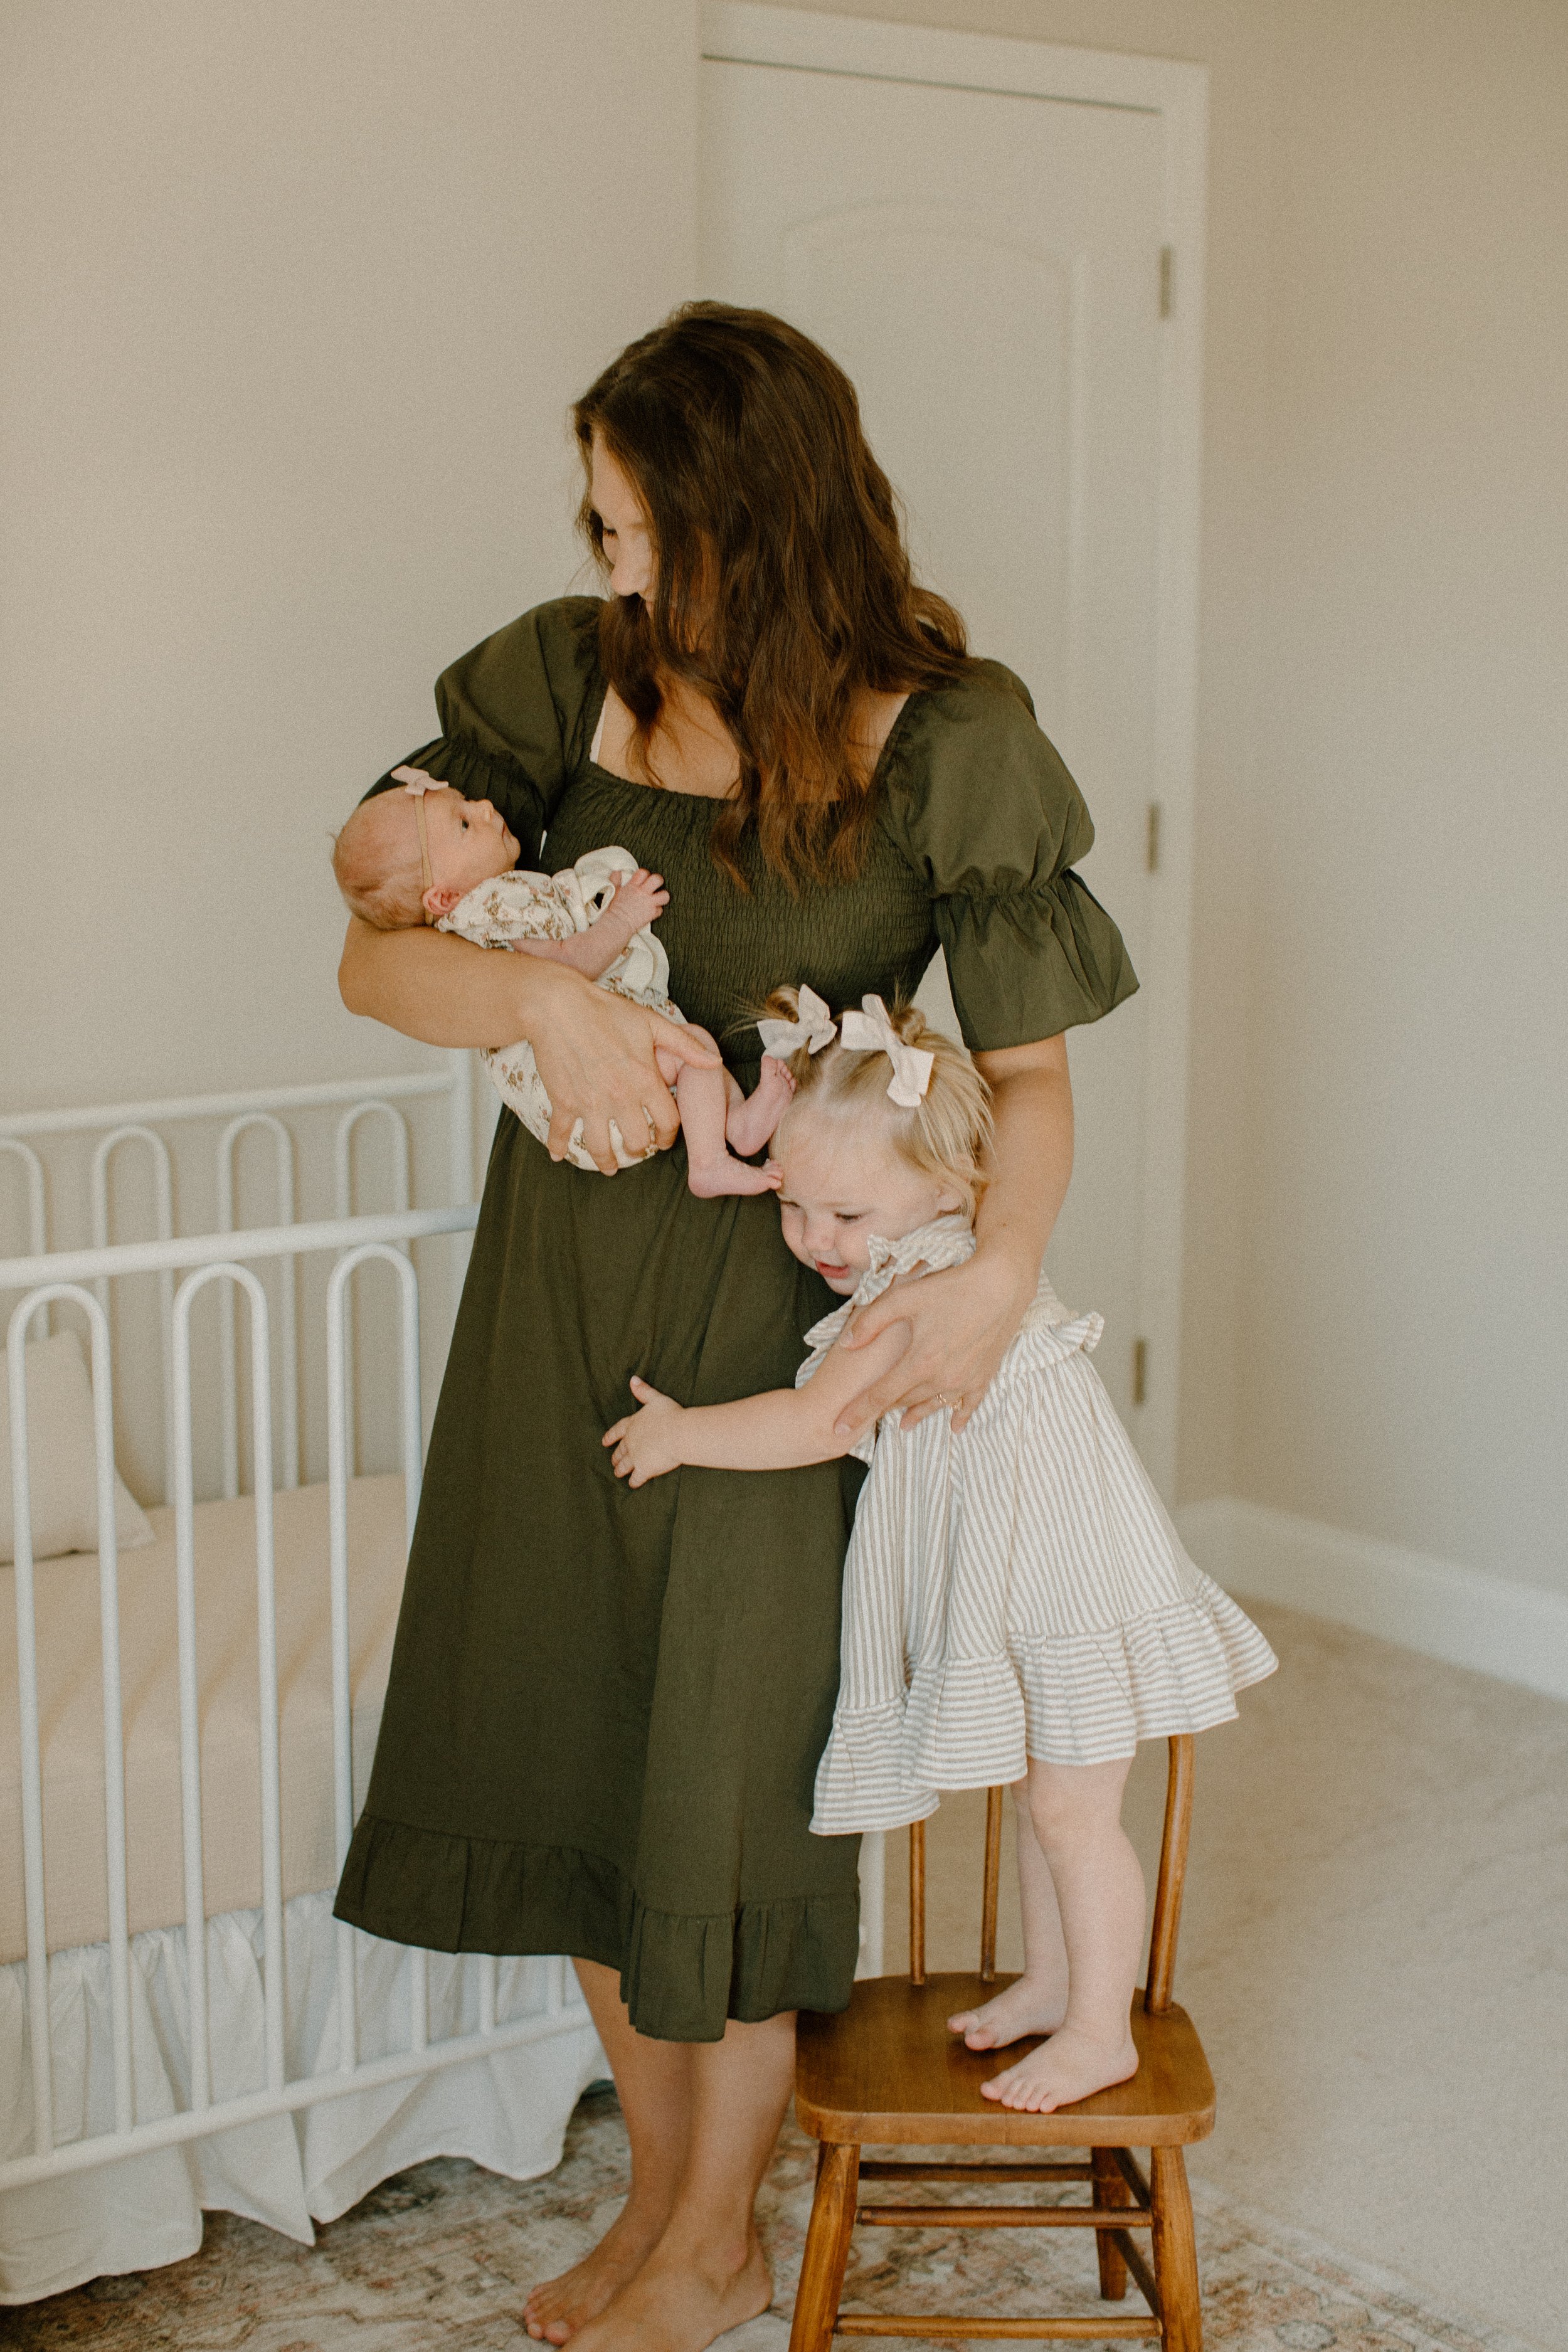
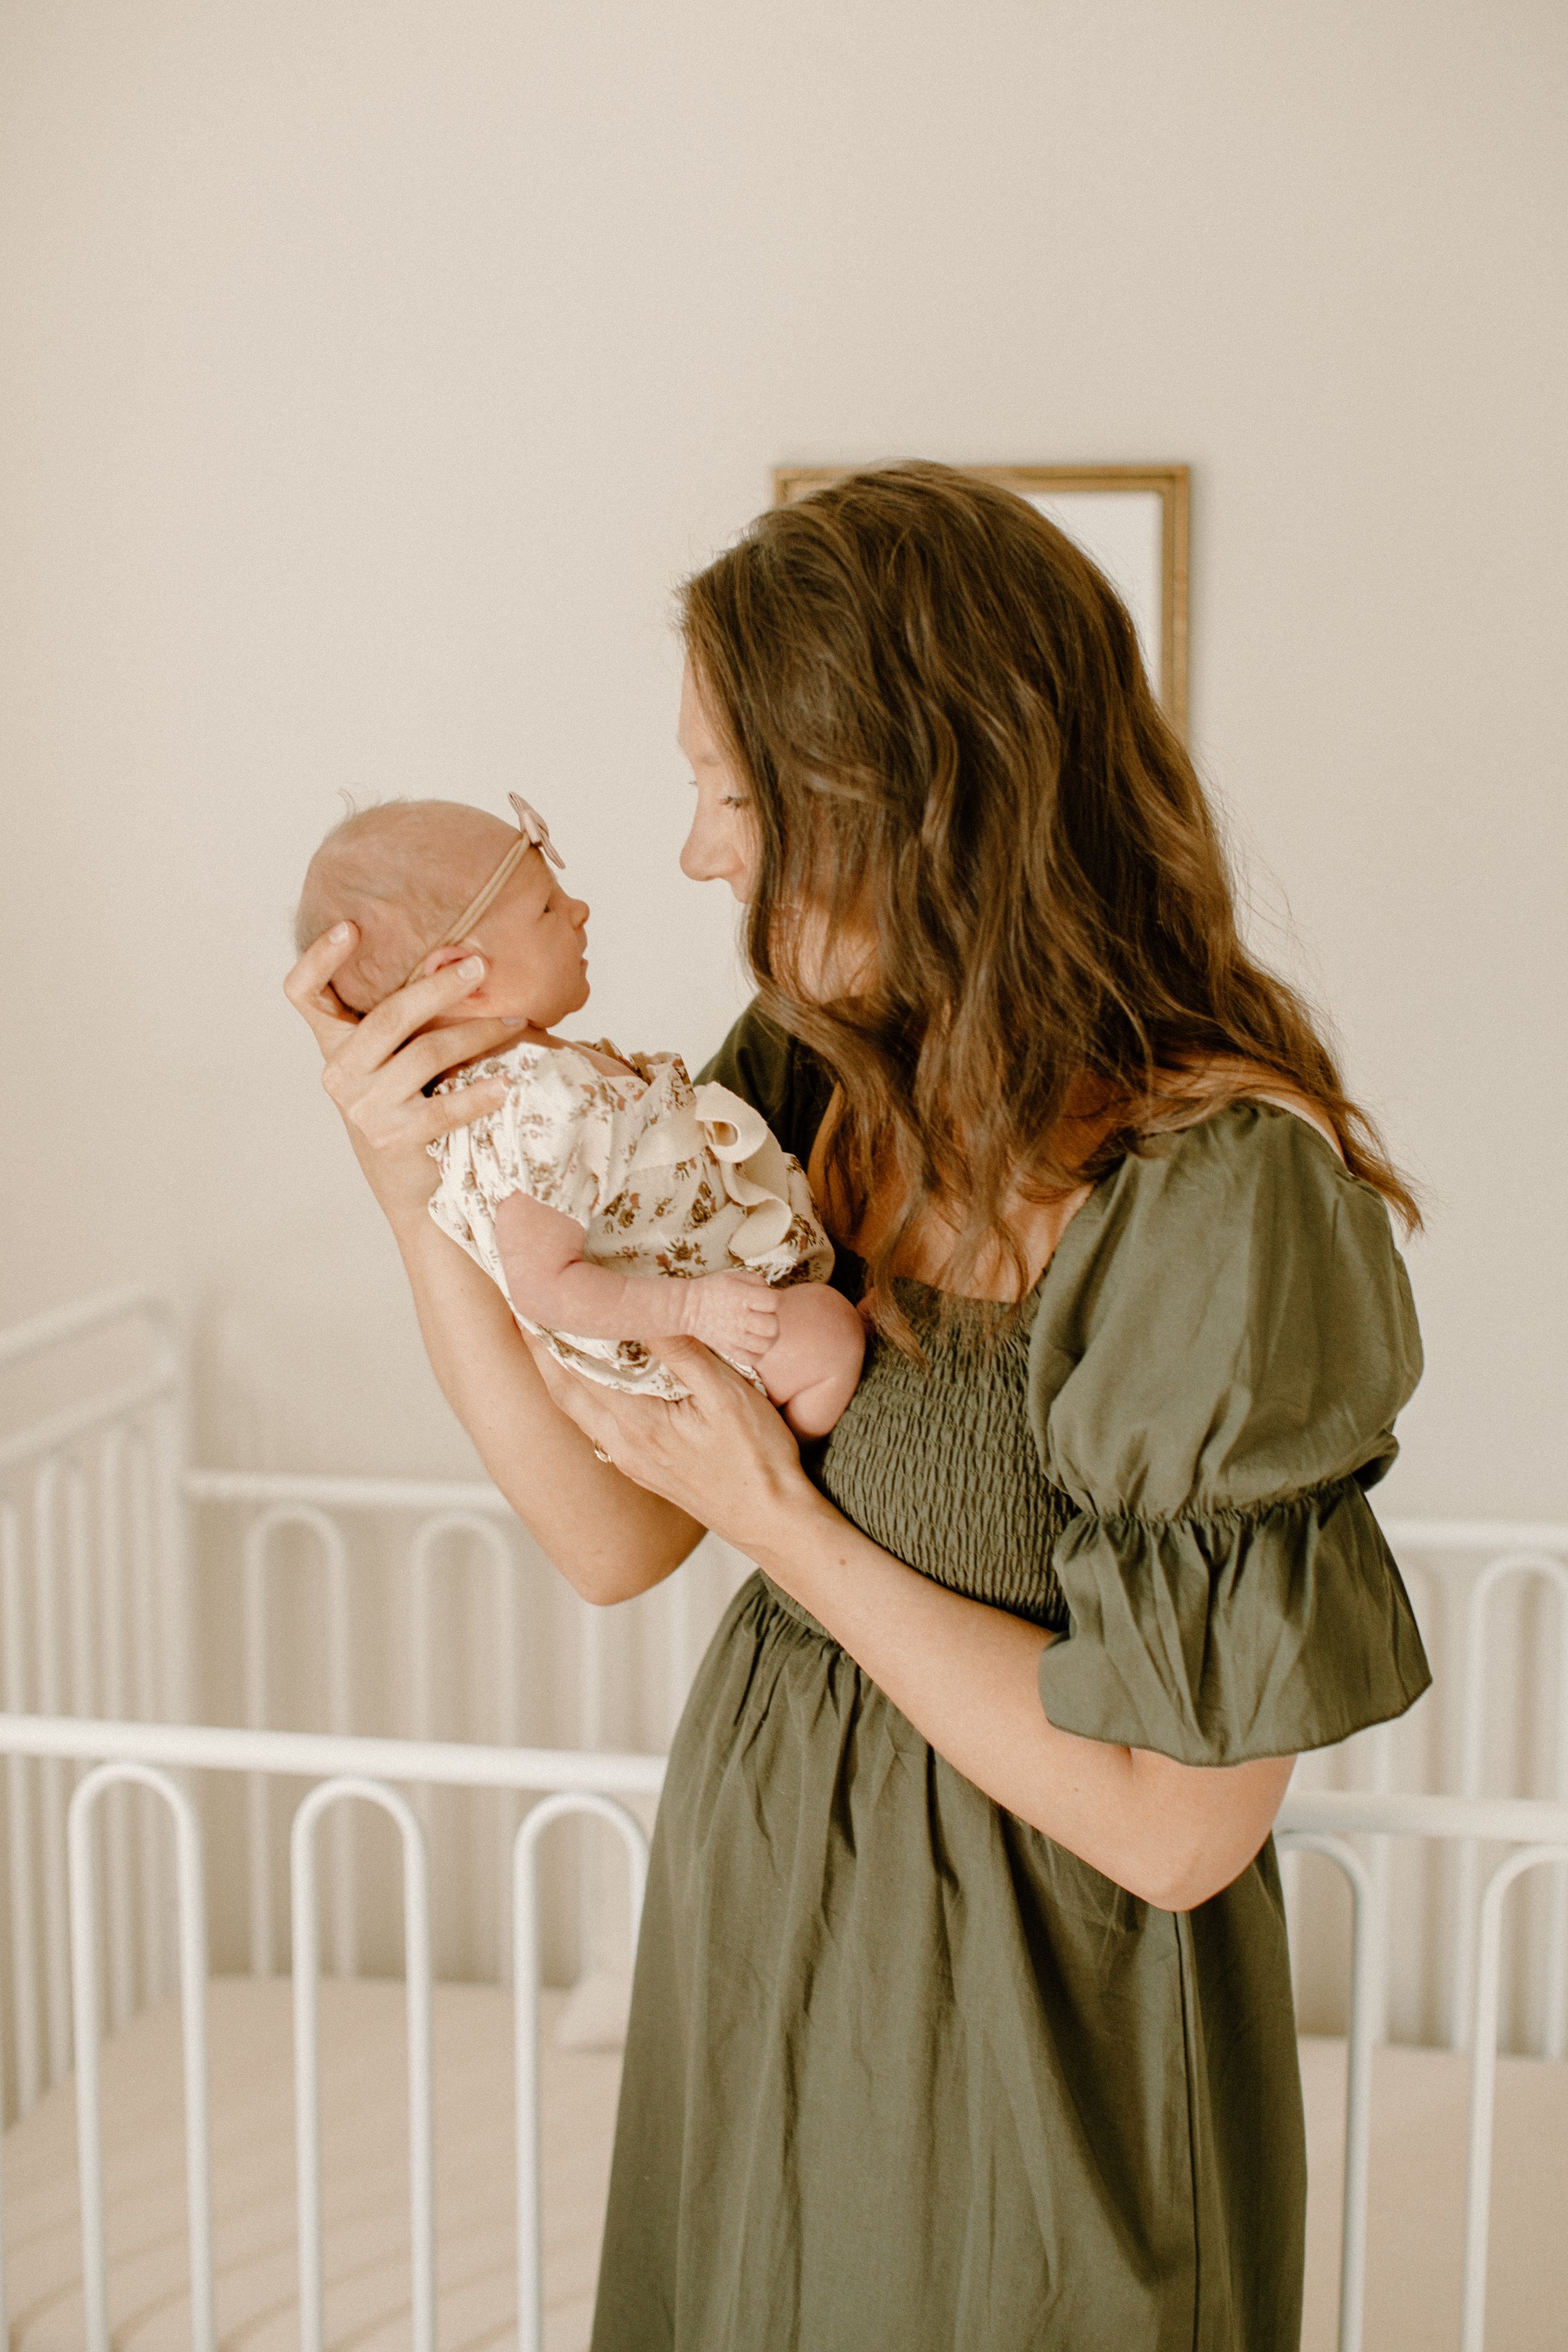
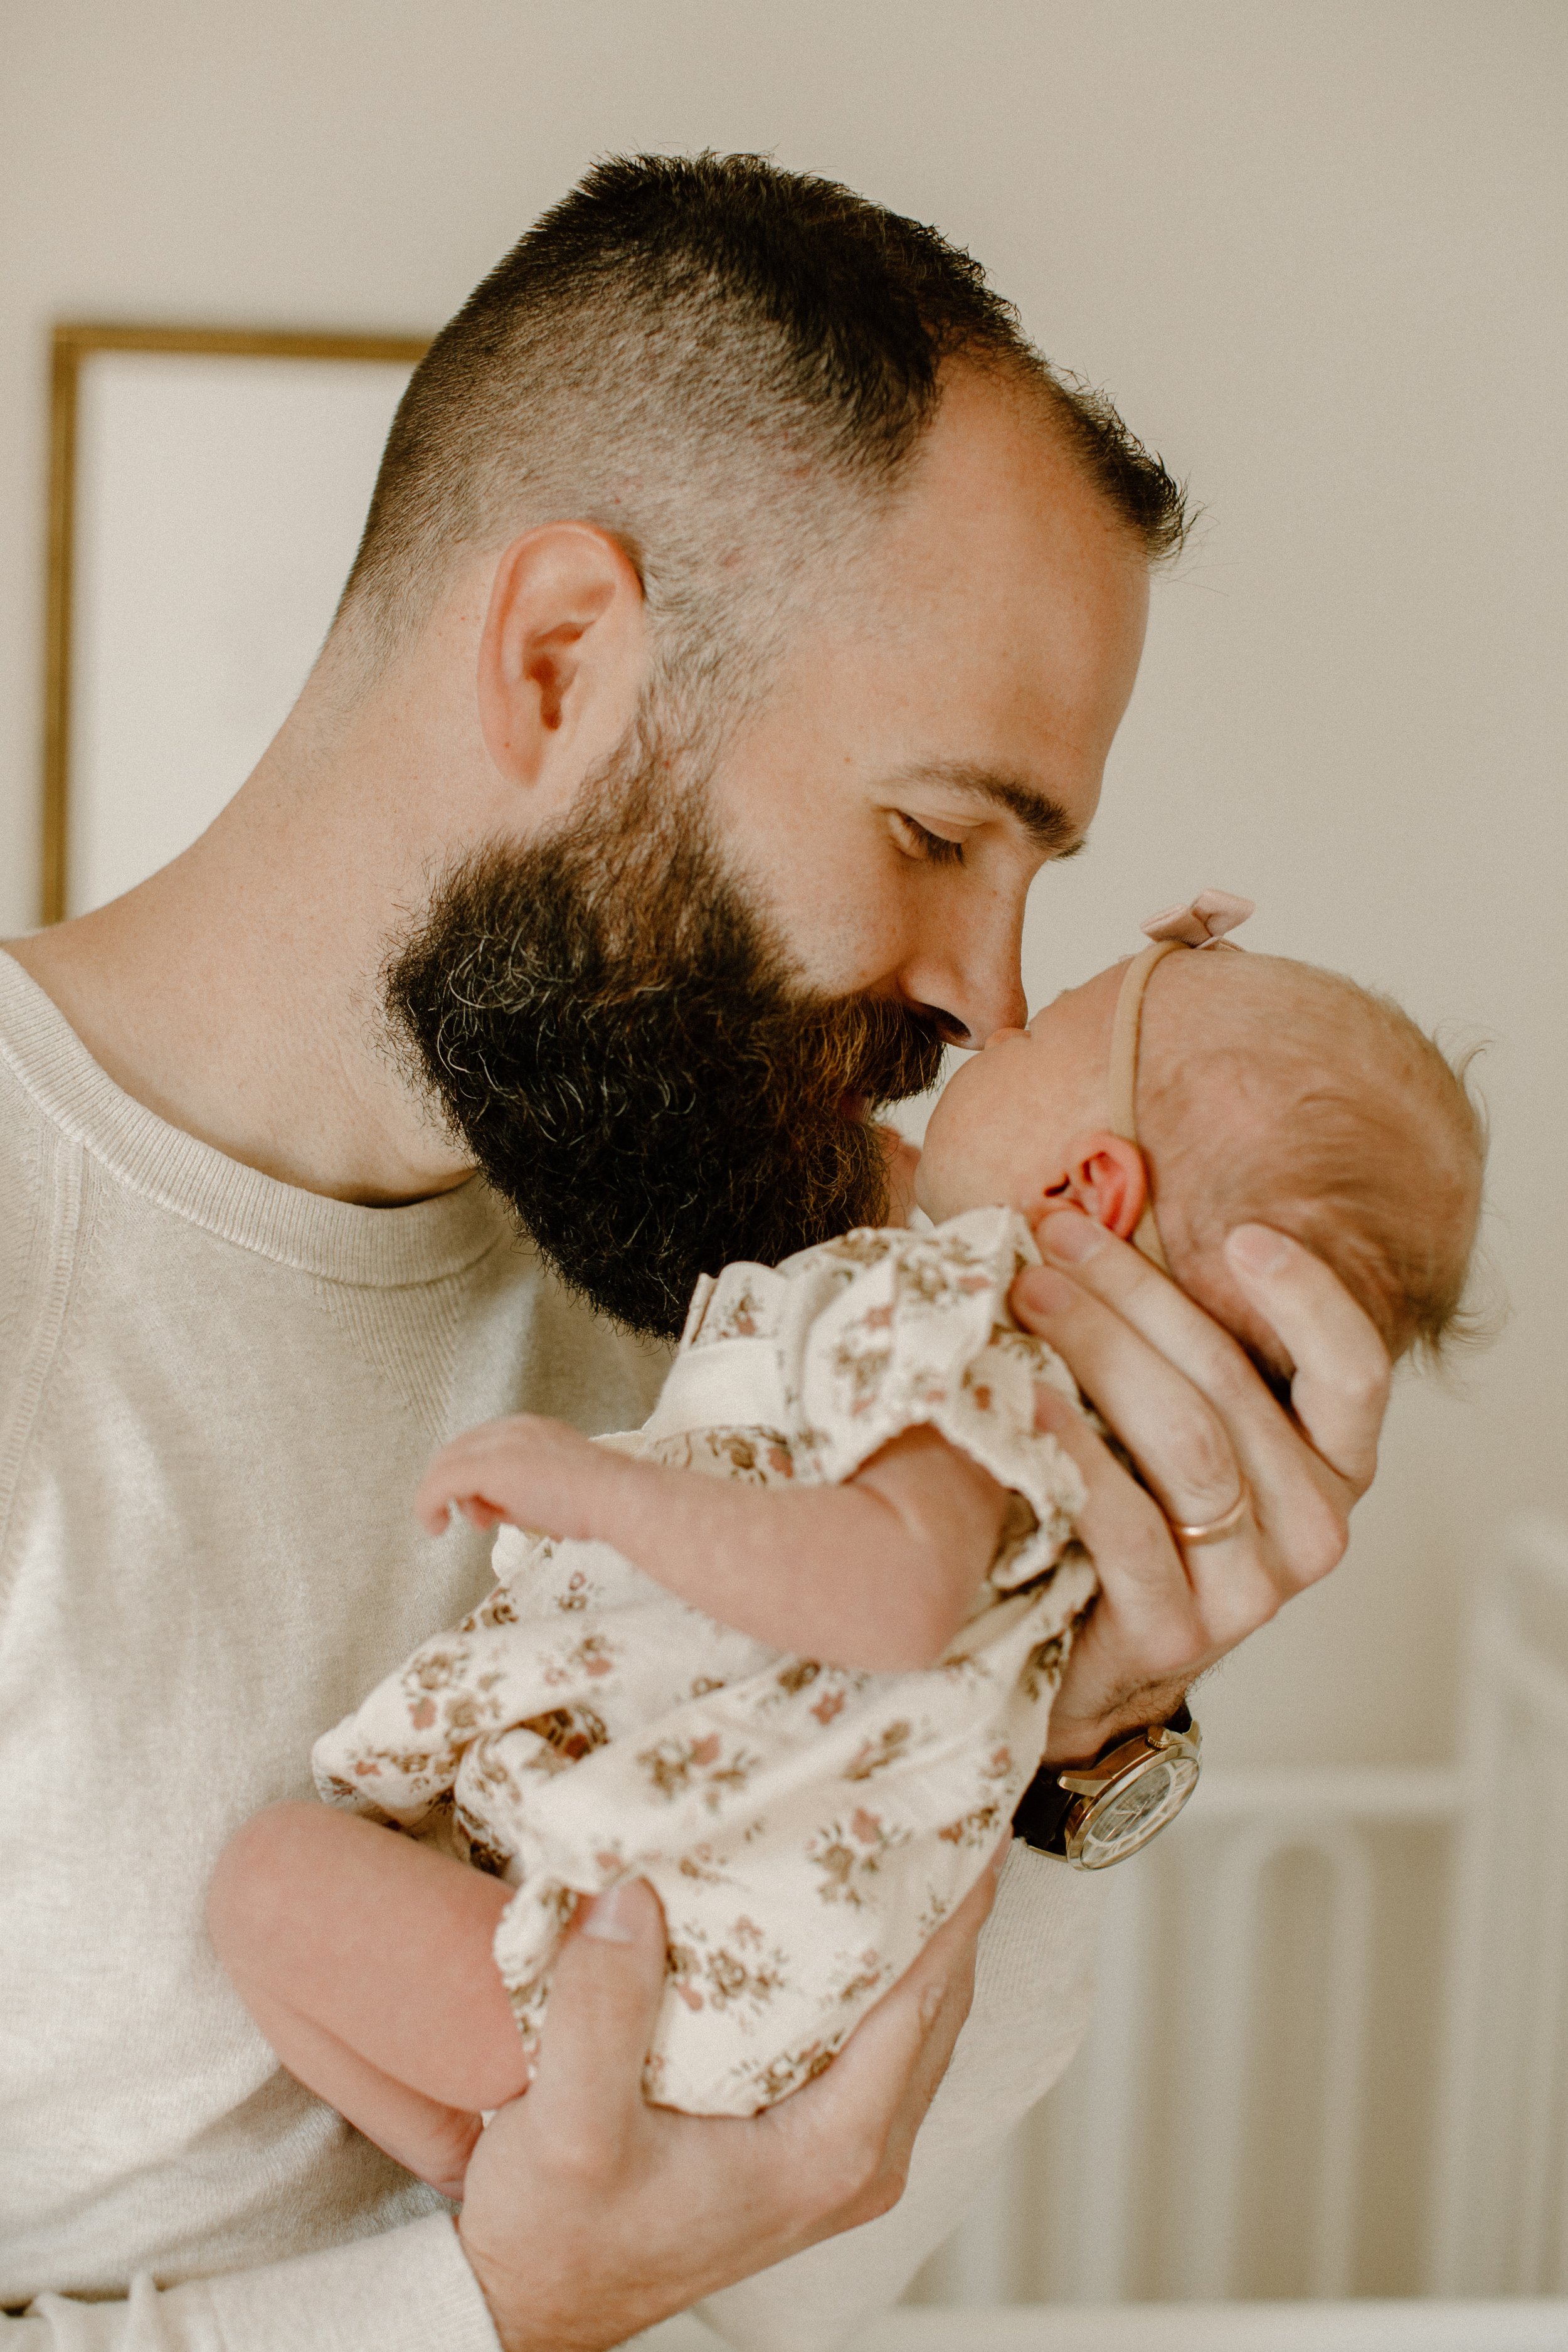
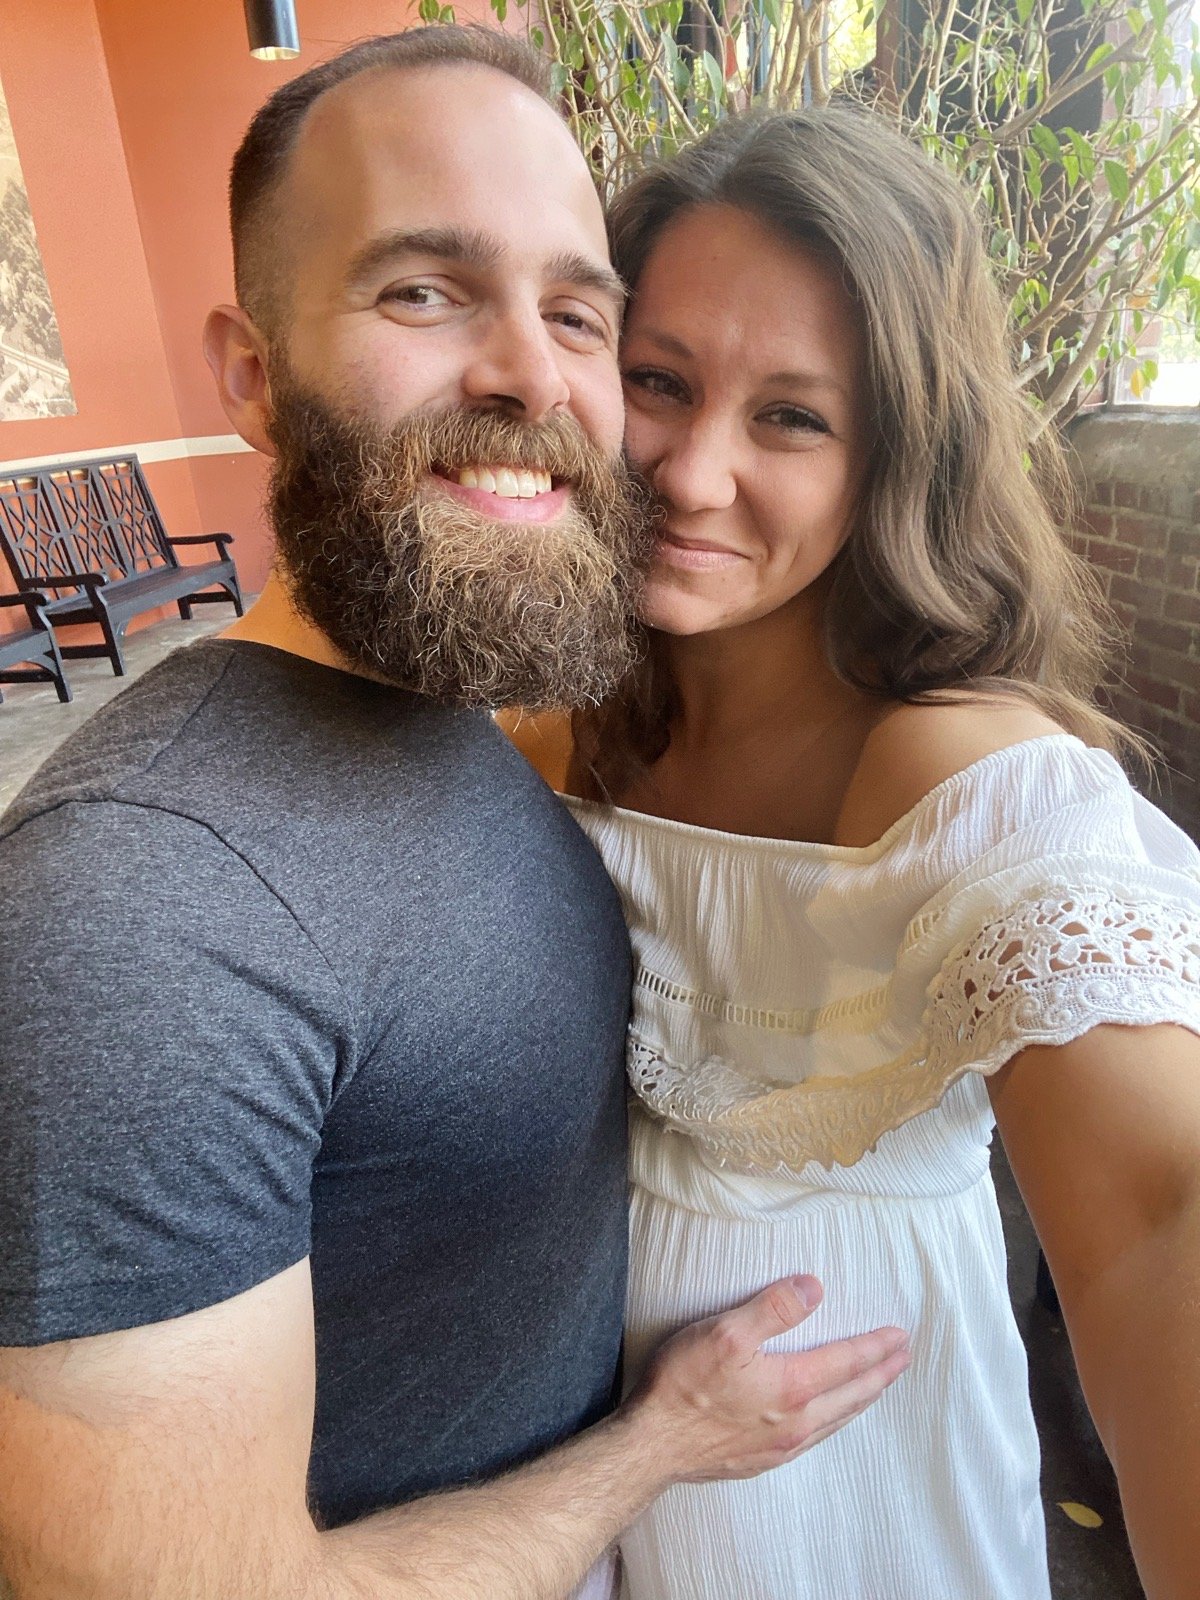
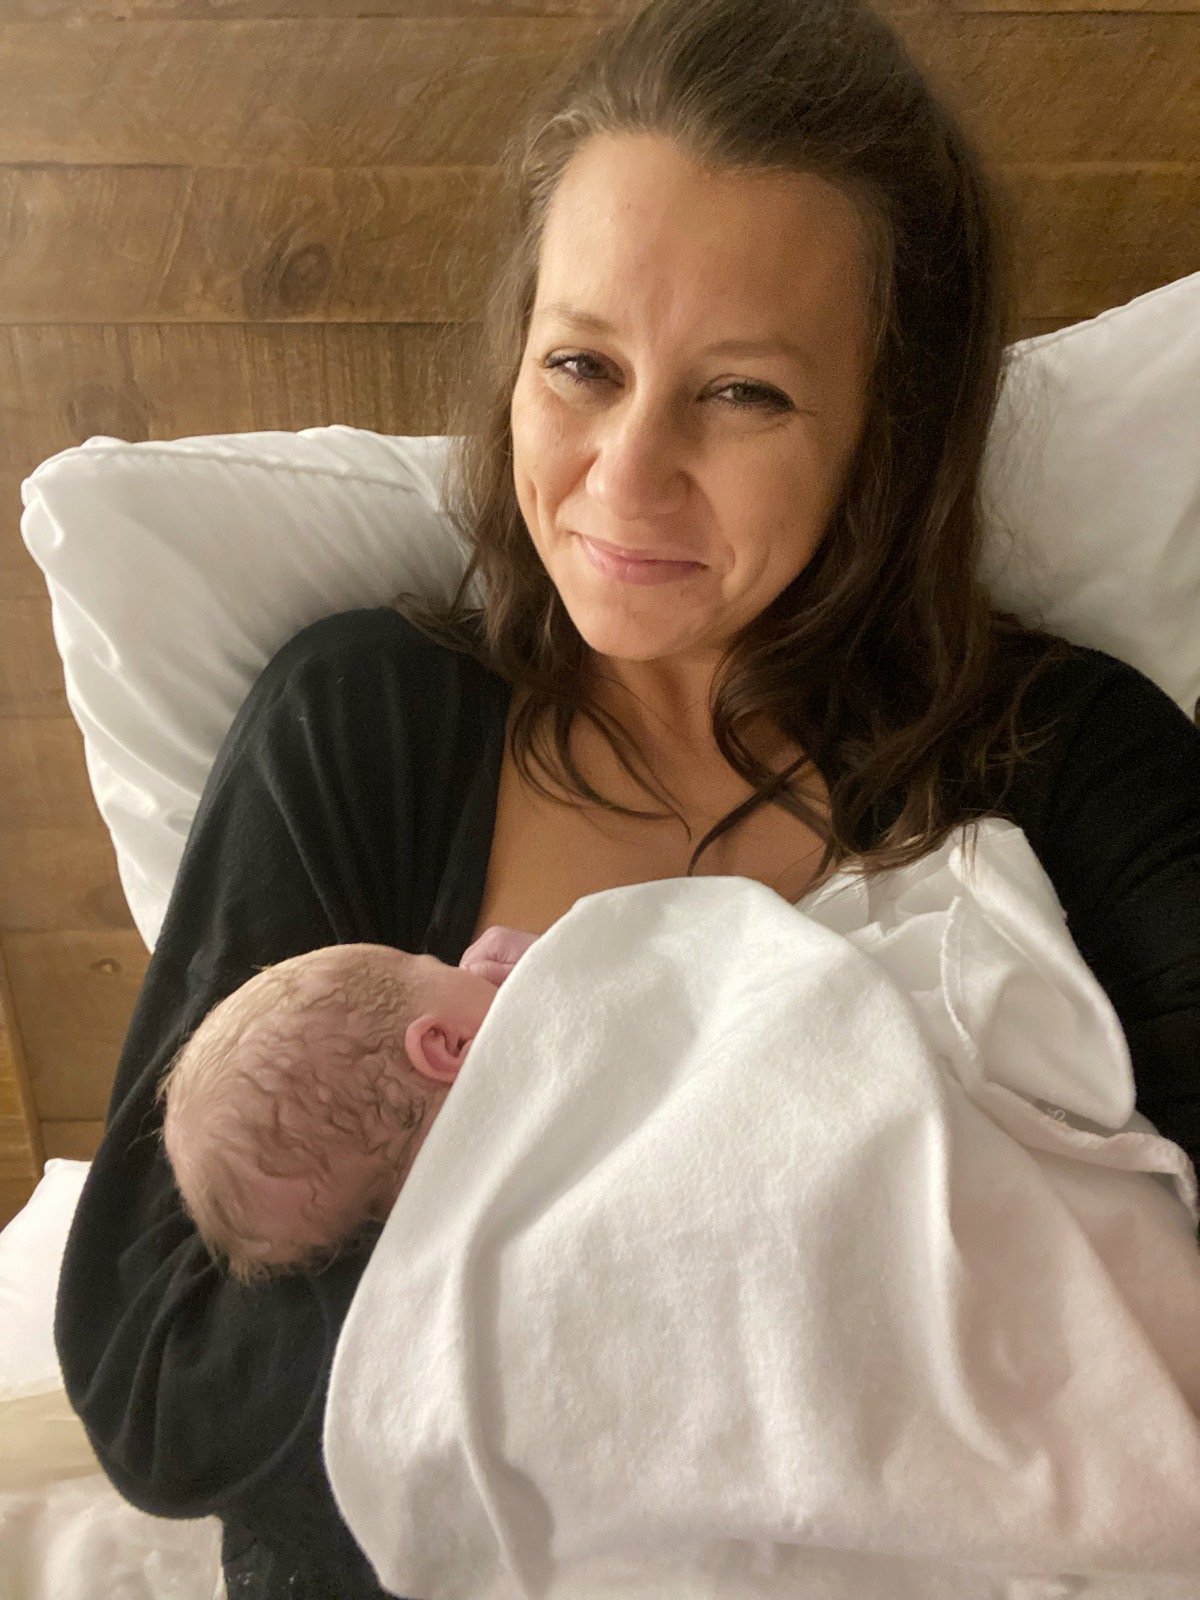
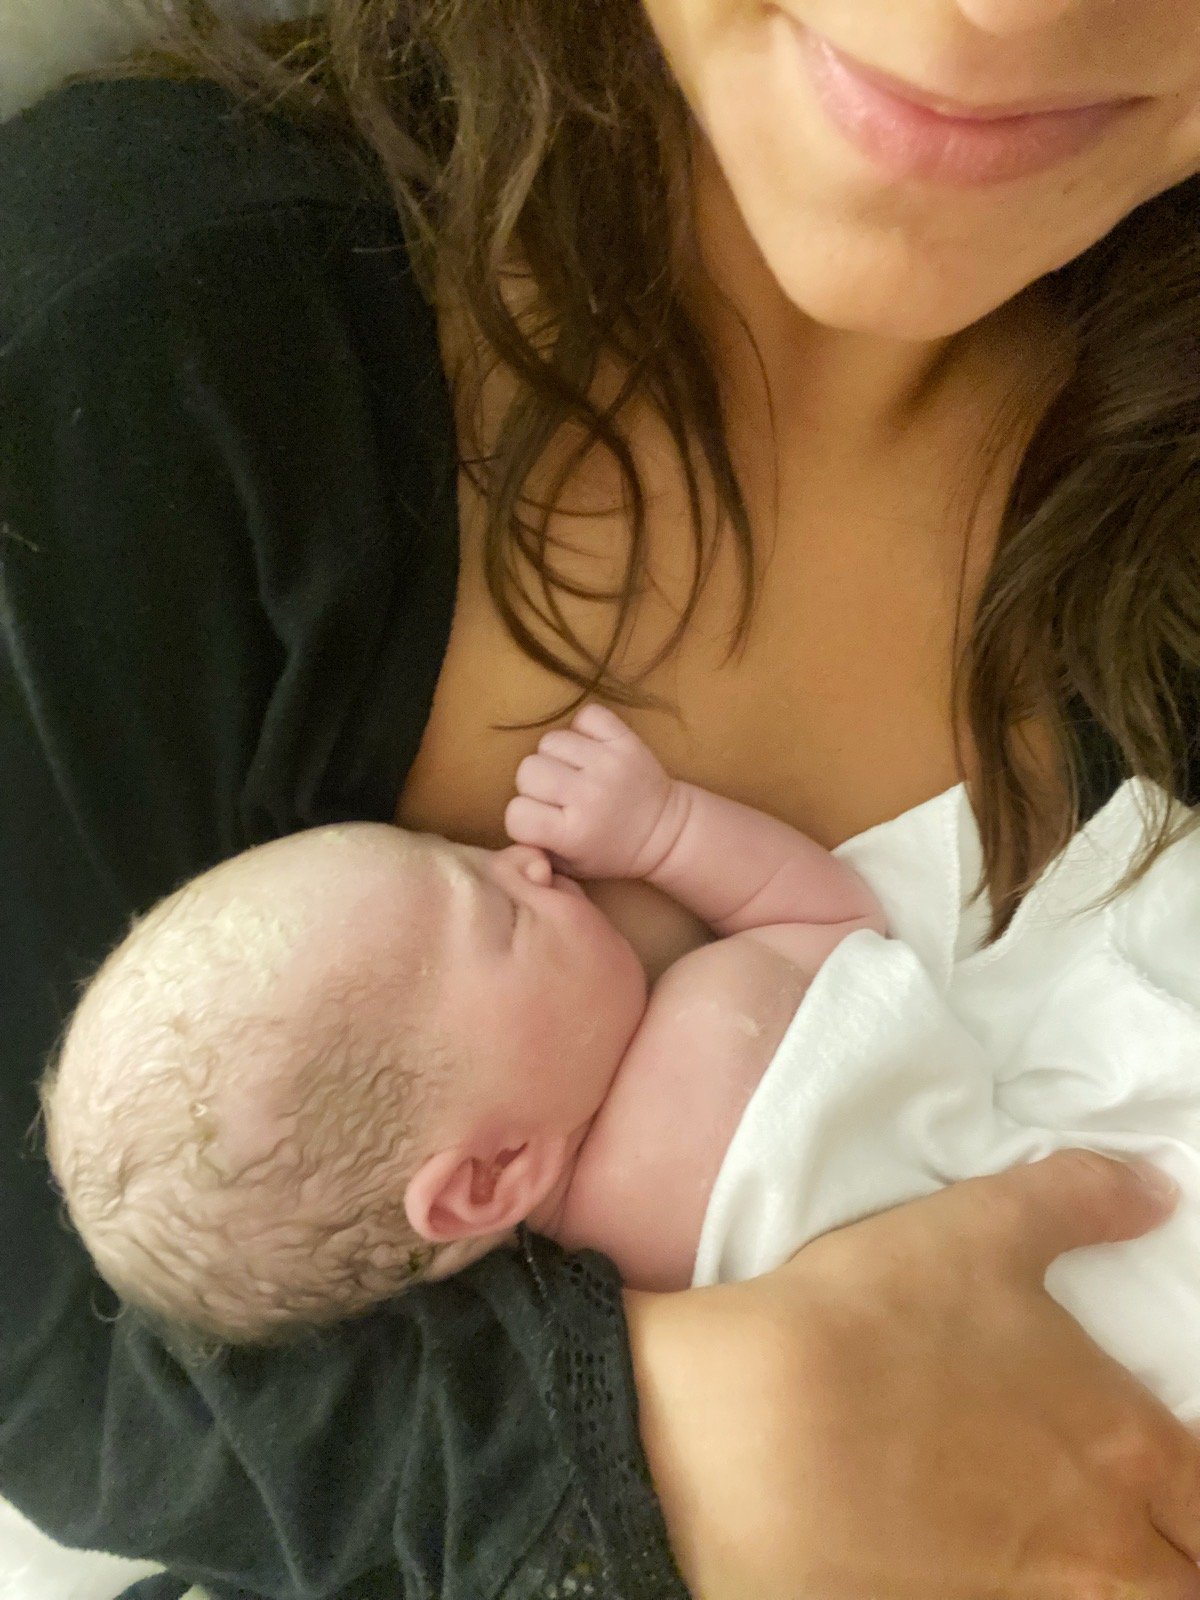
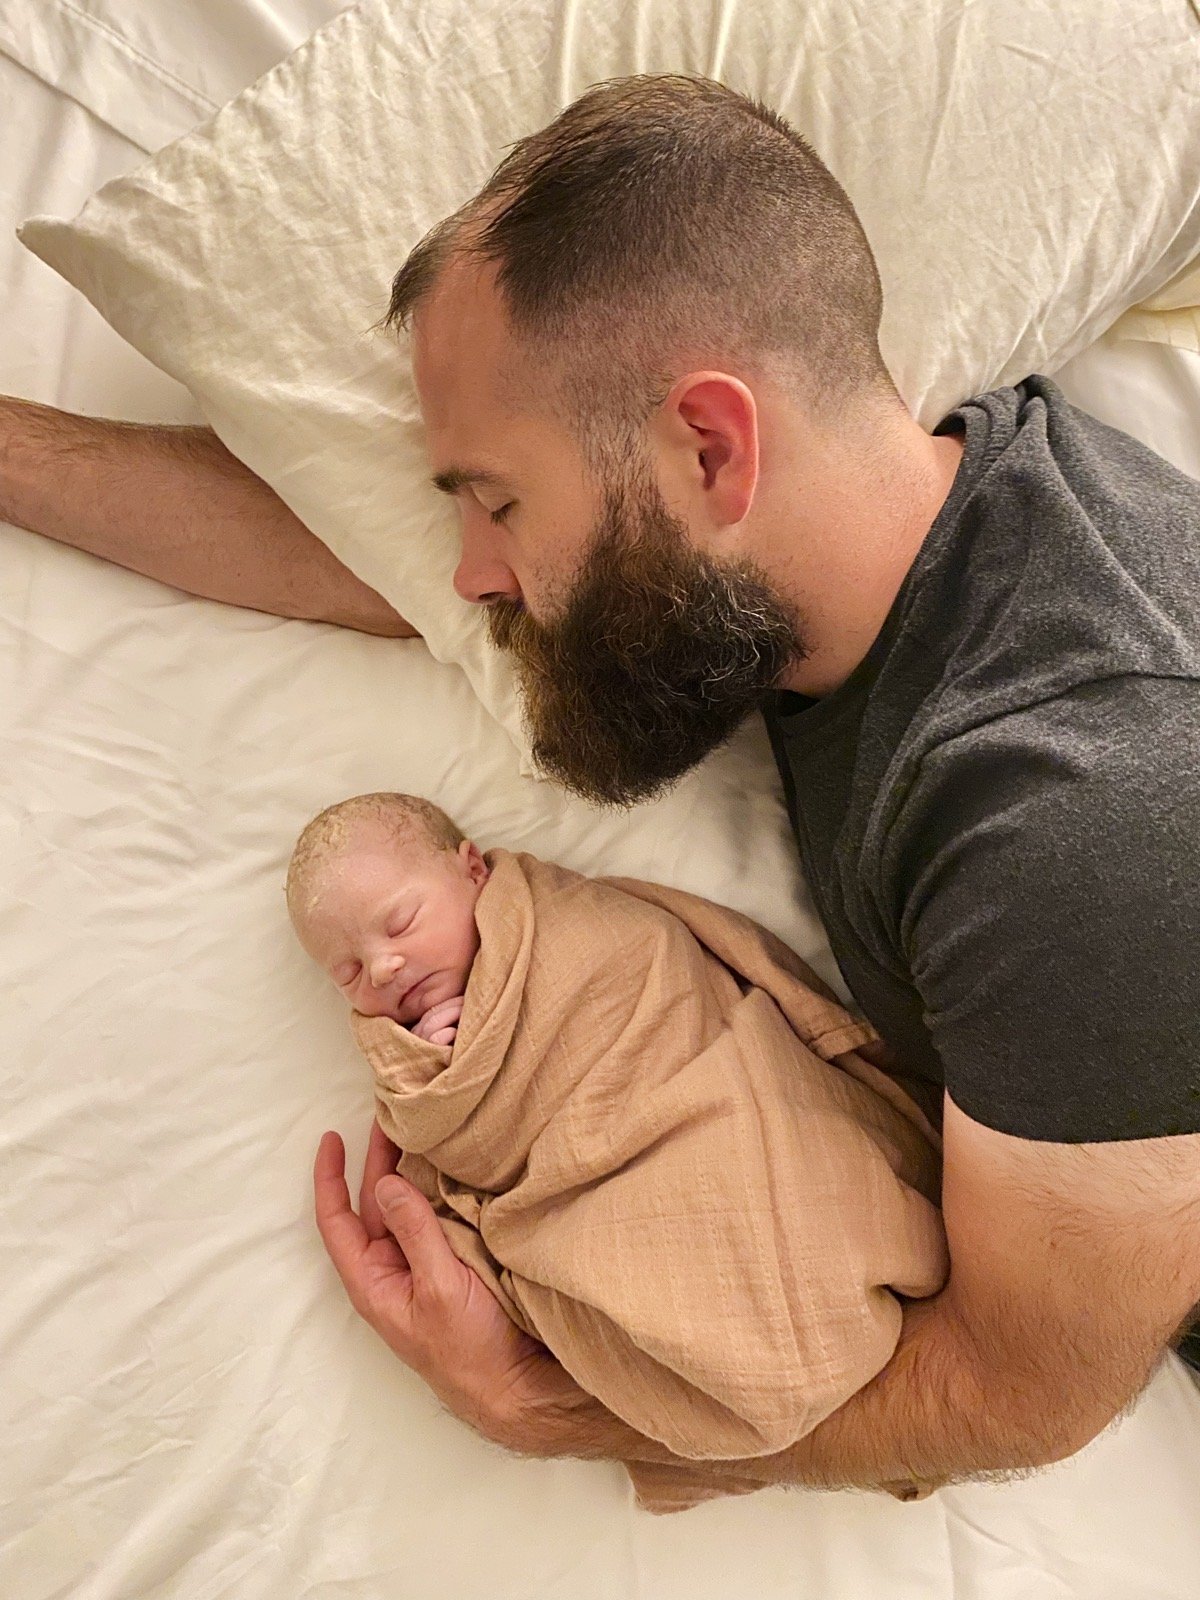
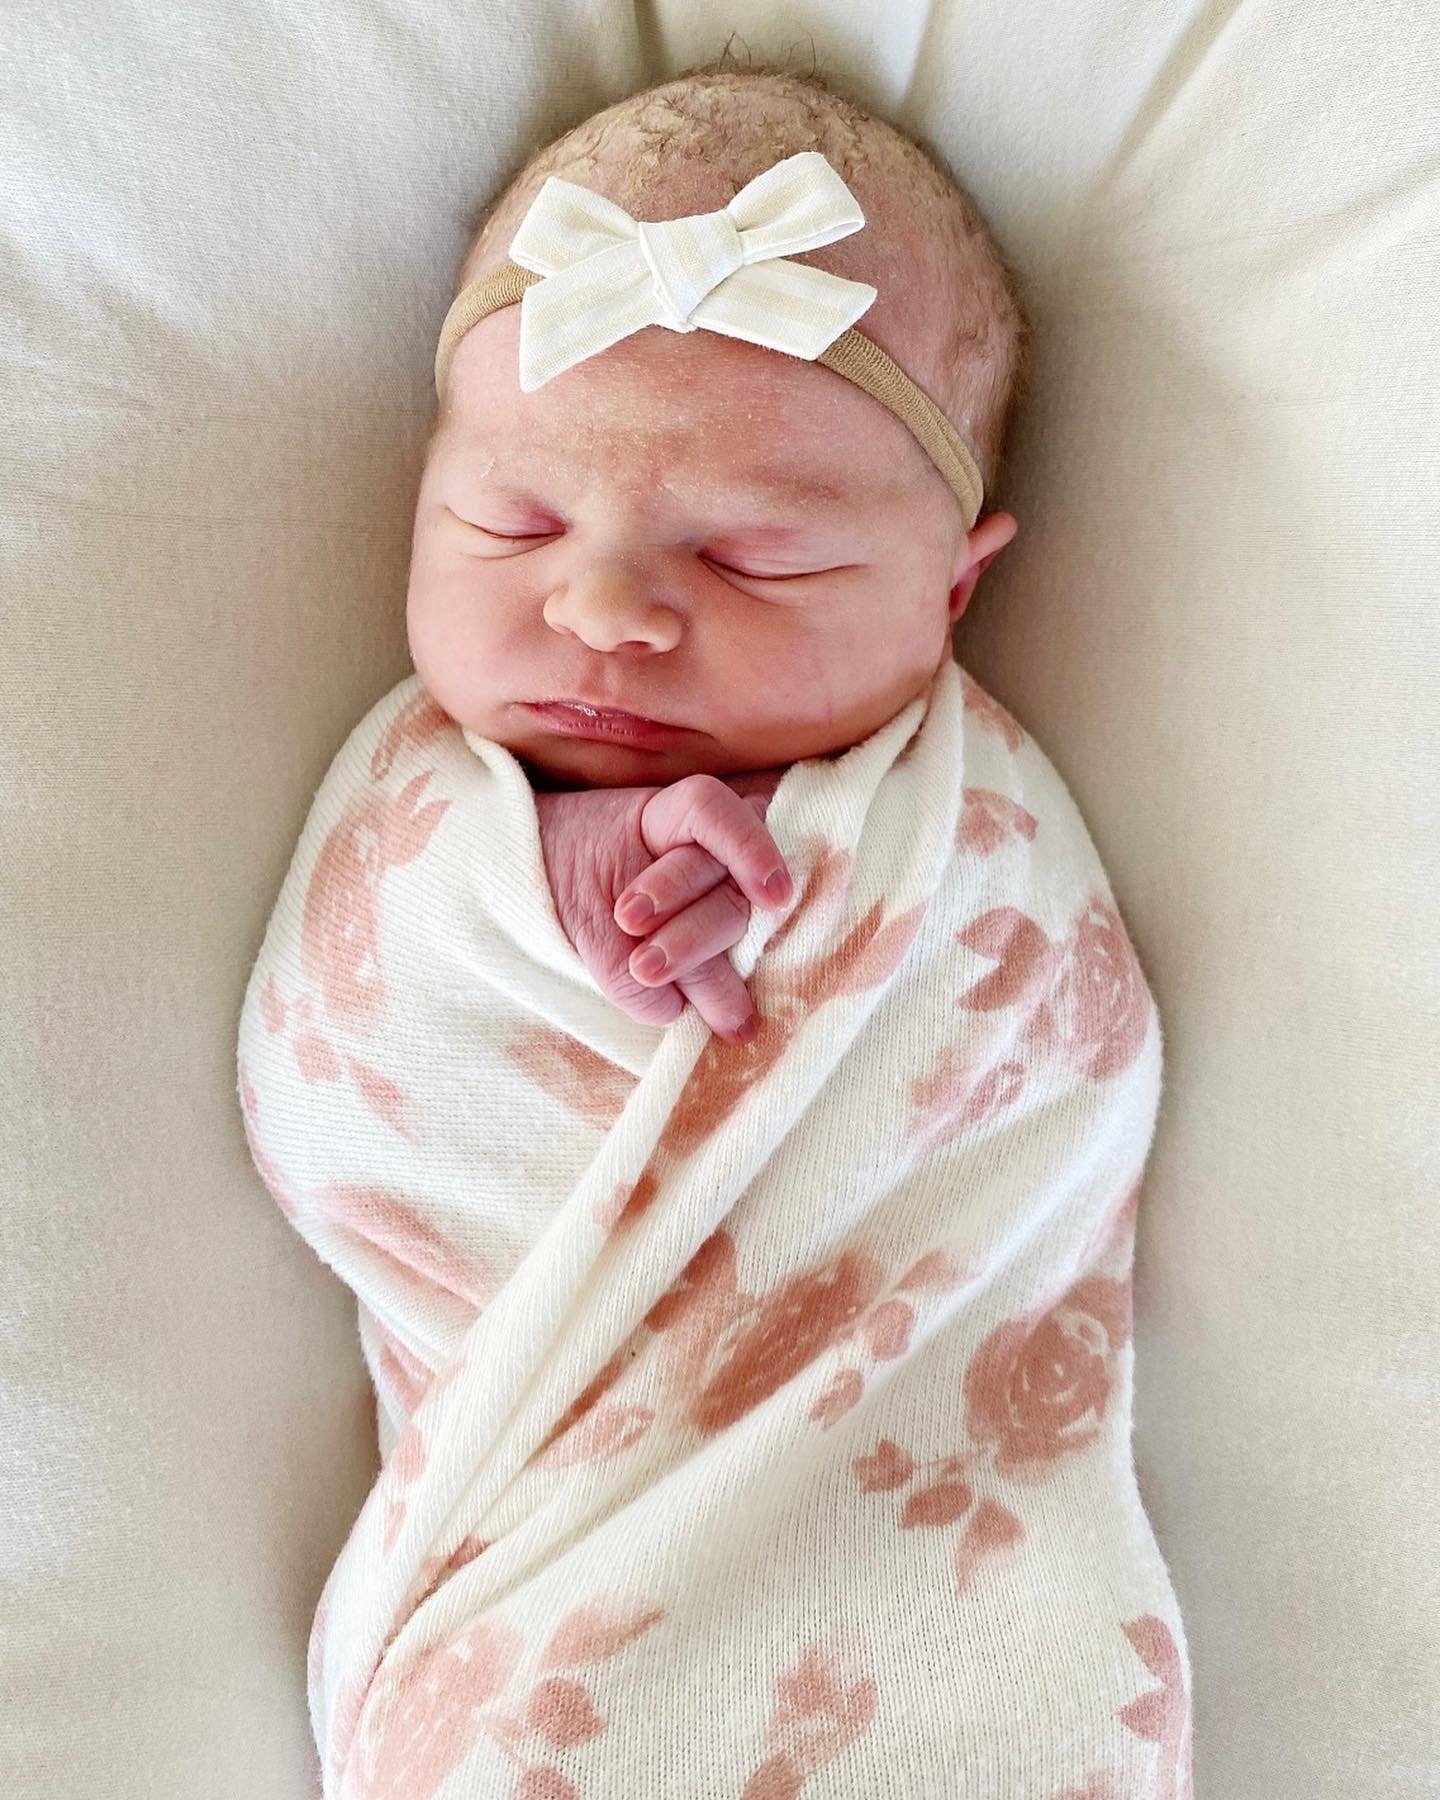
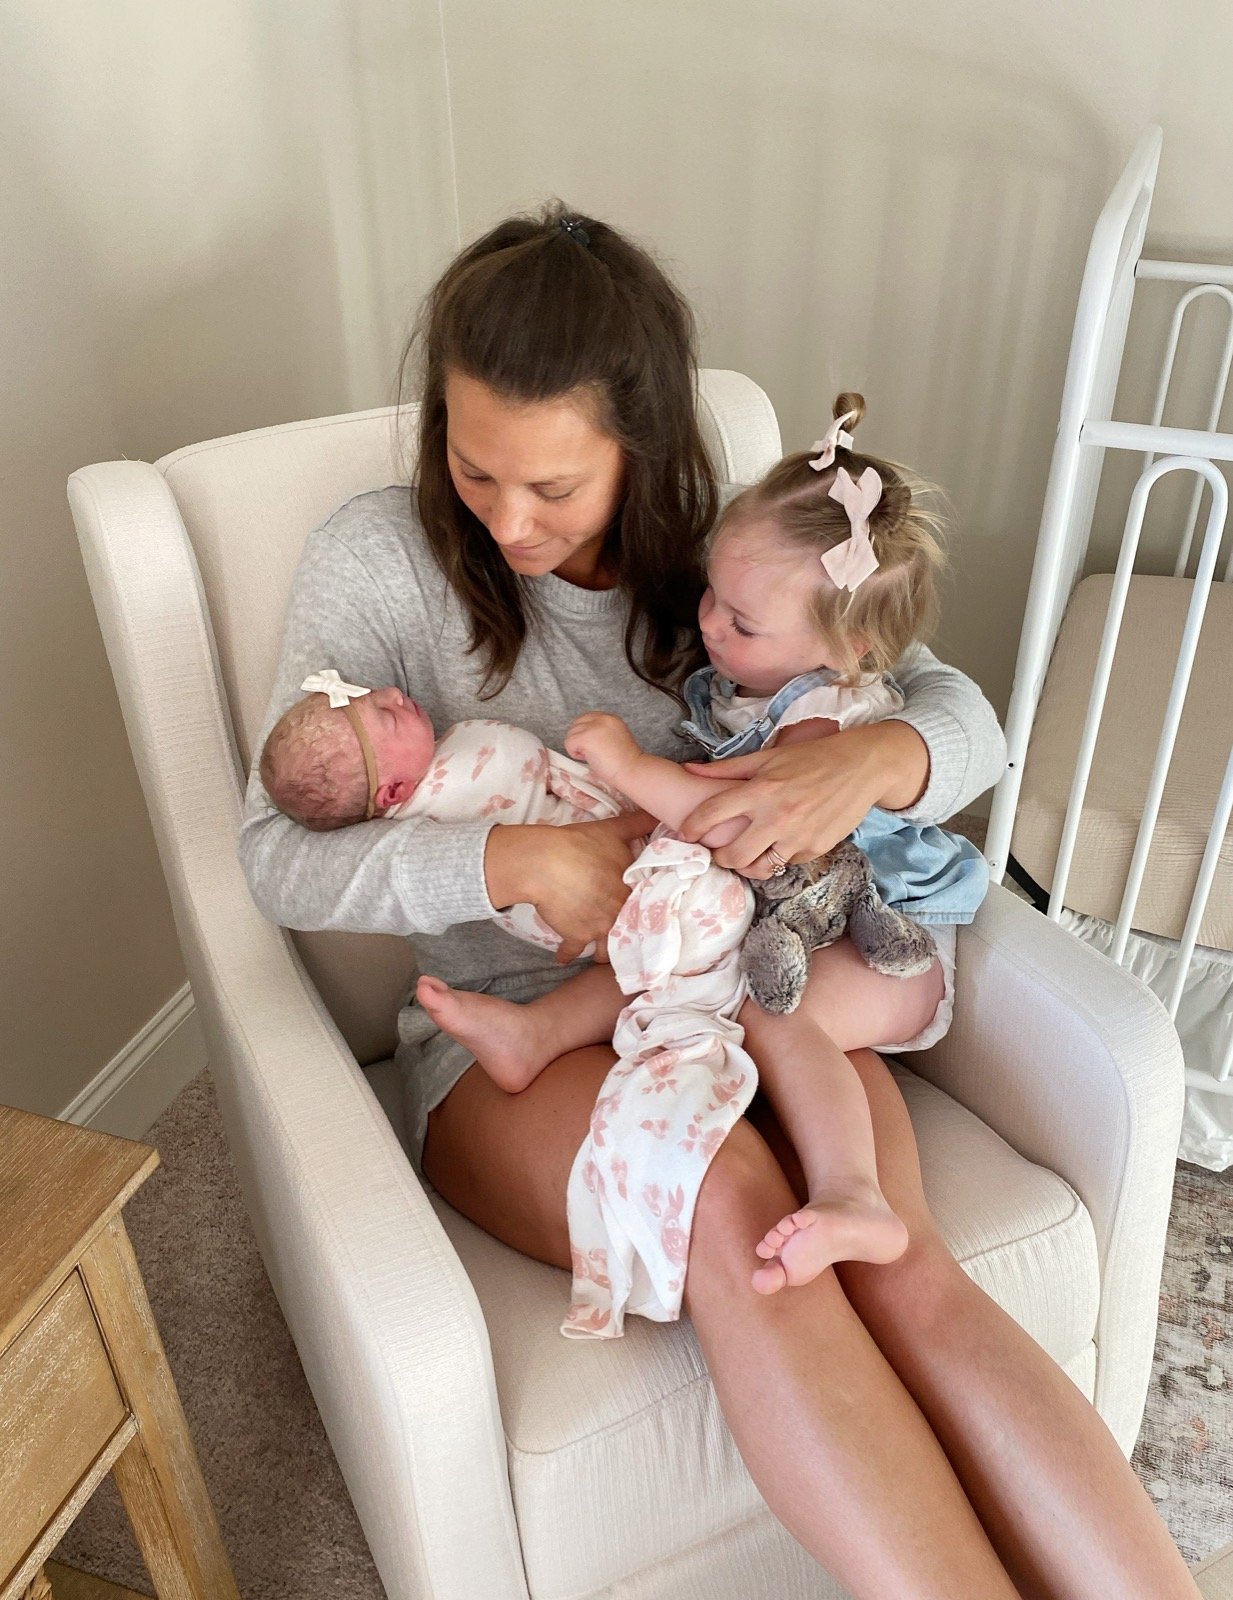
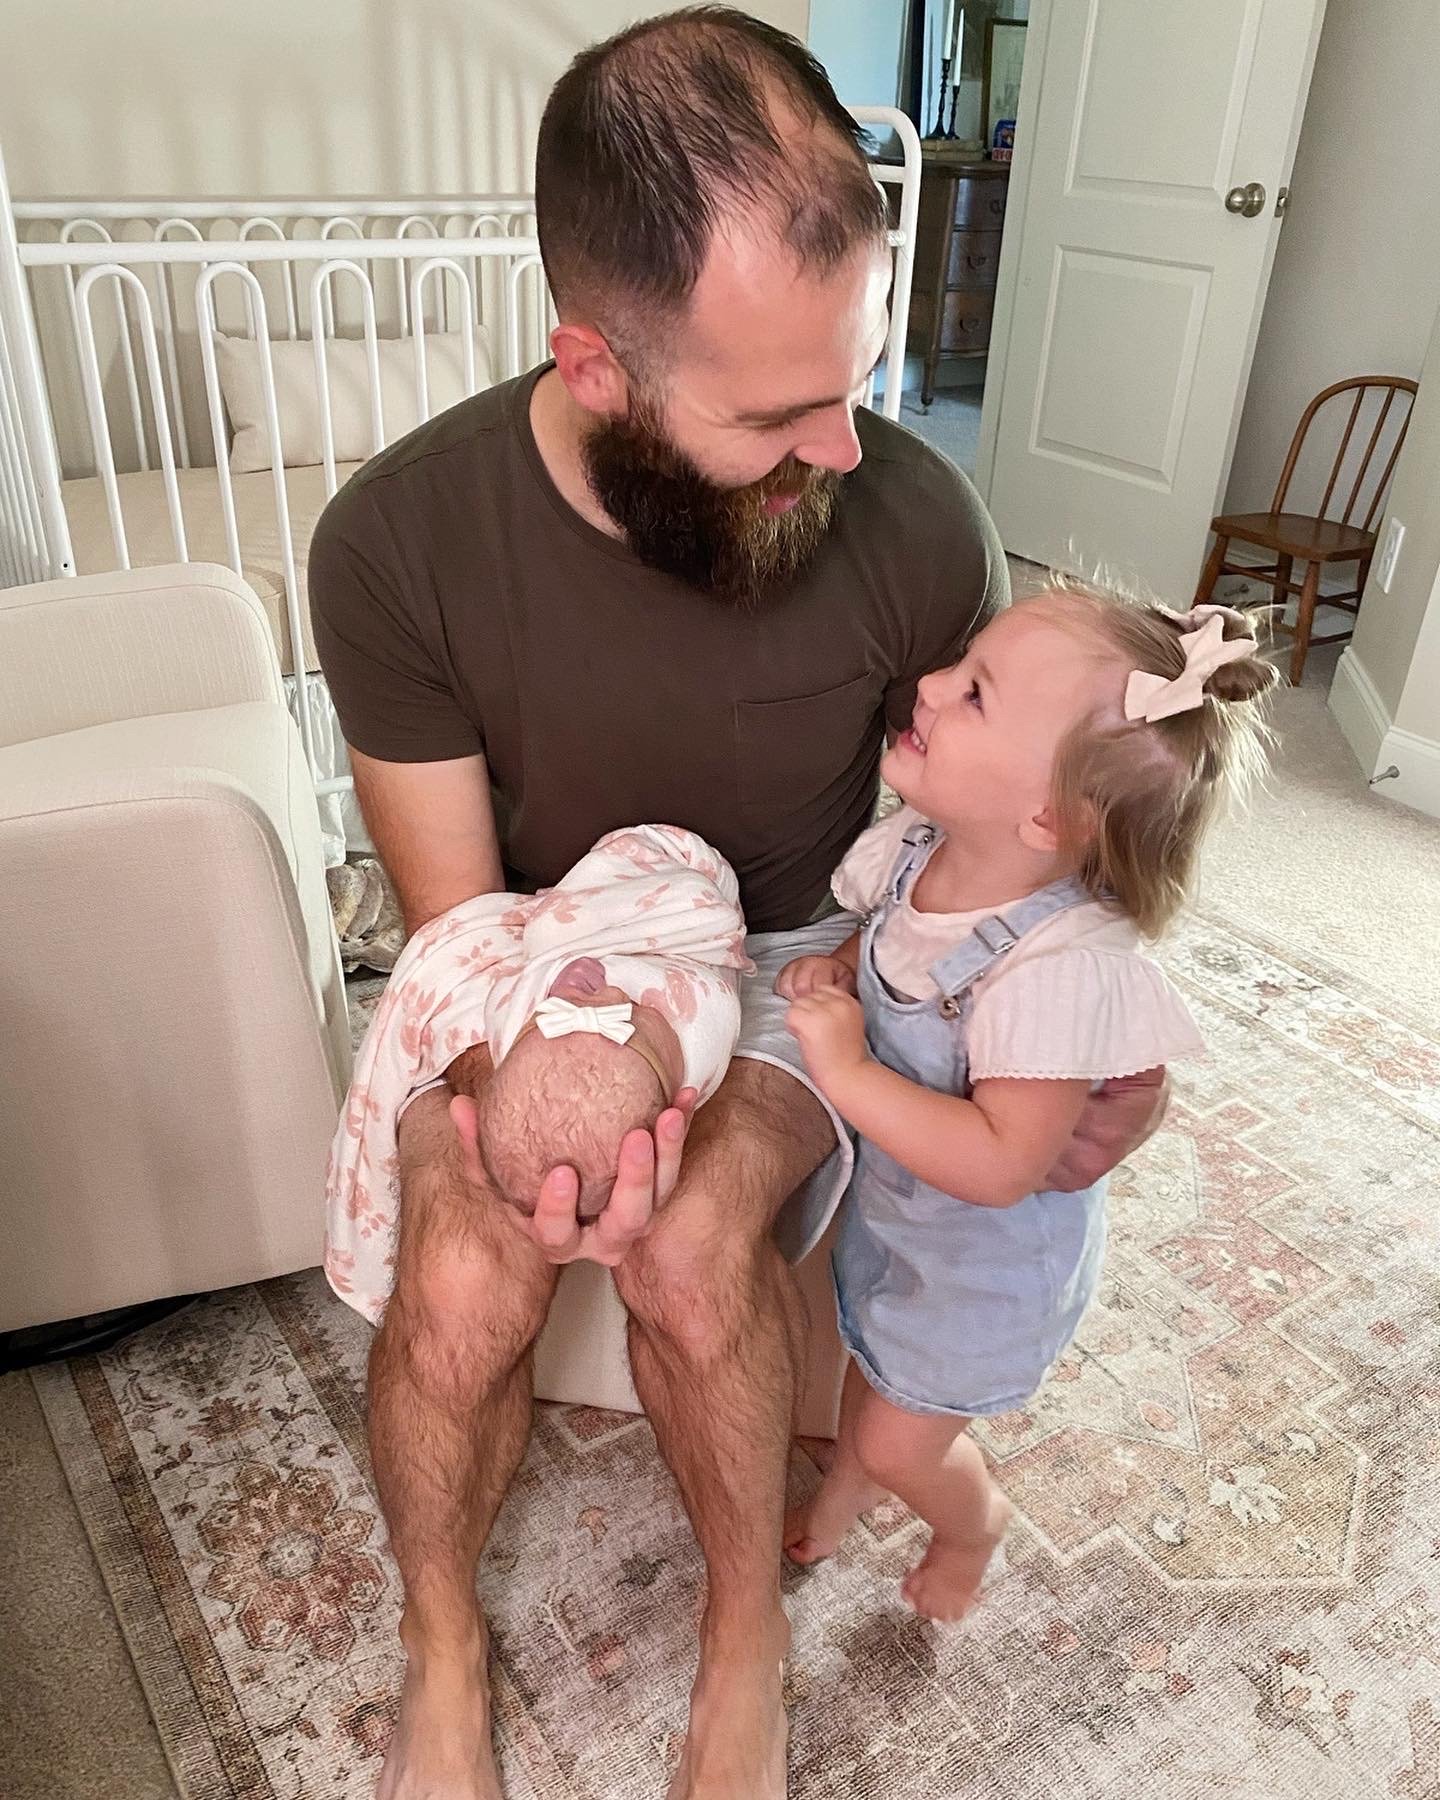
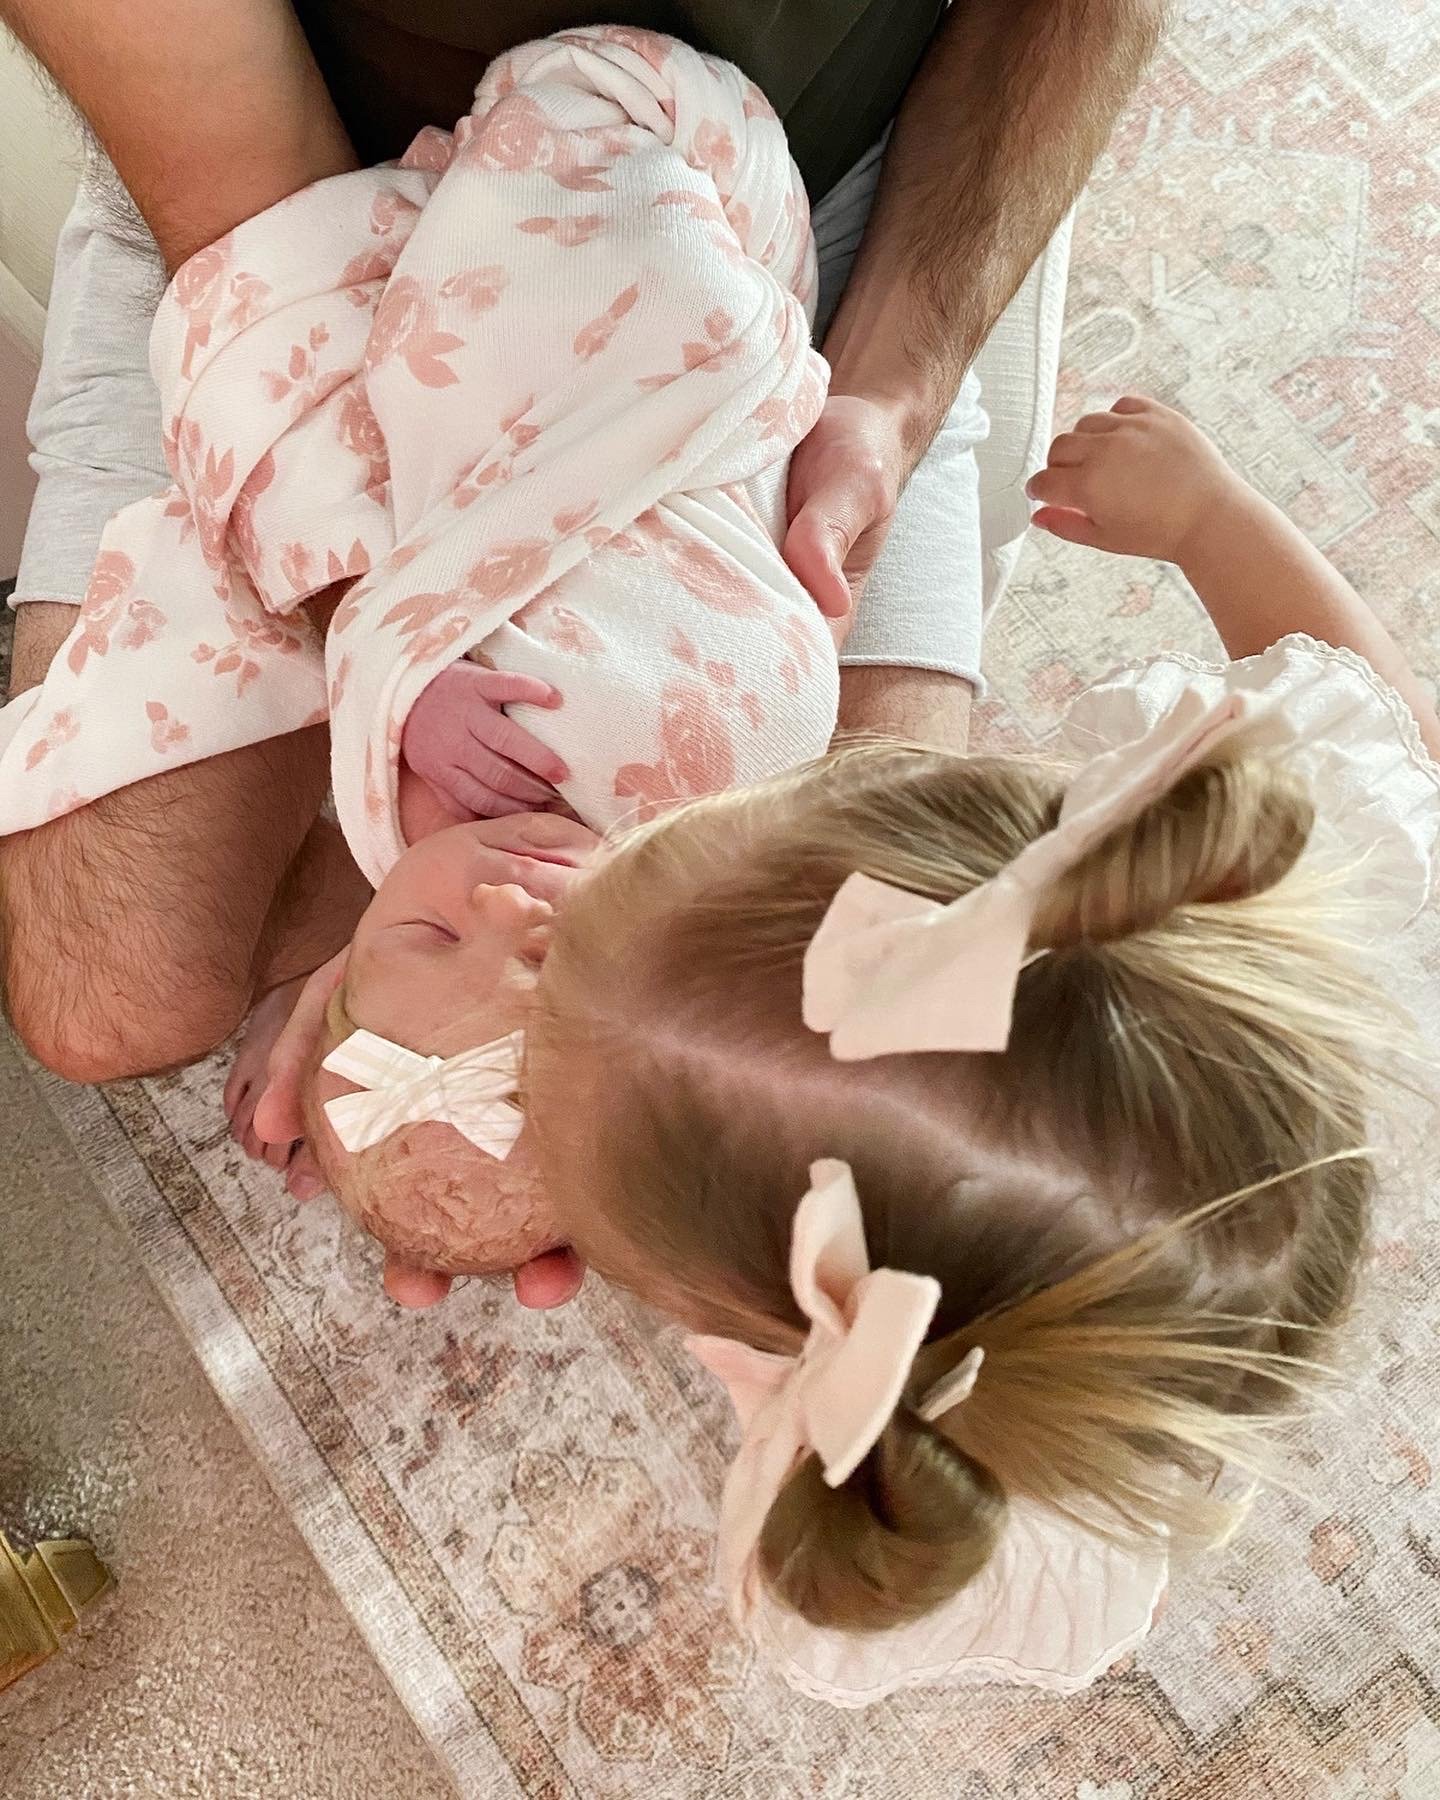
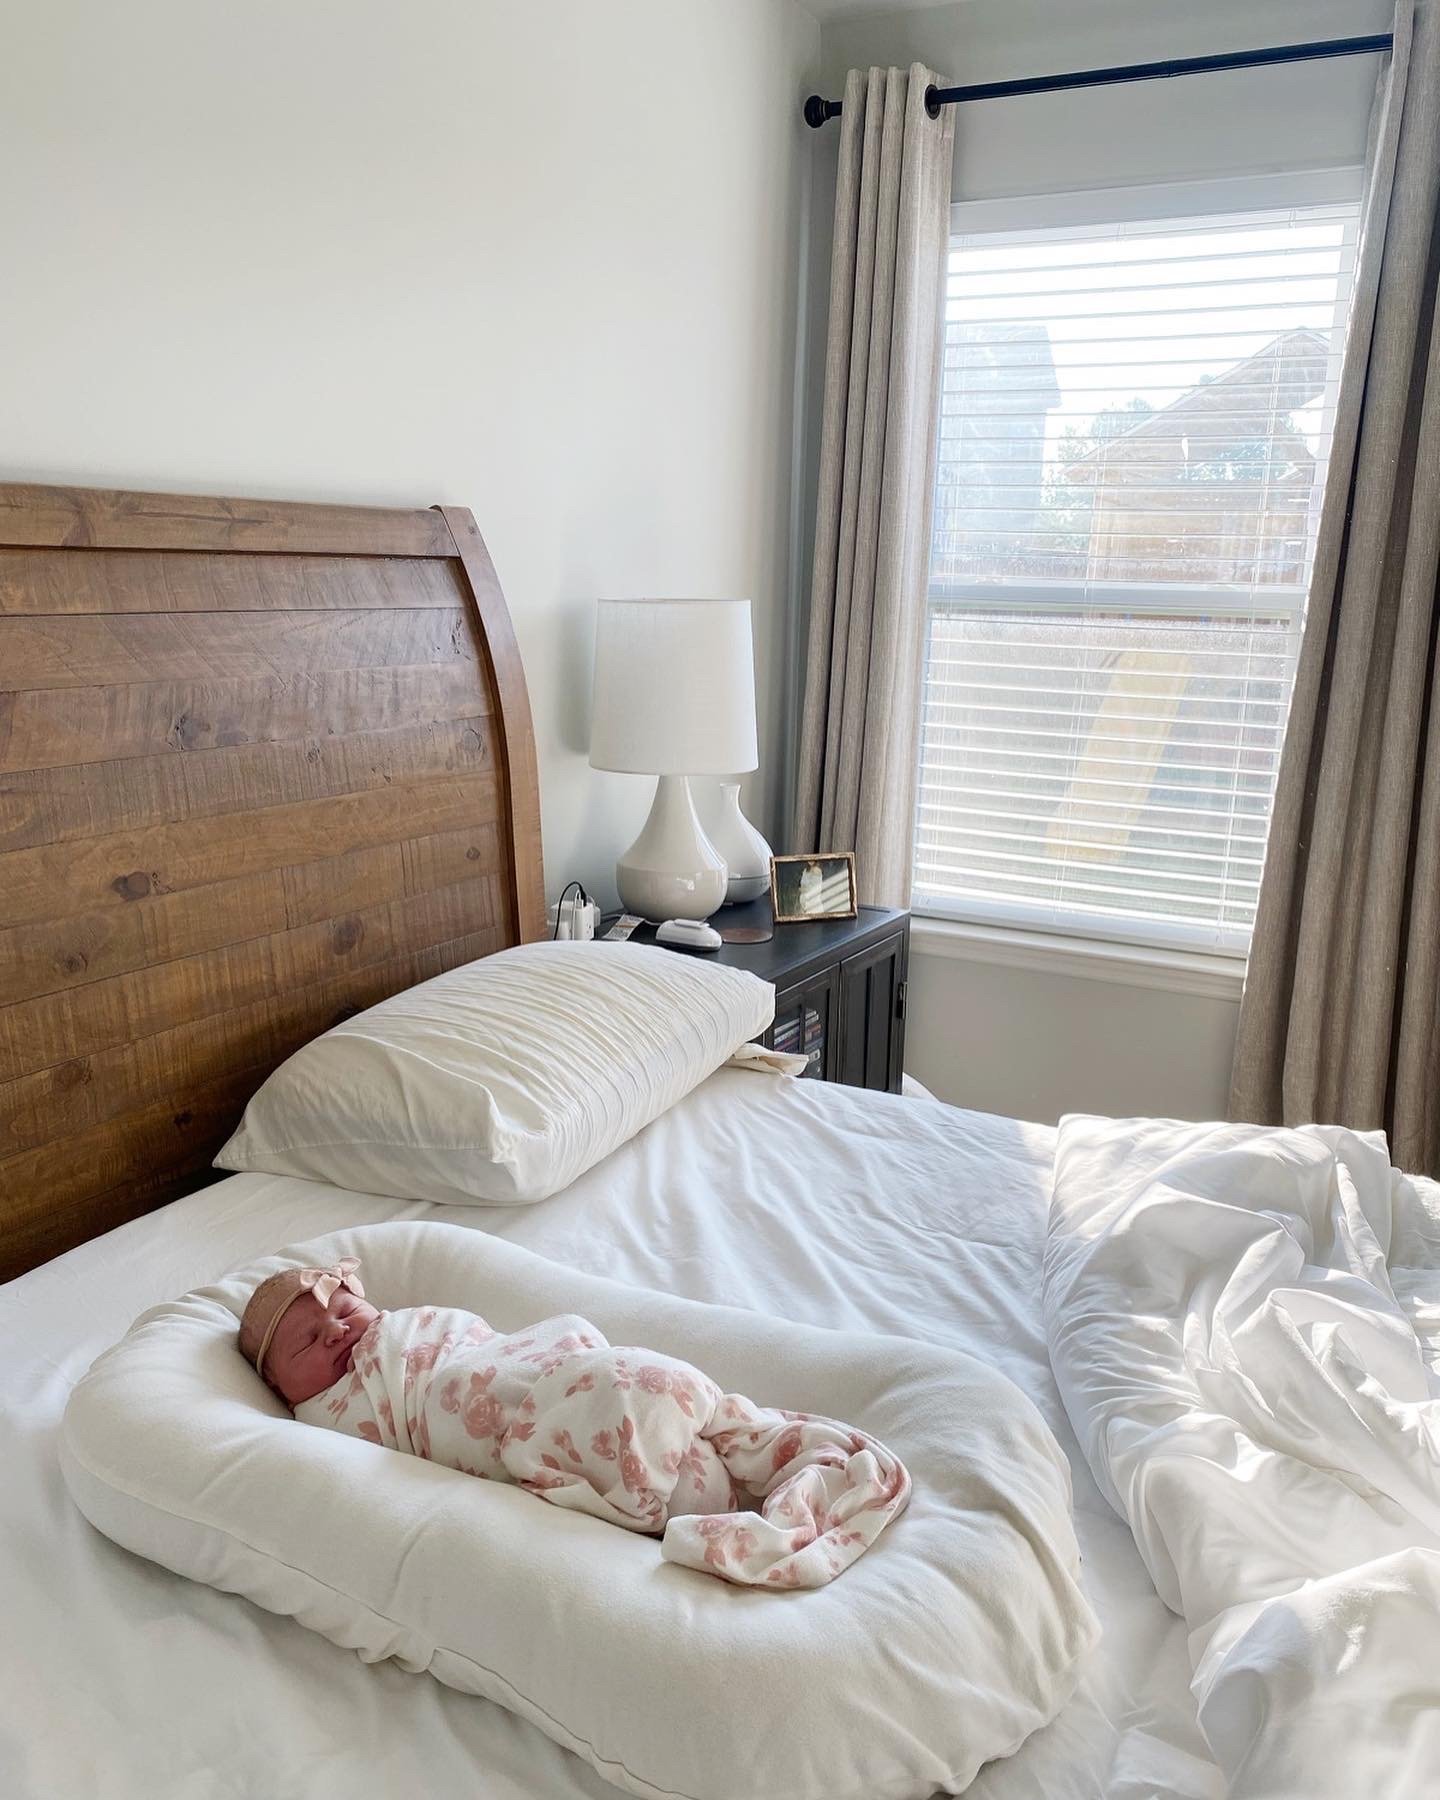
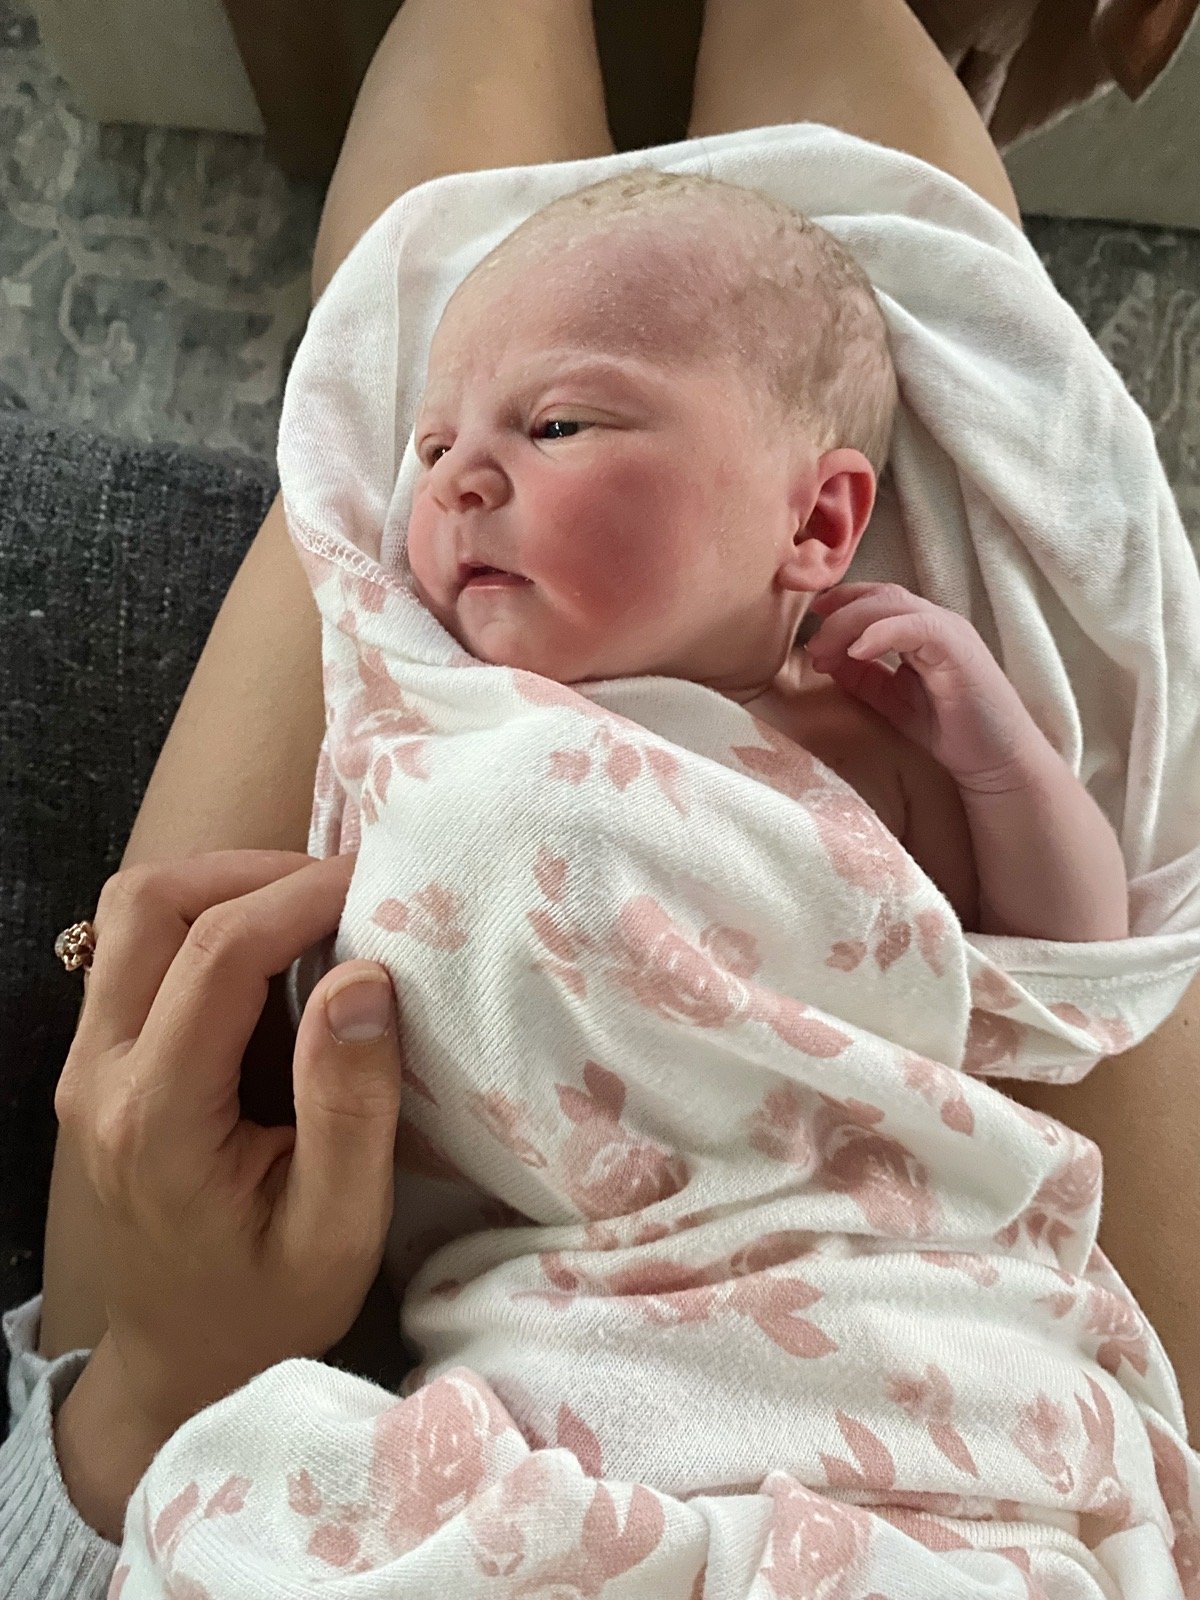
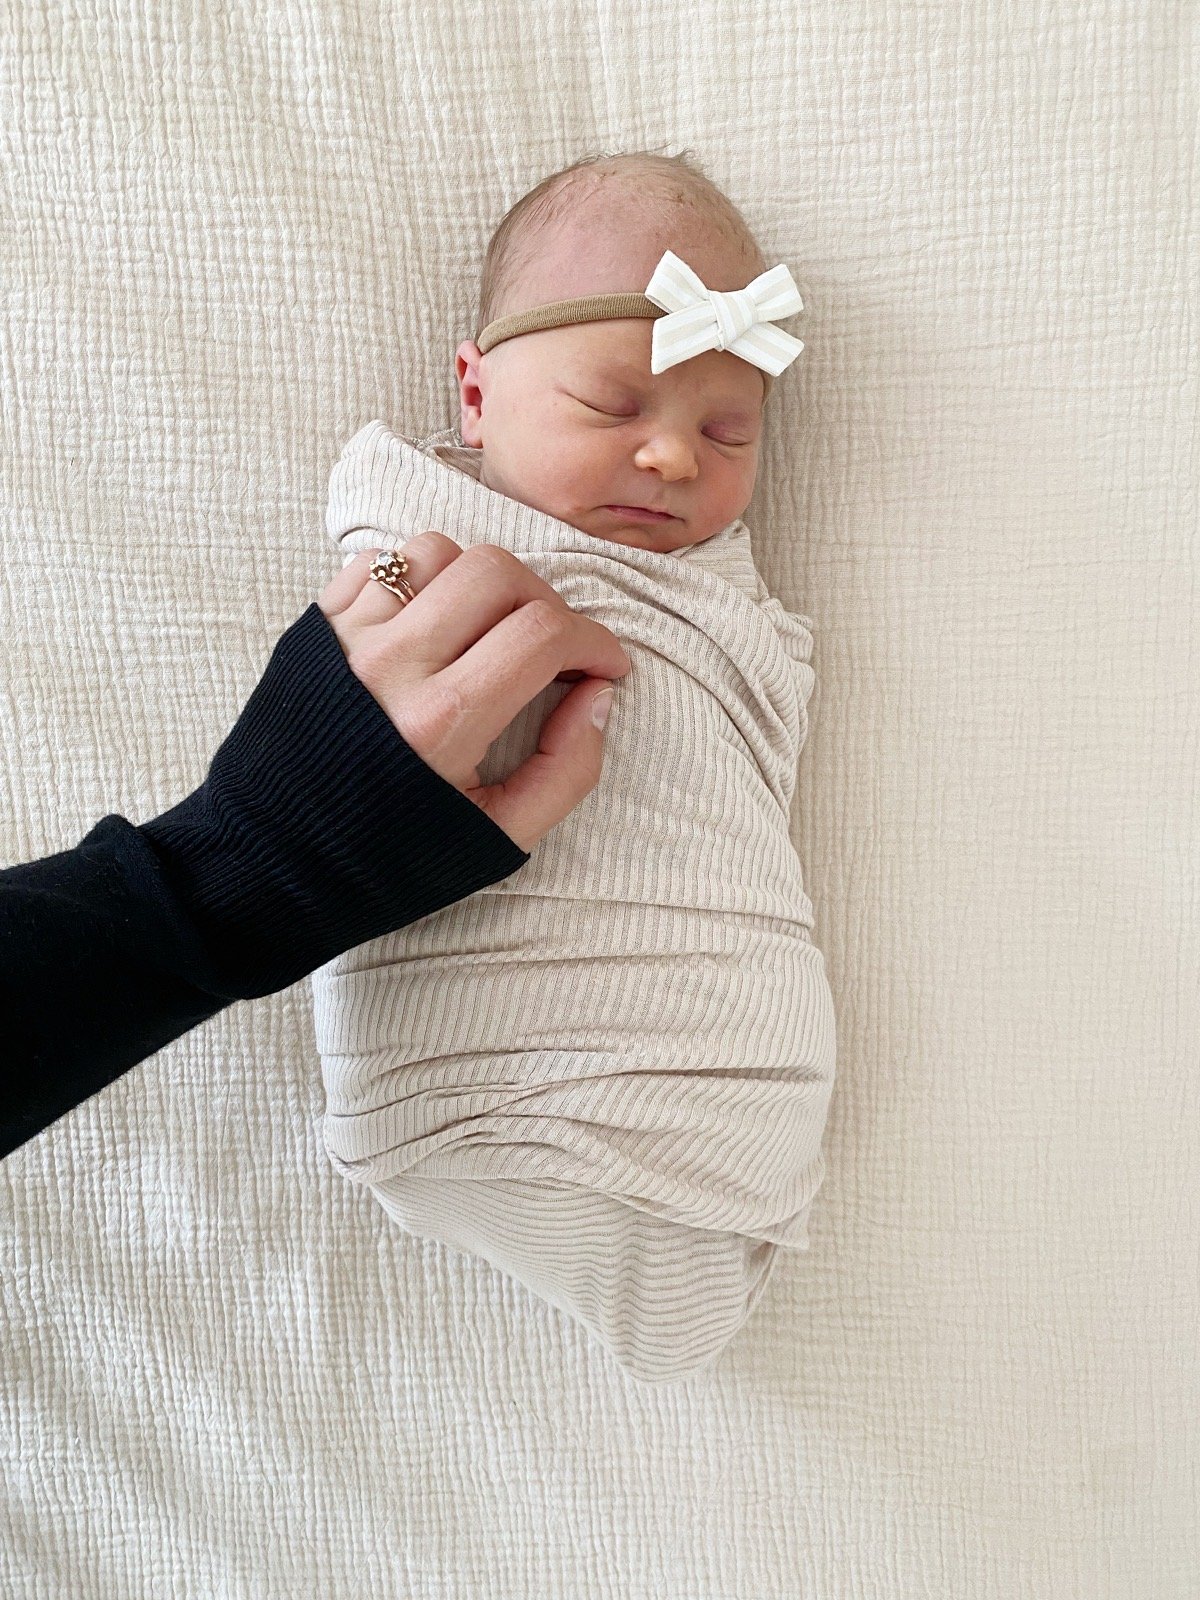
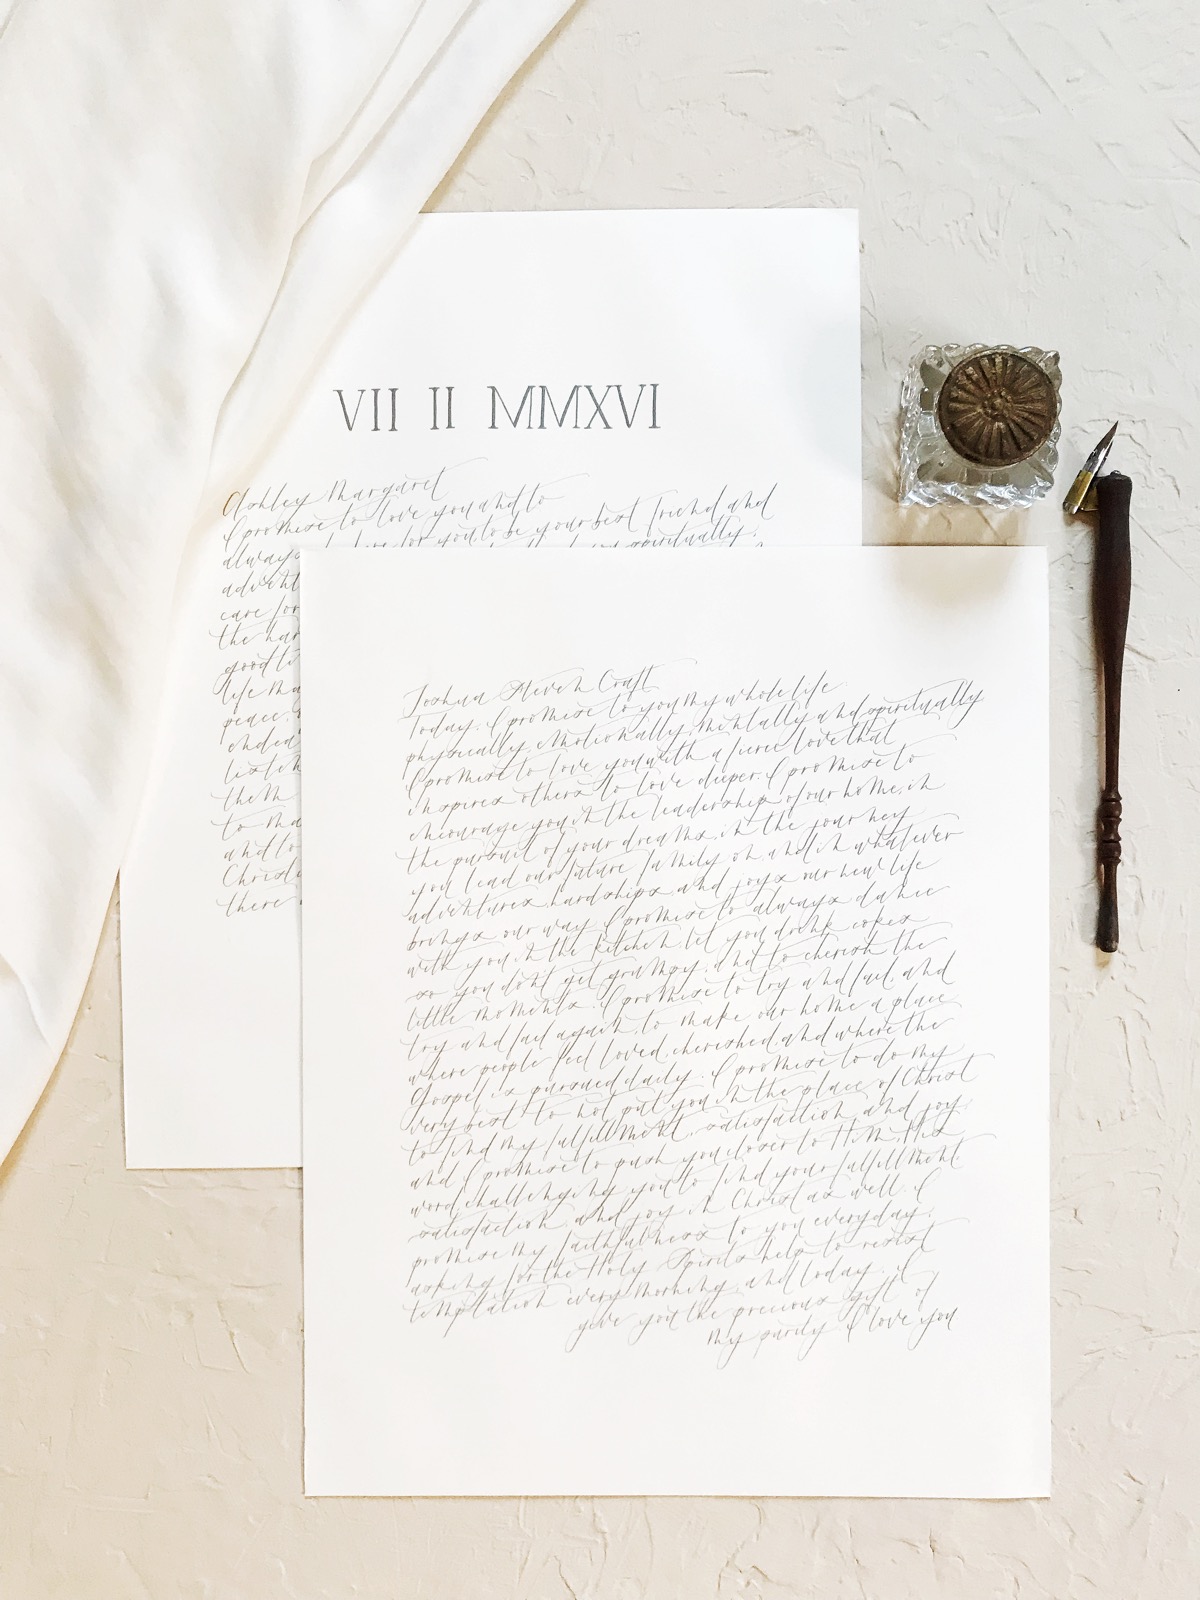
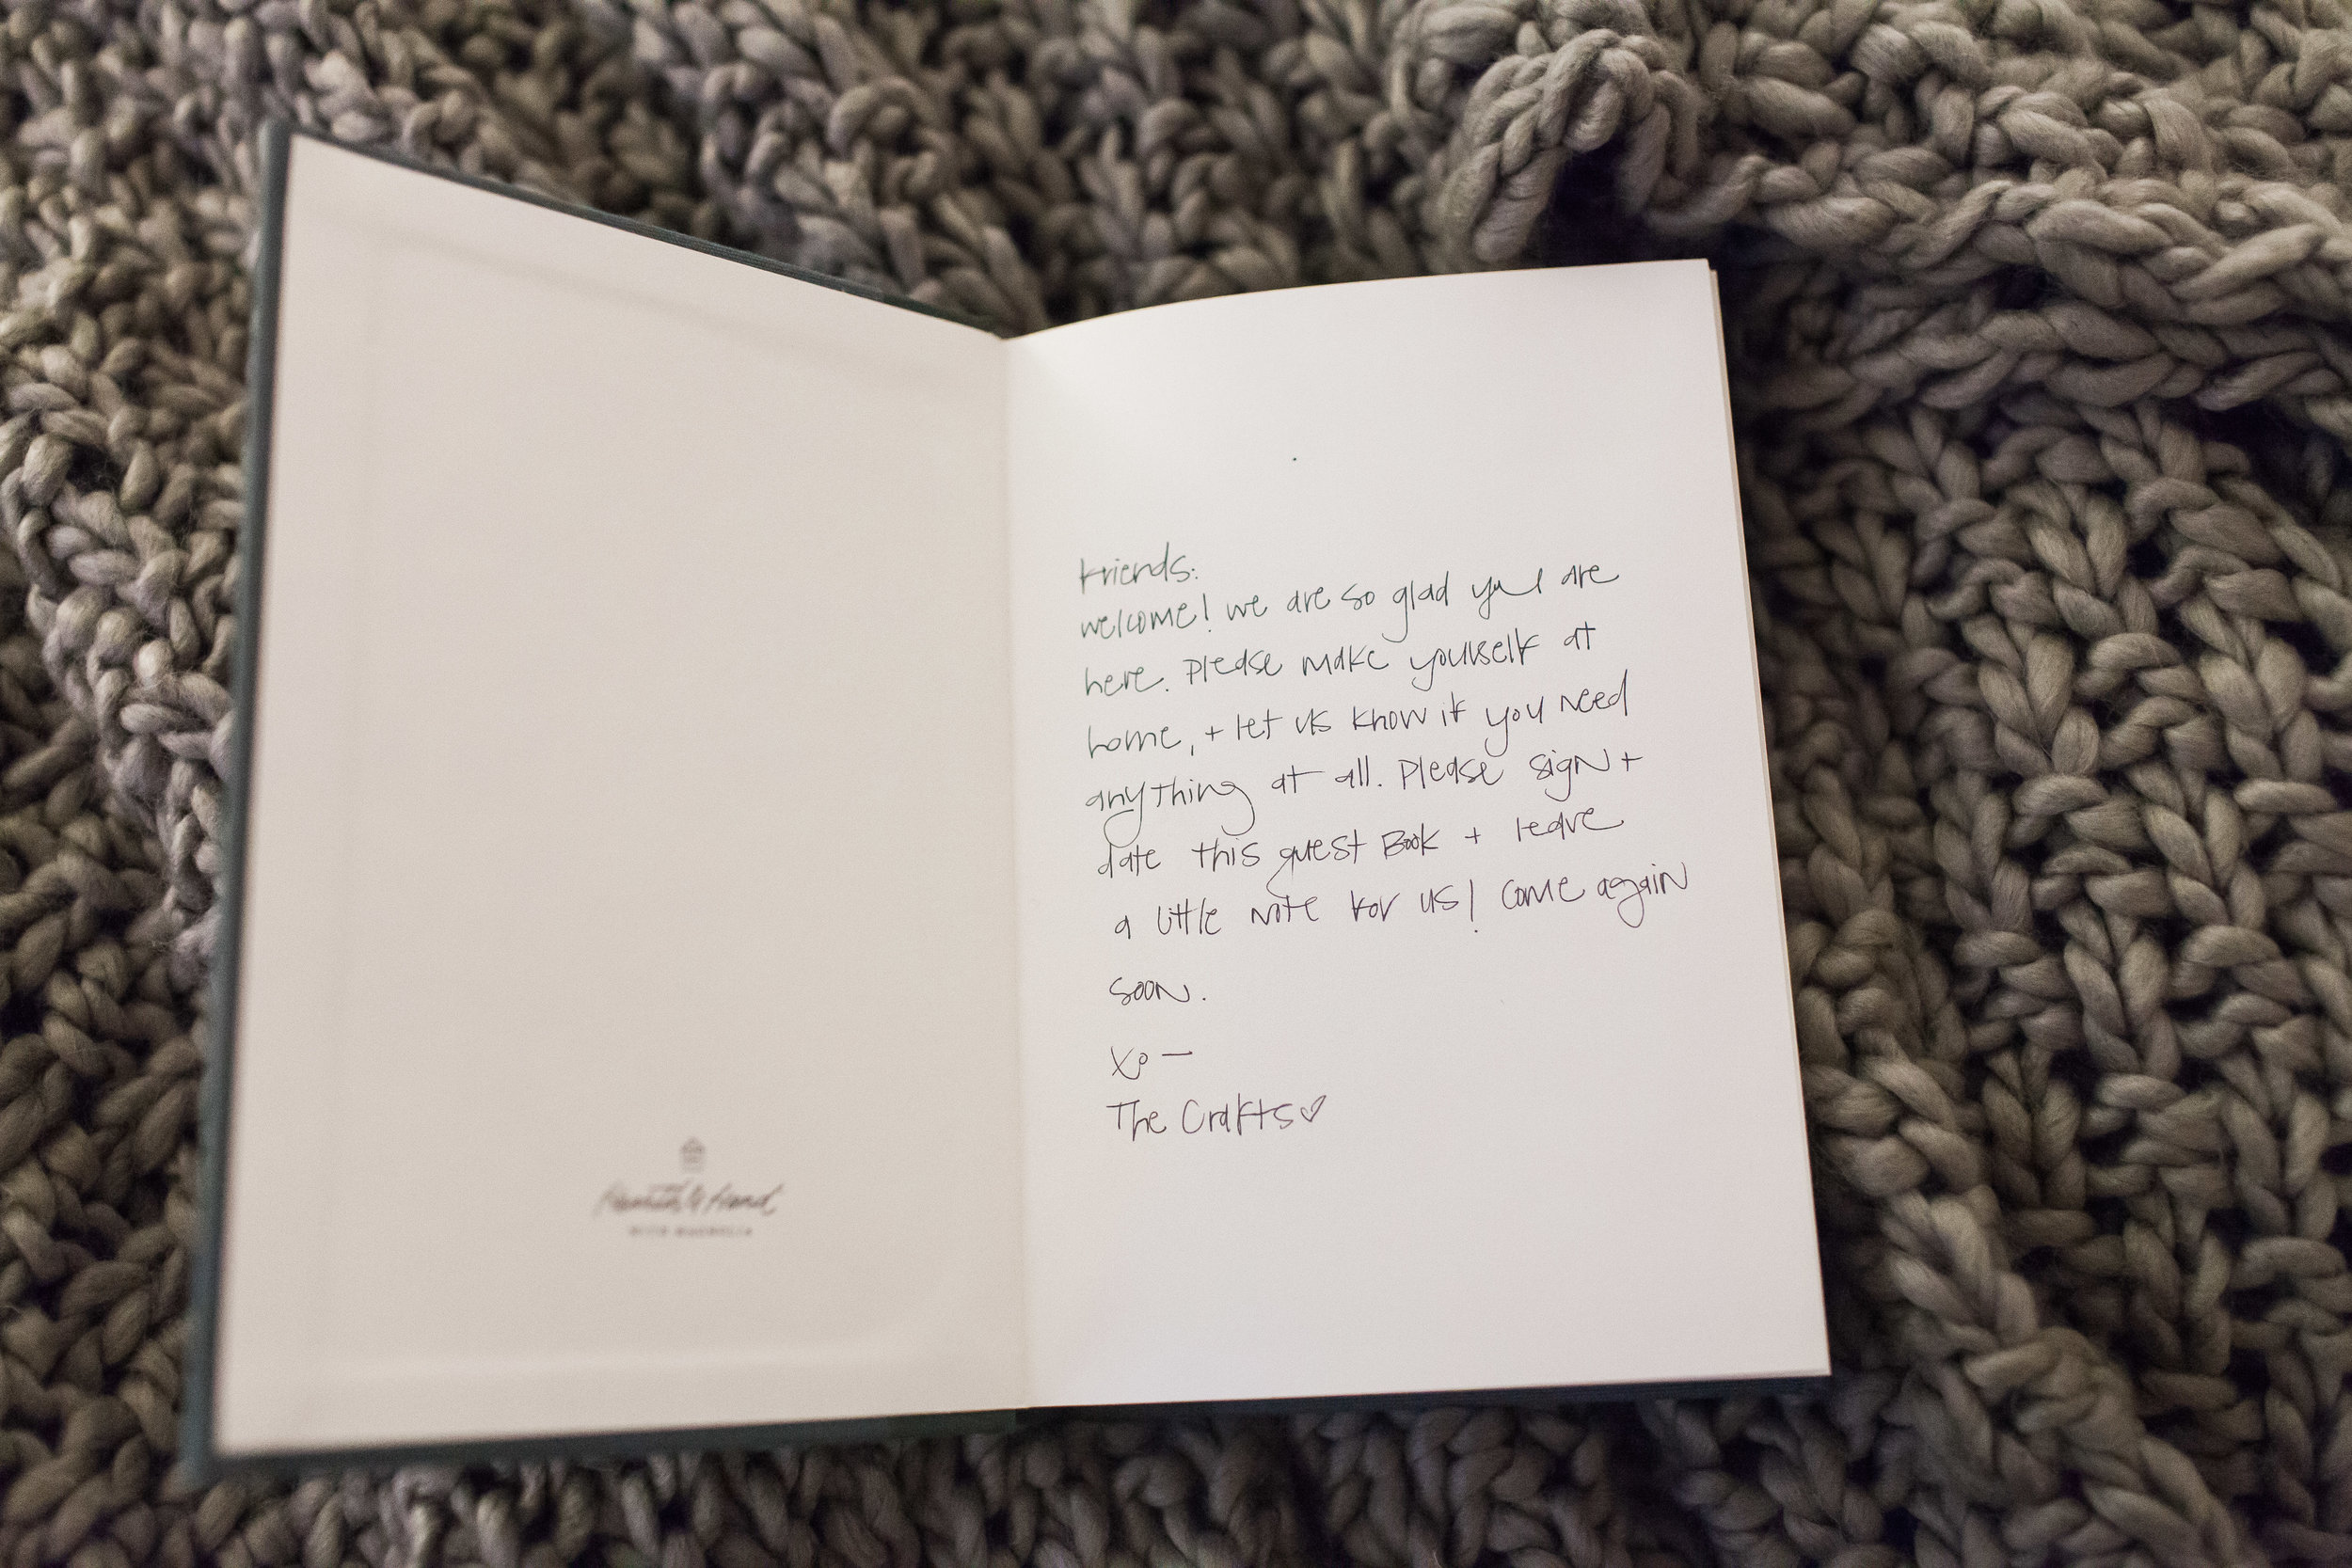
Eleanor Sage Craft is here and she is perfect! And her birth was more than I could have asked for.

After going through birth for the first time with Everly, I knew I wanted a different experience with Eleanor than I got with a hospital delivery. I planned to have an unmedicated birth with Everly, but the cascade of interventions is real, and I ended up with an epidural. I also wanted to be able to have more voice in my birth than I was given in the hospital, as well as more freedom to labor how my body would tell me I needed to labor.

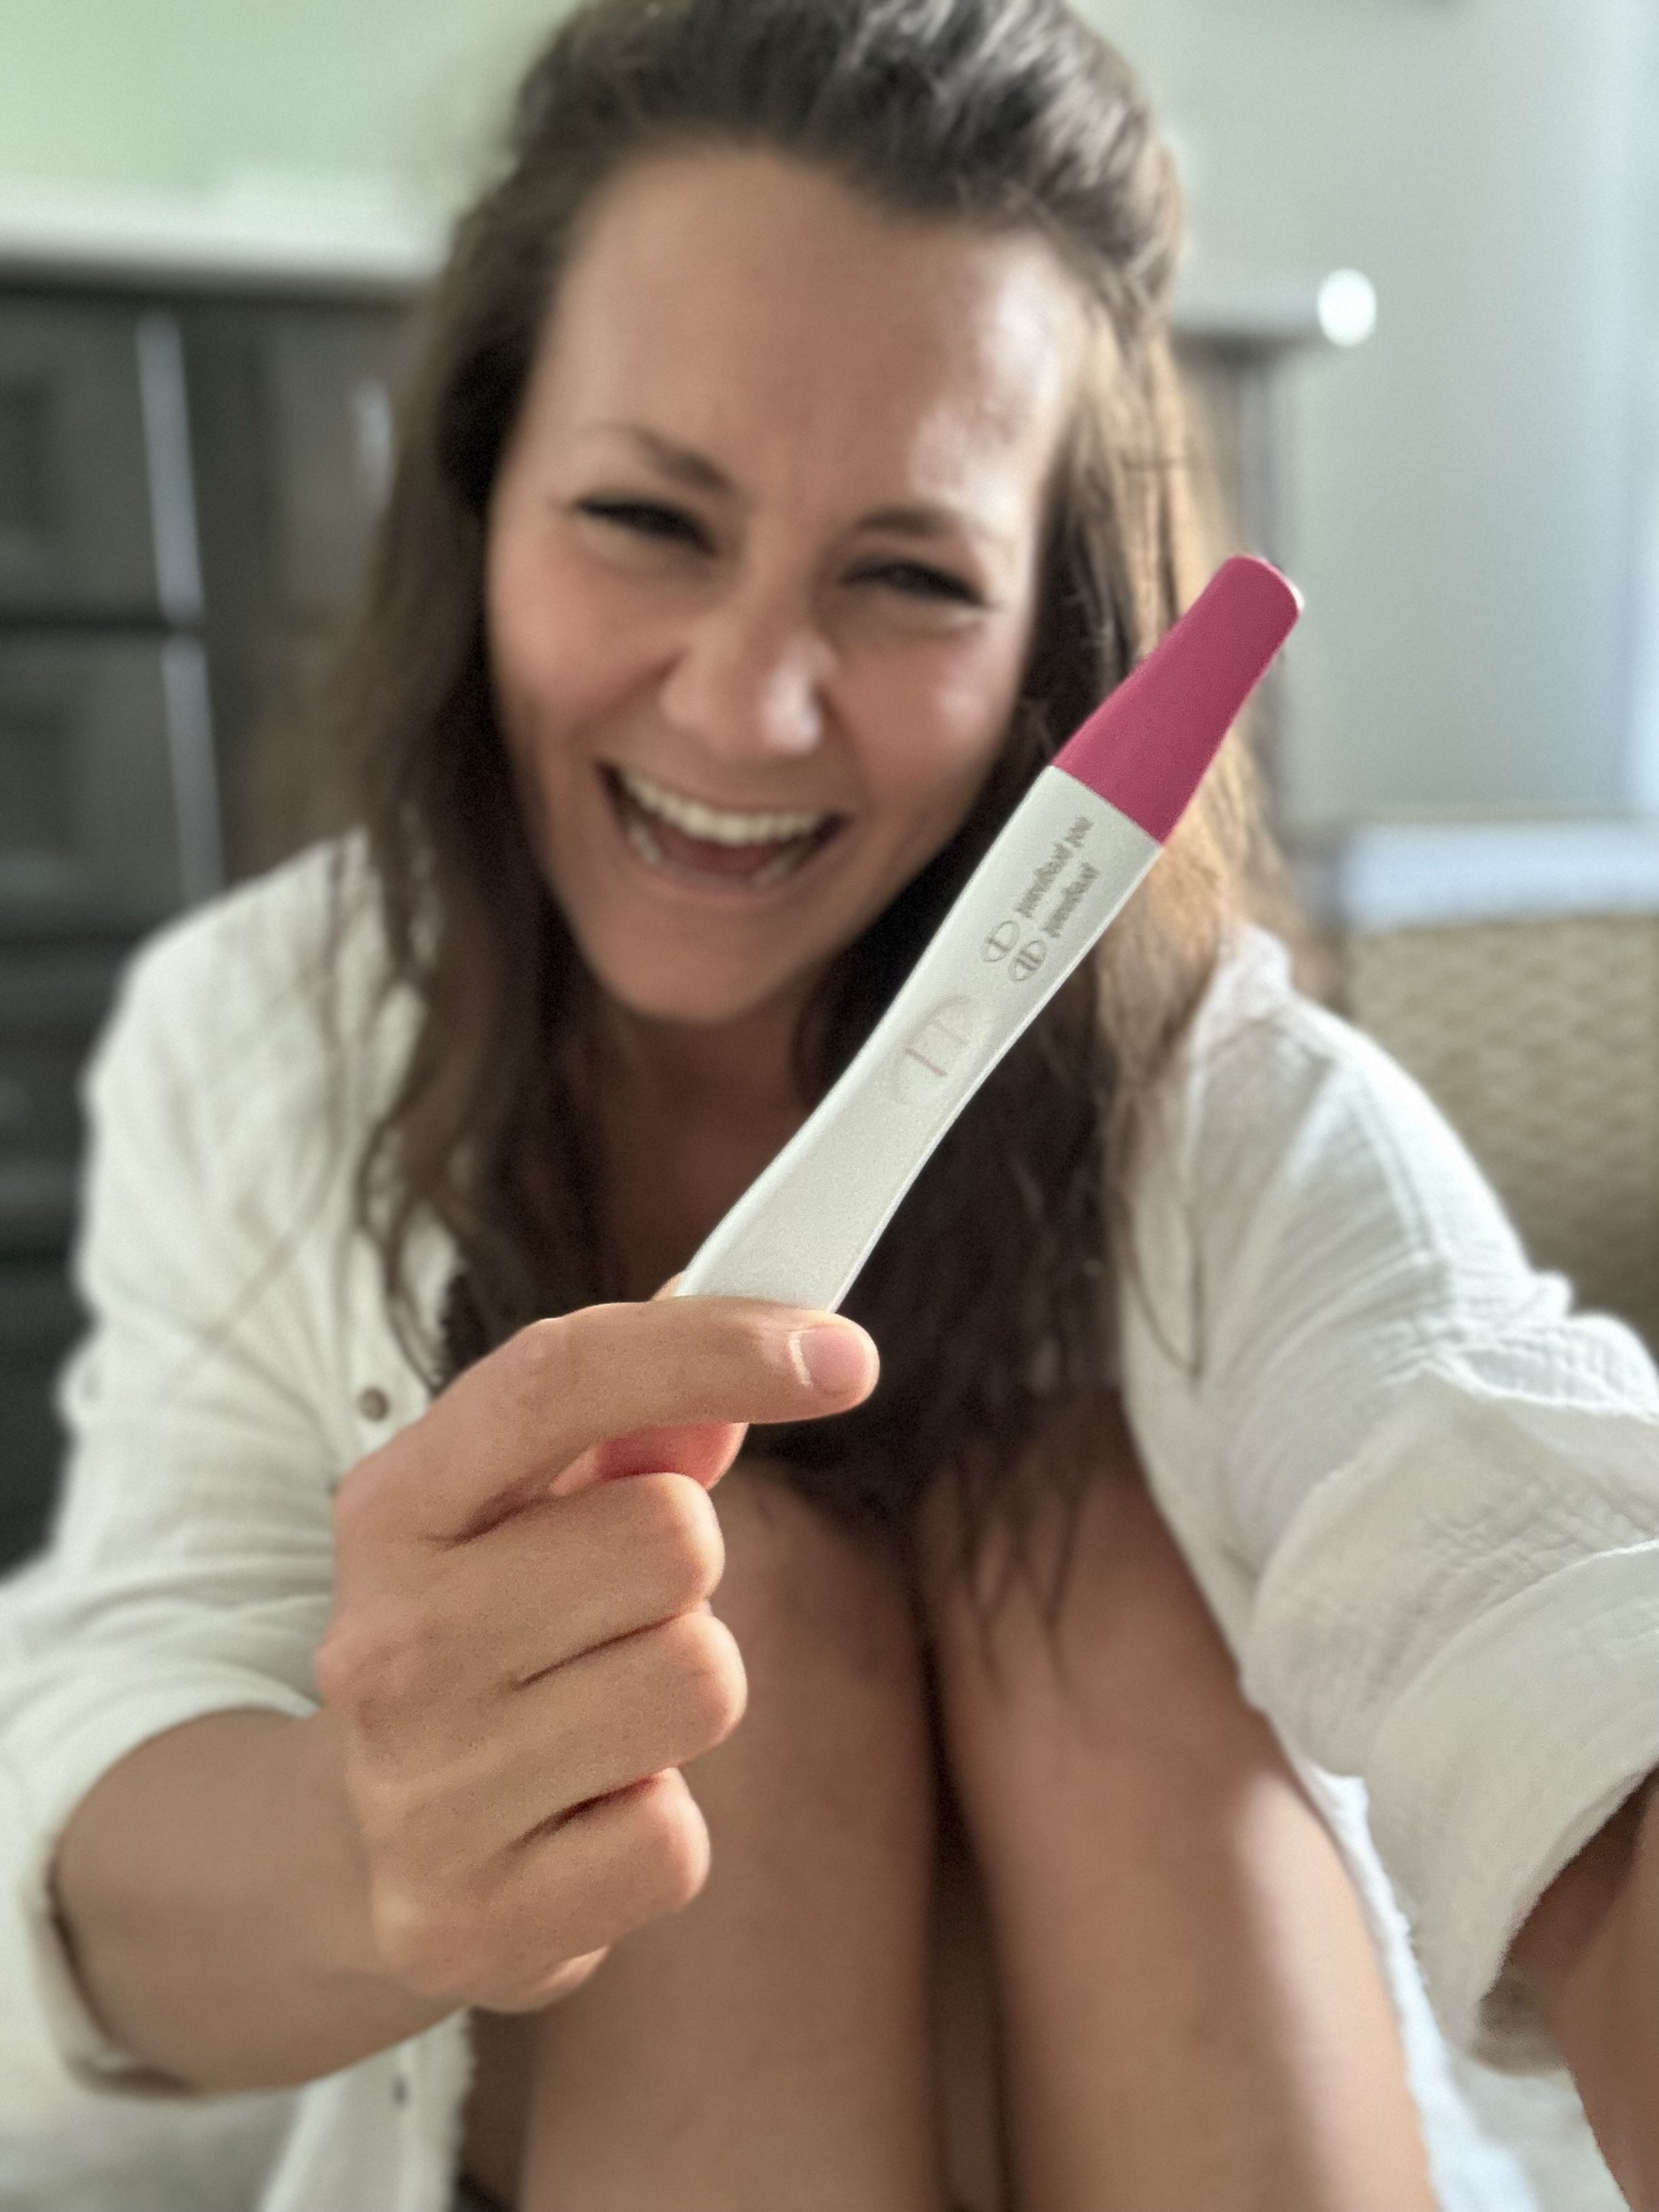
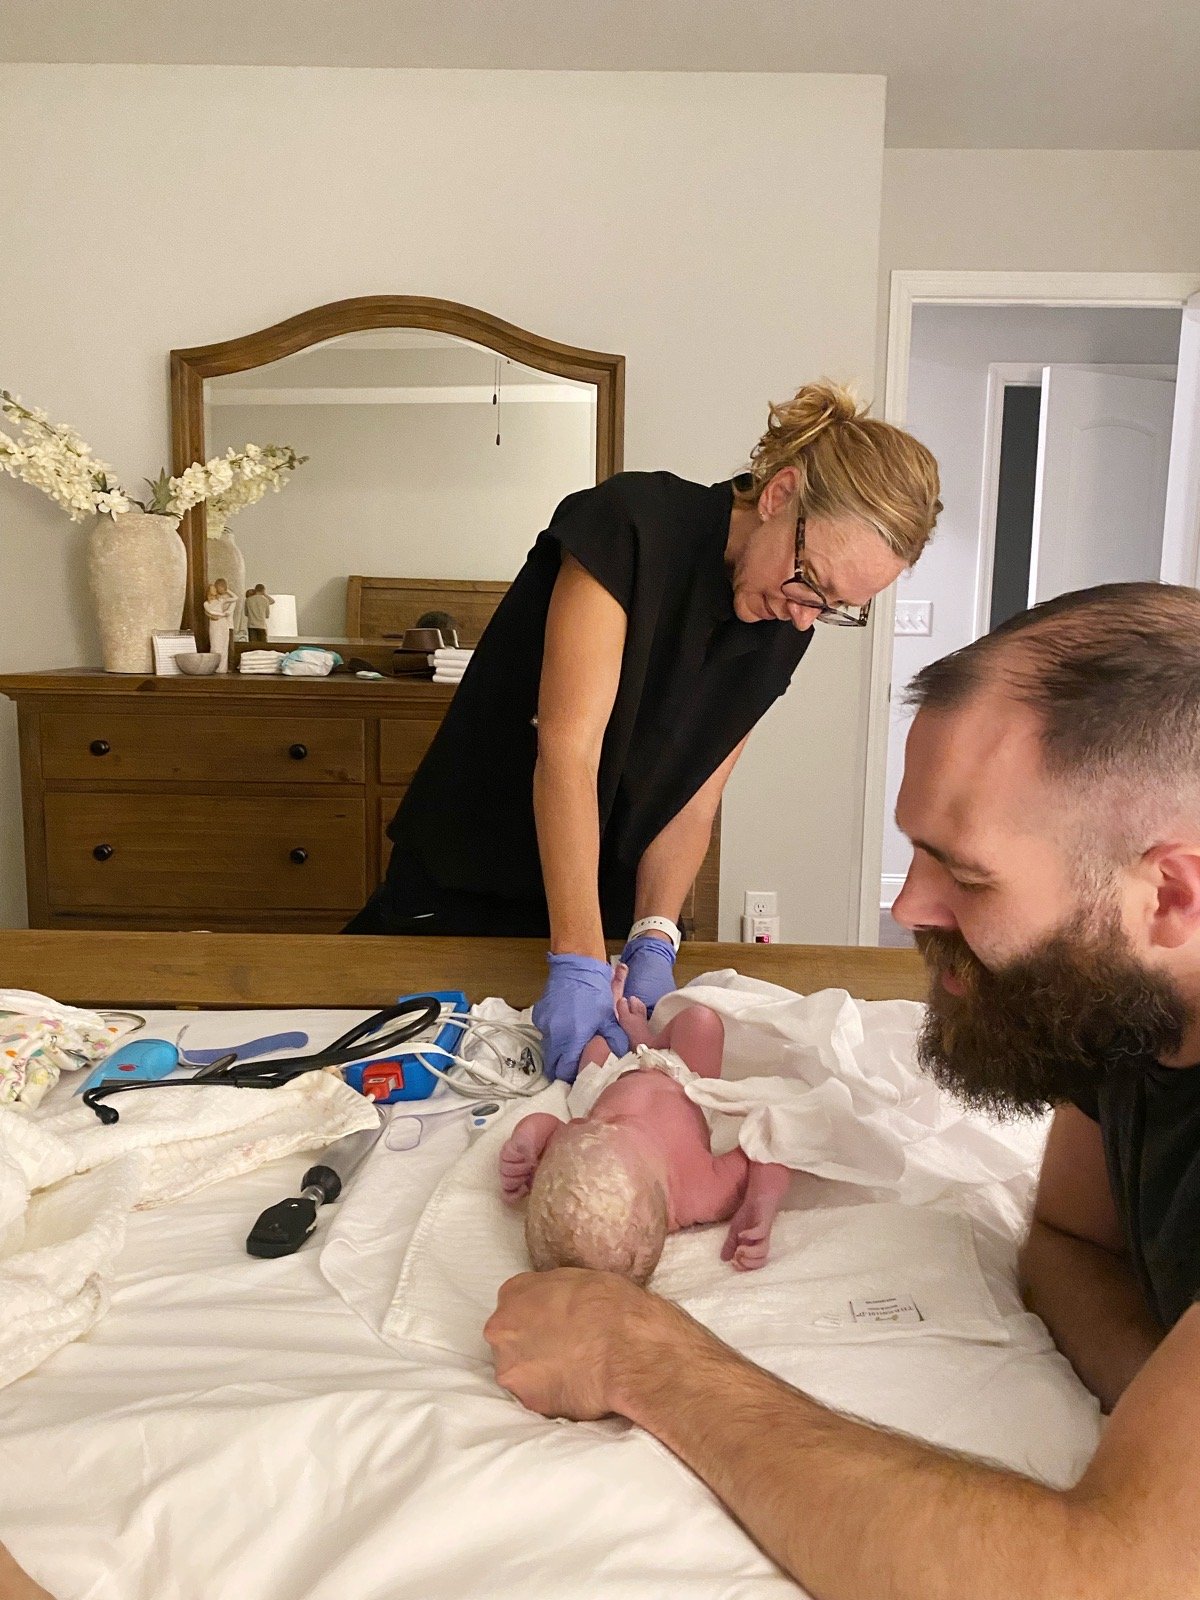
We did have an initial first ultrasound for Eleanor with our OB that delivered Everly, but with this pregnancy being after the heat of covid, we had some differences with how to have a safe pregnancy in these covid times, and I was not comfortable with the fear and guilting tactics used to try to get me to do things I did not want to do while pregnant. We walked out of that office after that first ultrasound and immediately made our appointment with Haven Birth here in Franklin, TN. They are a midwifery practice with an amazing team of Certified Nurse Midwives (CNM’s). I was 100% ready to commit to a homebirth, but Josh needed some questions answers on safety and what this would actually look like. If he was not 100% on board after the consult with Haven, we would proceed forward with a birthing center. But, from that very first consult we had with Lauren Drees, we knew that a home birth was the right option for us, and that this team would be the ones who would help us welcome Eleanor into the world with confidence, peace, and holistic wisdom.

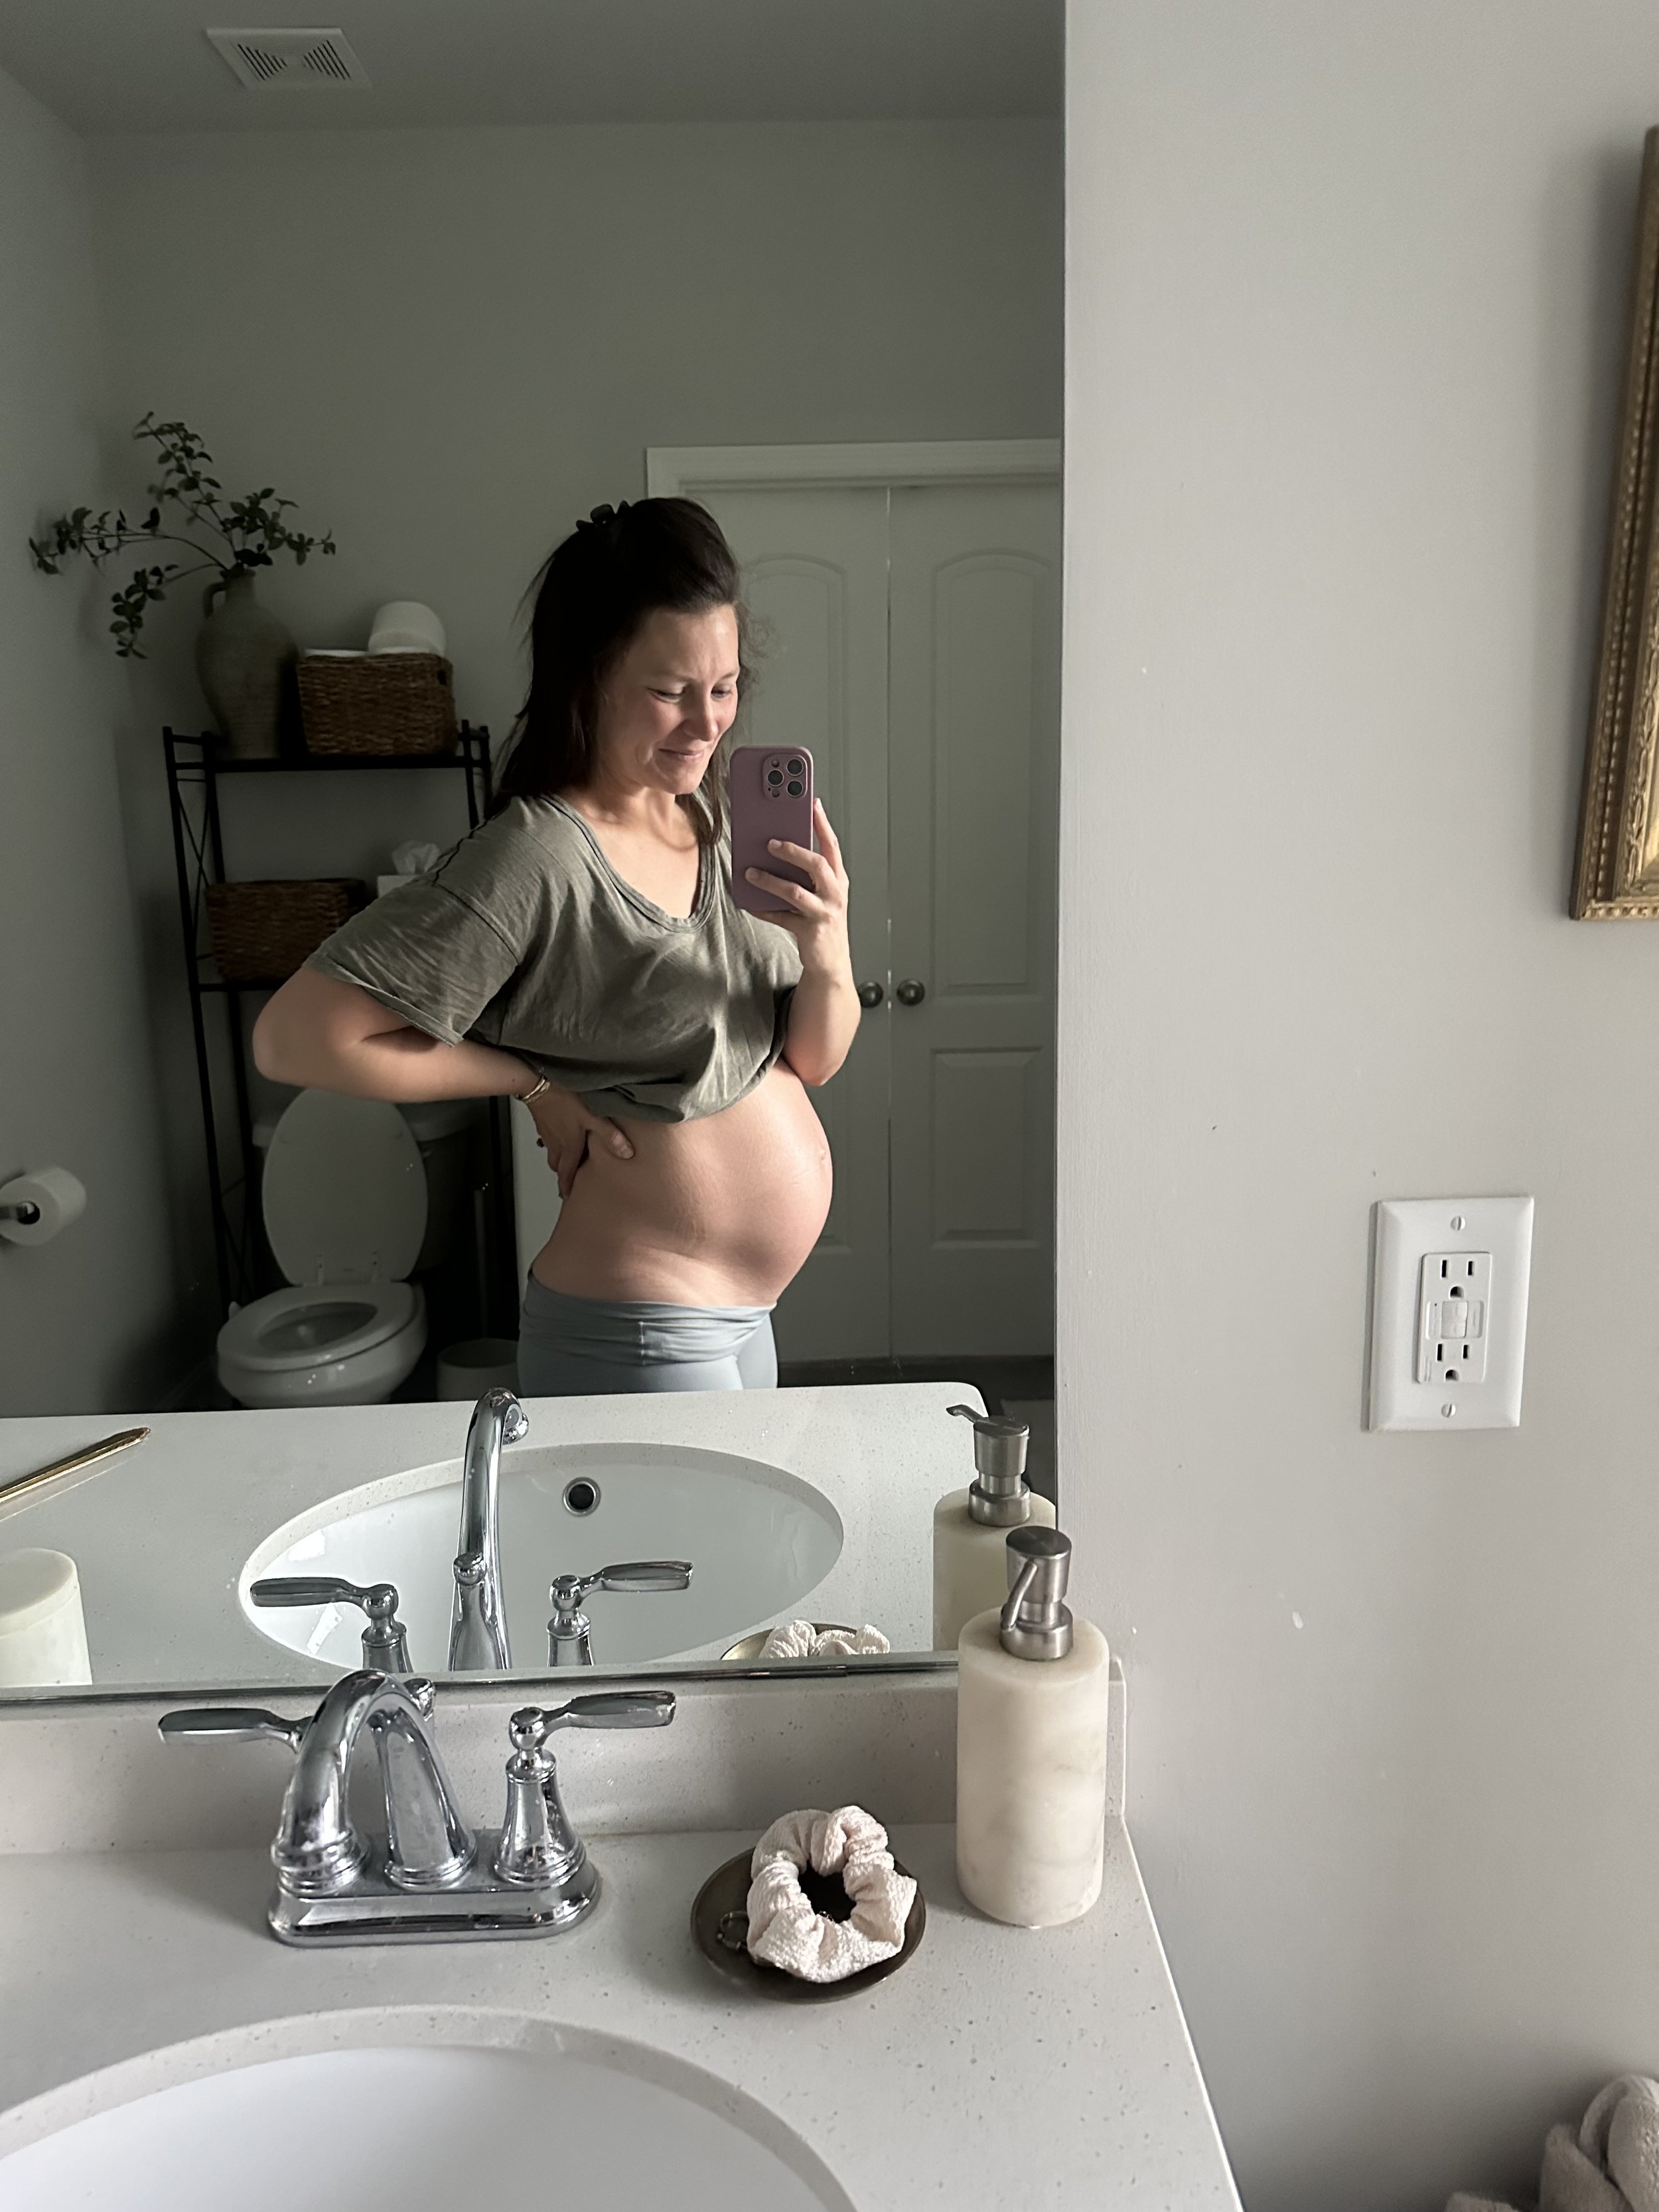
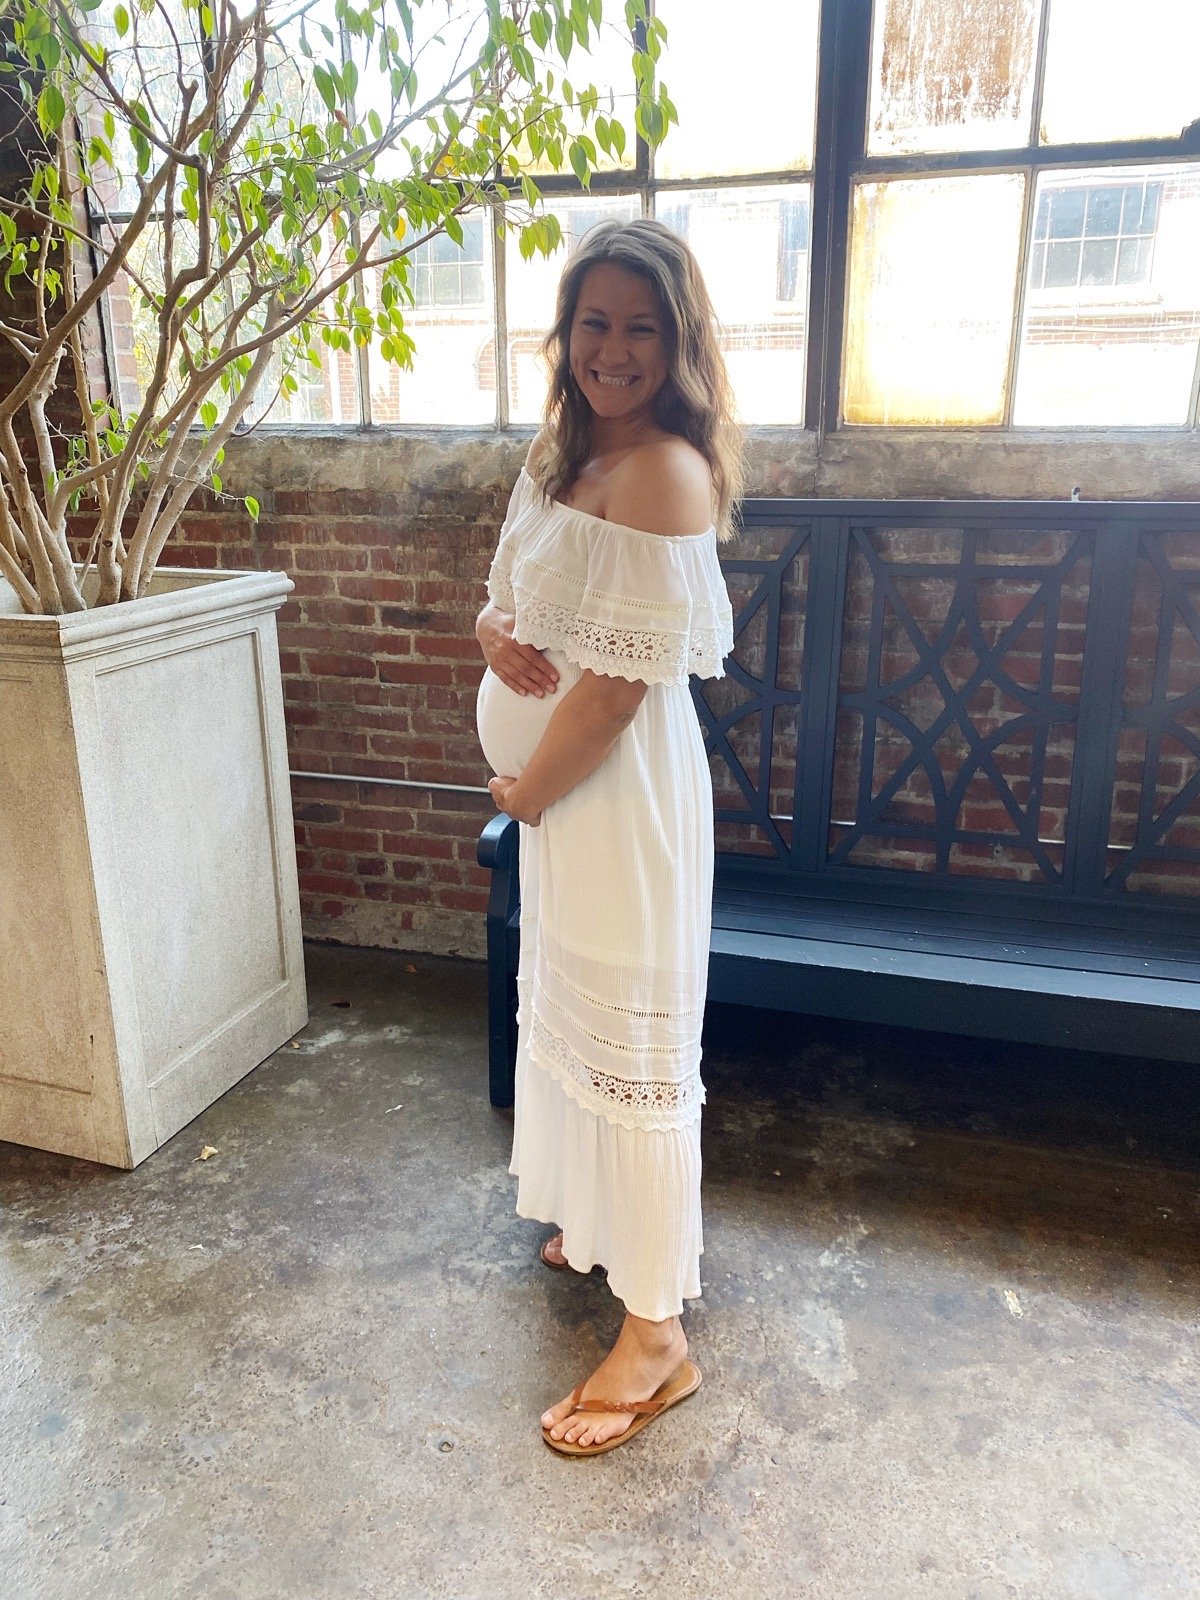
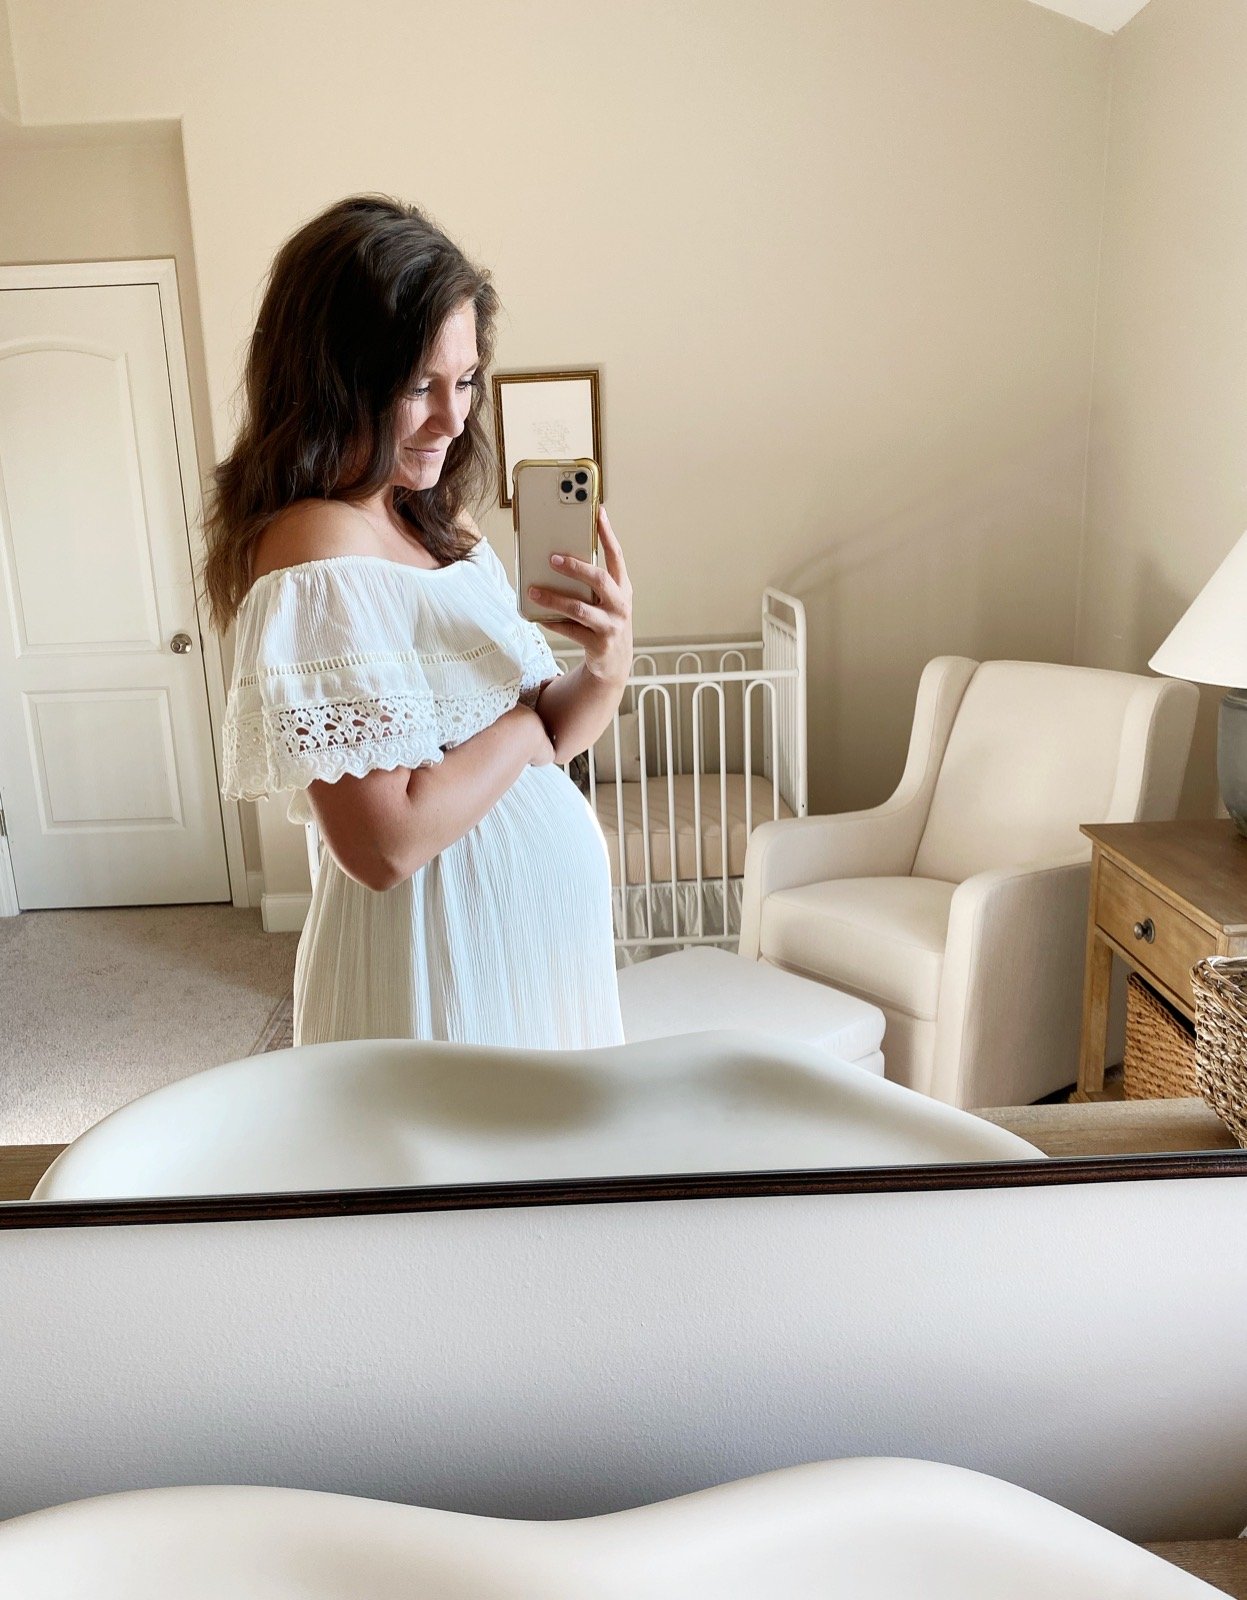
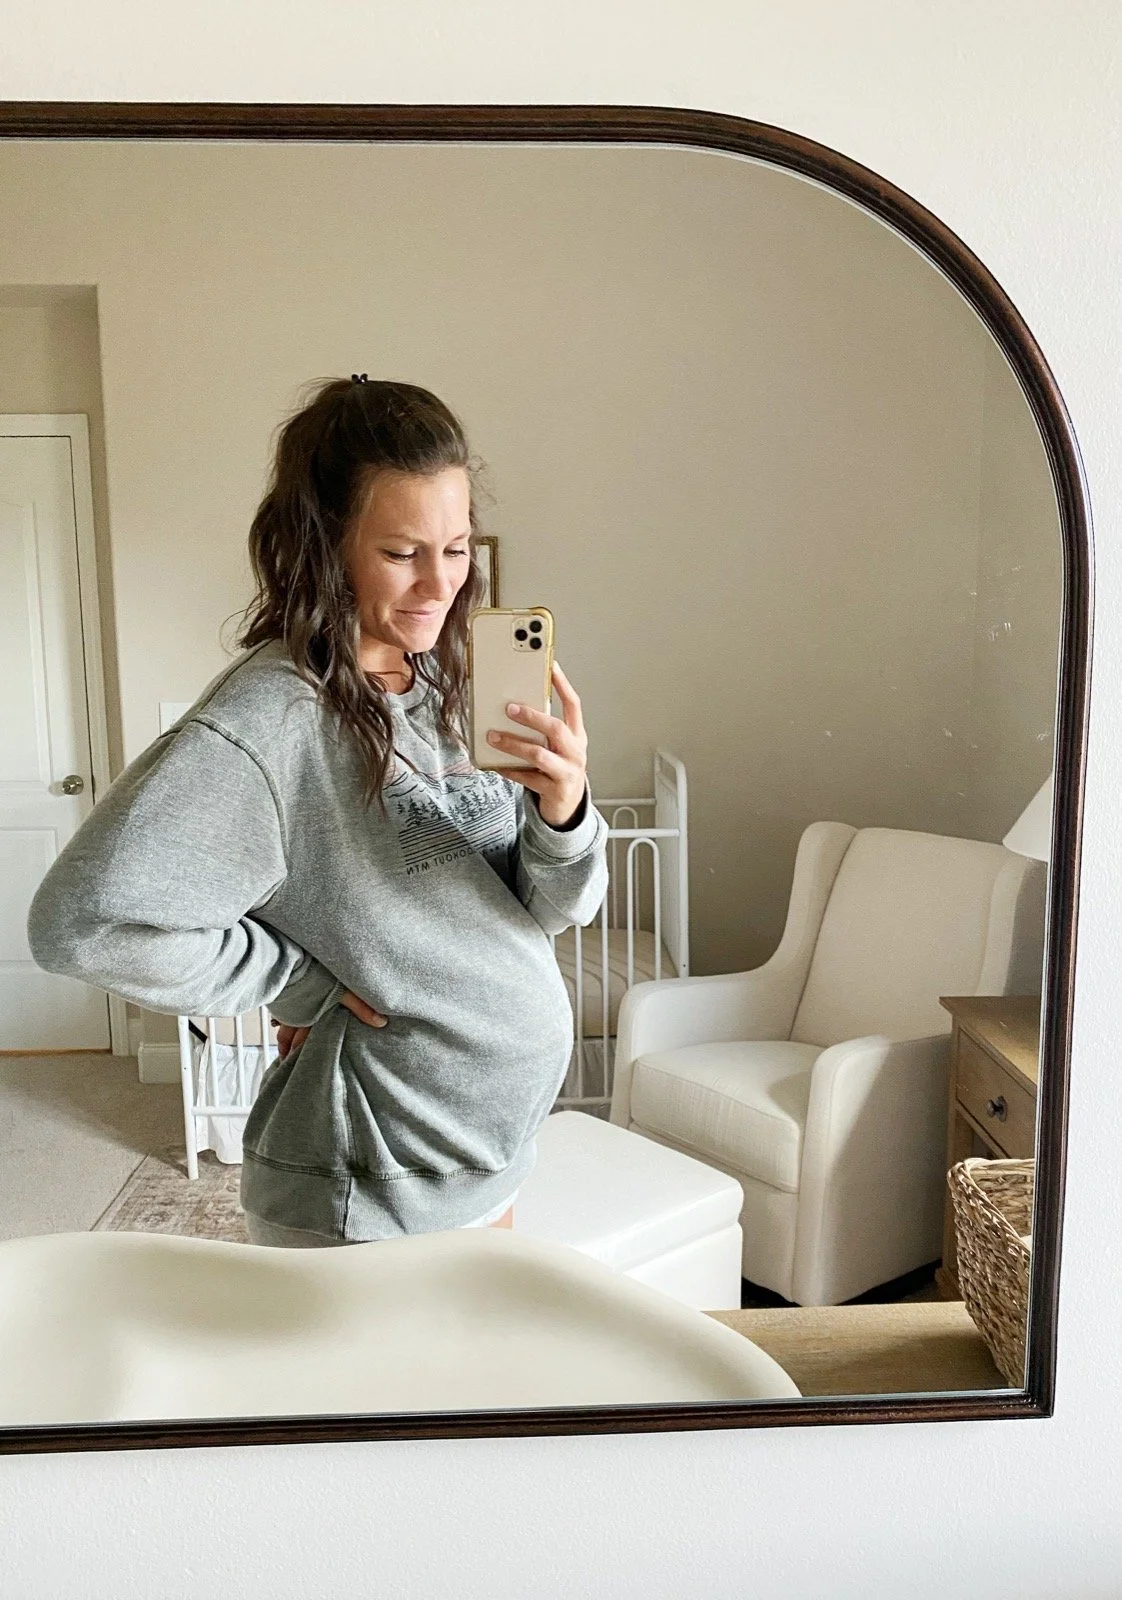
Everything was on track for me to carry 40 weeks+ until Eleanor was ready to come on her own, but at our 38 week appointment, some concerns were voiced and things moved quickly from there. On Thursday, 6/23, they did the routine check of my fundal height (measurement of pubic bone to the top of the uterus in centimeters). I had been at fundal height 34 cm for 4 weeks, now 5, without any growth (Your fundal height should match the amount of weeks your are pregnant, and they don’t like to see you 2 cm above or below that height.) At this point, I was now 4-5 cm behind the ideal fundal height for growth. I carry very small pregnant, but this was very different from my pregnancy with Ever, as she always measured right on track with her fundal height.

Our midwife team was pretty concerned, so they sent me for a same-day (Thursday, 6/23) Biophysical Profile Ultrasound (BPP). This first BPP showed that Eleanor was measuring around the thirteenth percentile, but her abdomen was measuring around three percentile, which would technically qualify her for Intrauterine Growth Restriction (IUGR). Before they took any further action, they wanted to do monitoring of her movement with them at Haven ASAP, and another BPP. She passed her monitoring on Monday, 6/27, with flying colors. At her second BPP, though, on Tuesday, 6/28 at 8 am, they measured her around the twelfth percentile, but her abdomen was still measuring in the three percentile range, and her head was measuring in the one percentile range. We didn’t know what this would be mean, but we were still very concerned.

We waited for our midwife to call us back that afternoon, and it was a long few hours waiting. After Haven got the results of our BPP and they were able to consult with their partnering hospital doctor, they finally had facts and a few plans of action for us. Praise the Lord! They had officially determined that she was IUGR, and that the best thing for Eleanor was to be outside my womb as soon as possible so she could grow without restriction. Their overarching strong recommendation was to induce early and not let me go past 40 weeks. They talked Joshua and I through the two options to induce early:

  1. Induce at their partner hospital and deliver in a hospital. This would be WAY outside of our plan for Eleanor’s birth, but we were thankful for this option. They would have been there every step of the way had we chose this option.

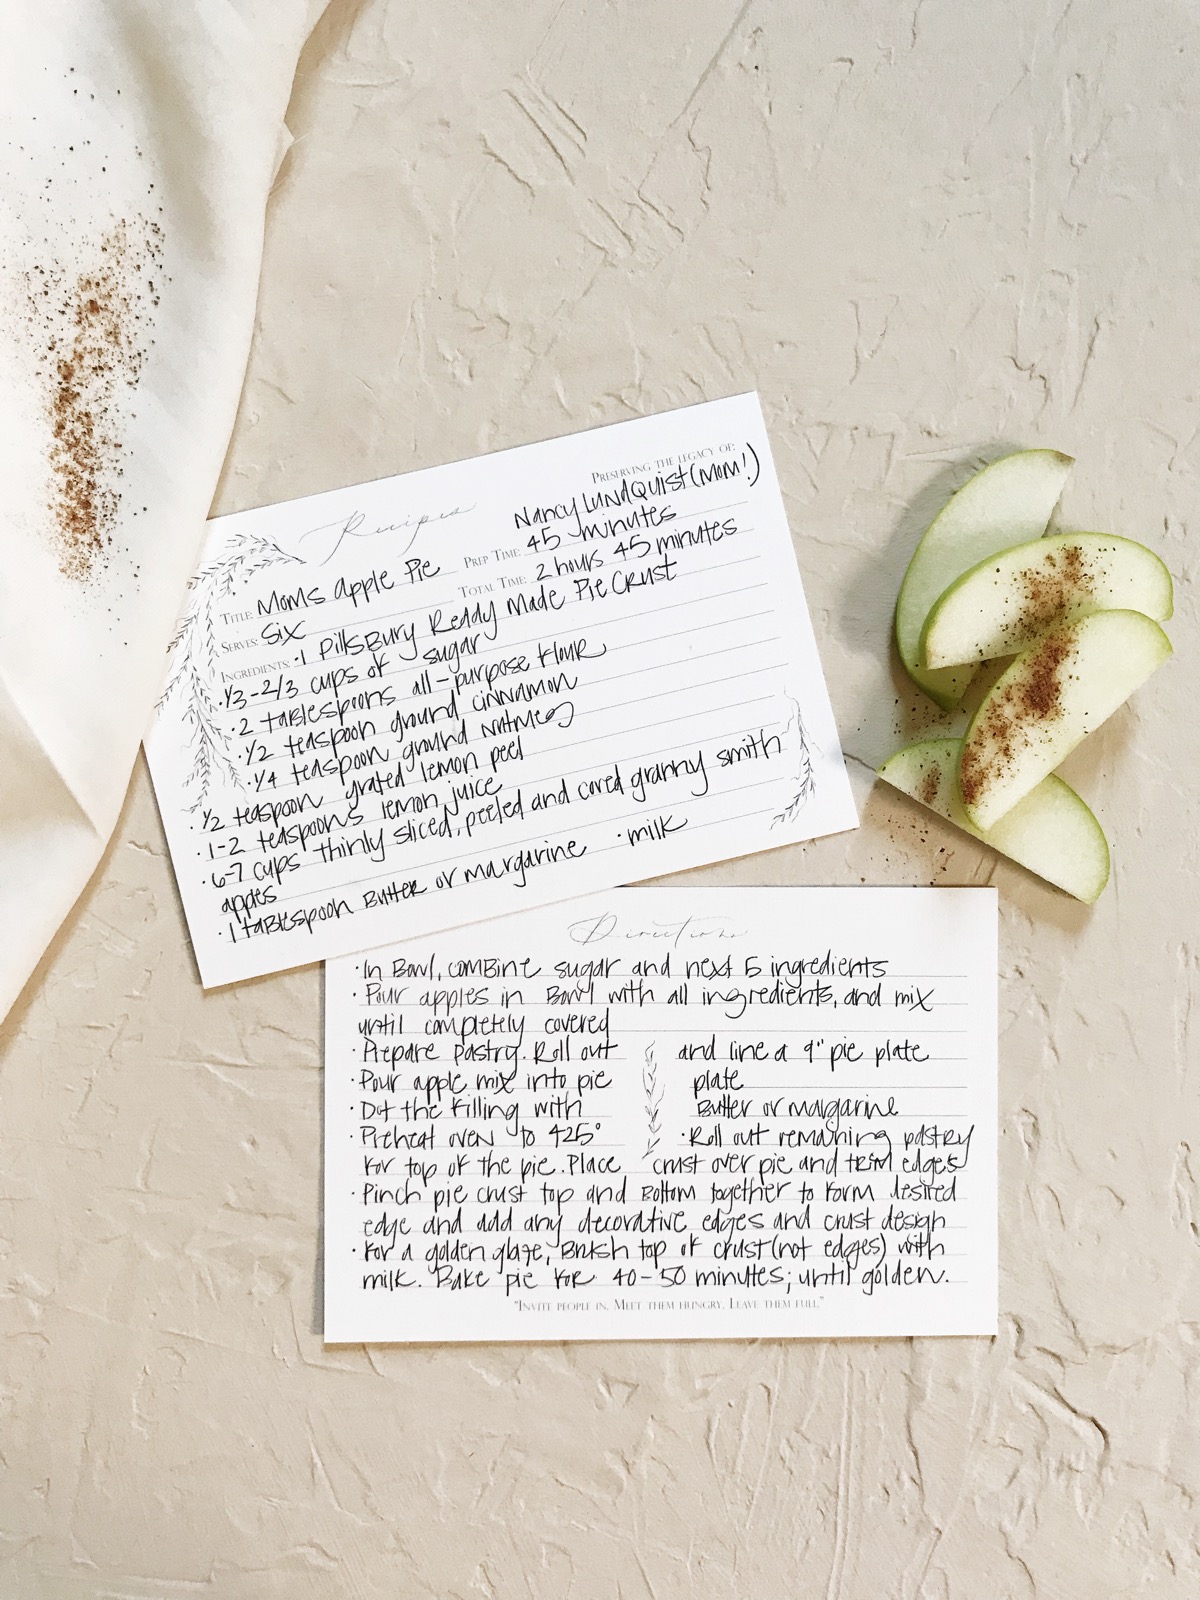
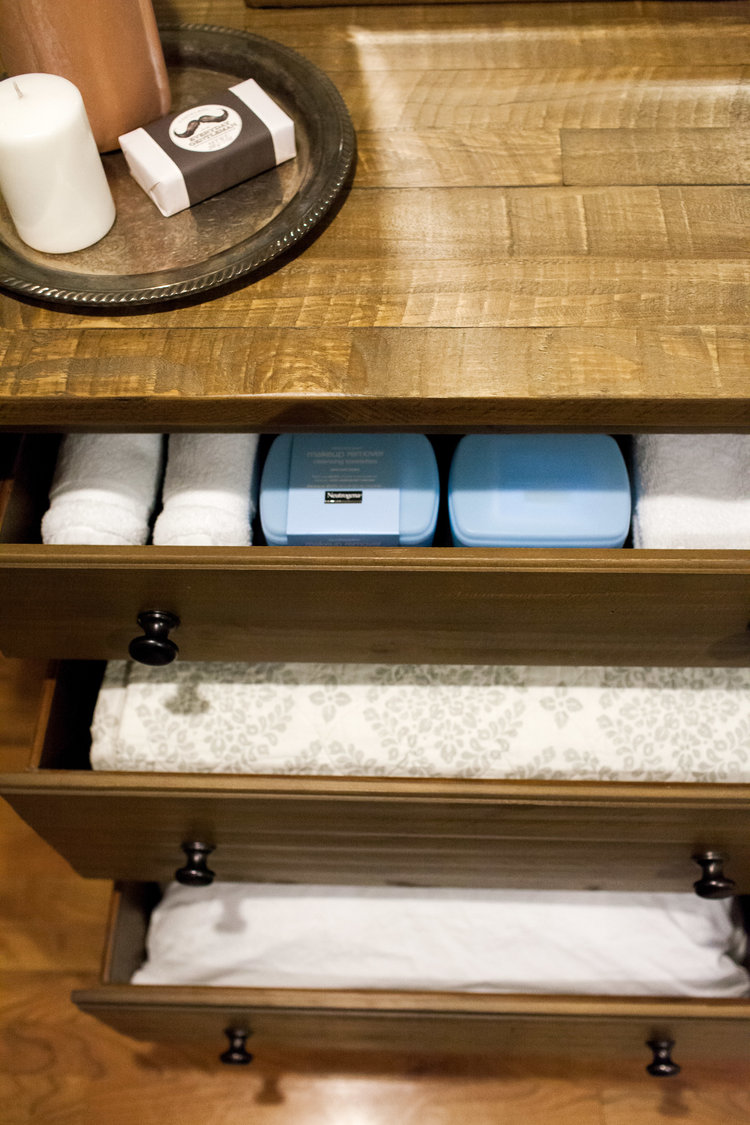
  2. Start the process of natural induction on Thursday, 6/30 at our 38w6d appointment, and move forward with our planned home birth. (The way we would naturally work to induce labor would be to do a membrane sweep at my appointment, and then drink the ‘Midwives Brew’ with Castor Oil in the afternoon - 4 TBSP castor oil, 4 TBSP nut butter, 1 cup of apricot, pineapple, or orange juice, optional I cup of champagne, or sparkling cider.)

After having all the facts presented to us and praying through it together, we decided to continue forward with option 2, the natural induction process and our planned home birth. Our midwife team was so supportive of either decision and we are extremely grateful for their wisdom and guidance through an unexpected and scary decision. We never once felt pressured in either direction and we had their full support no matter what we chose.

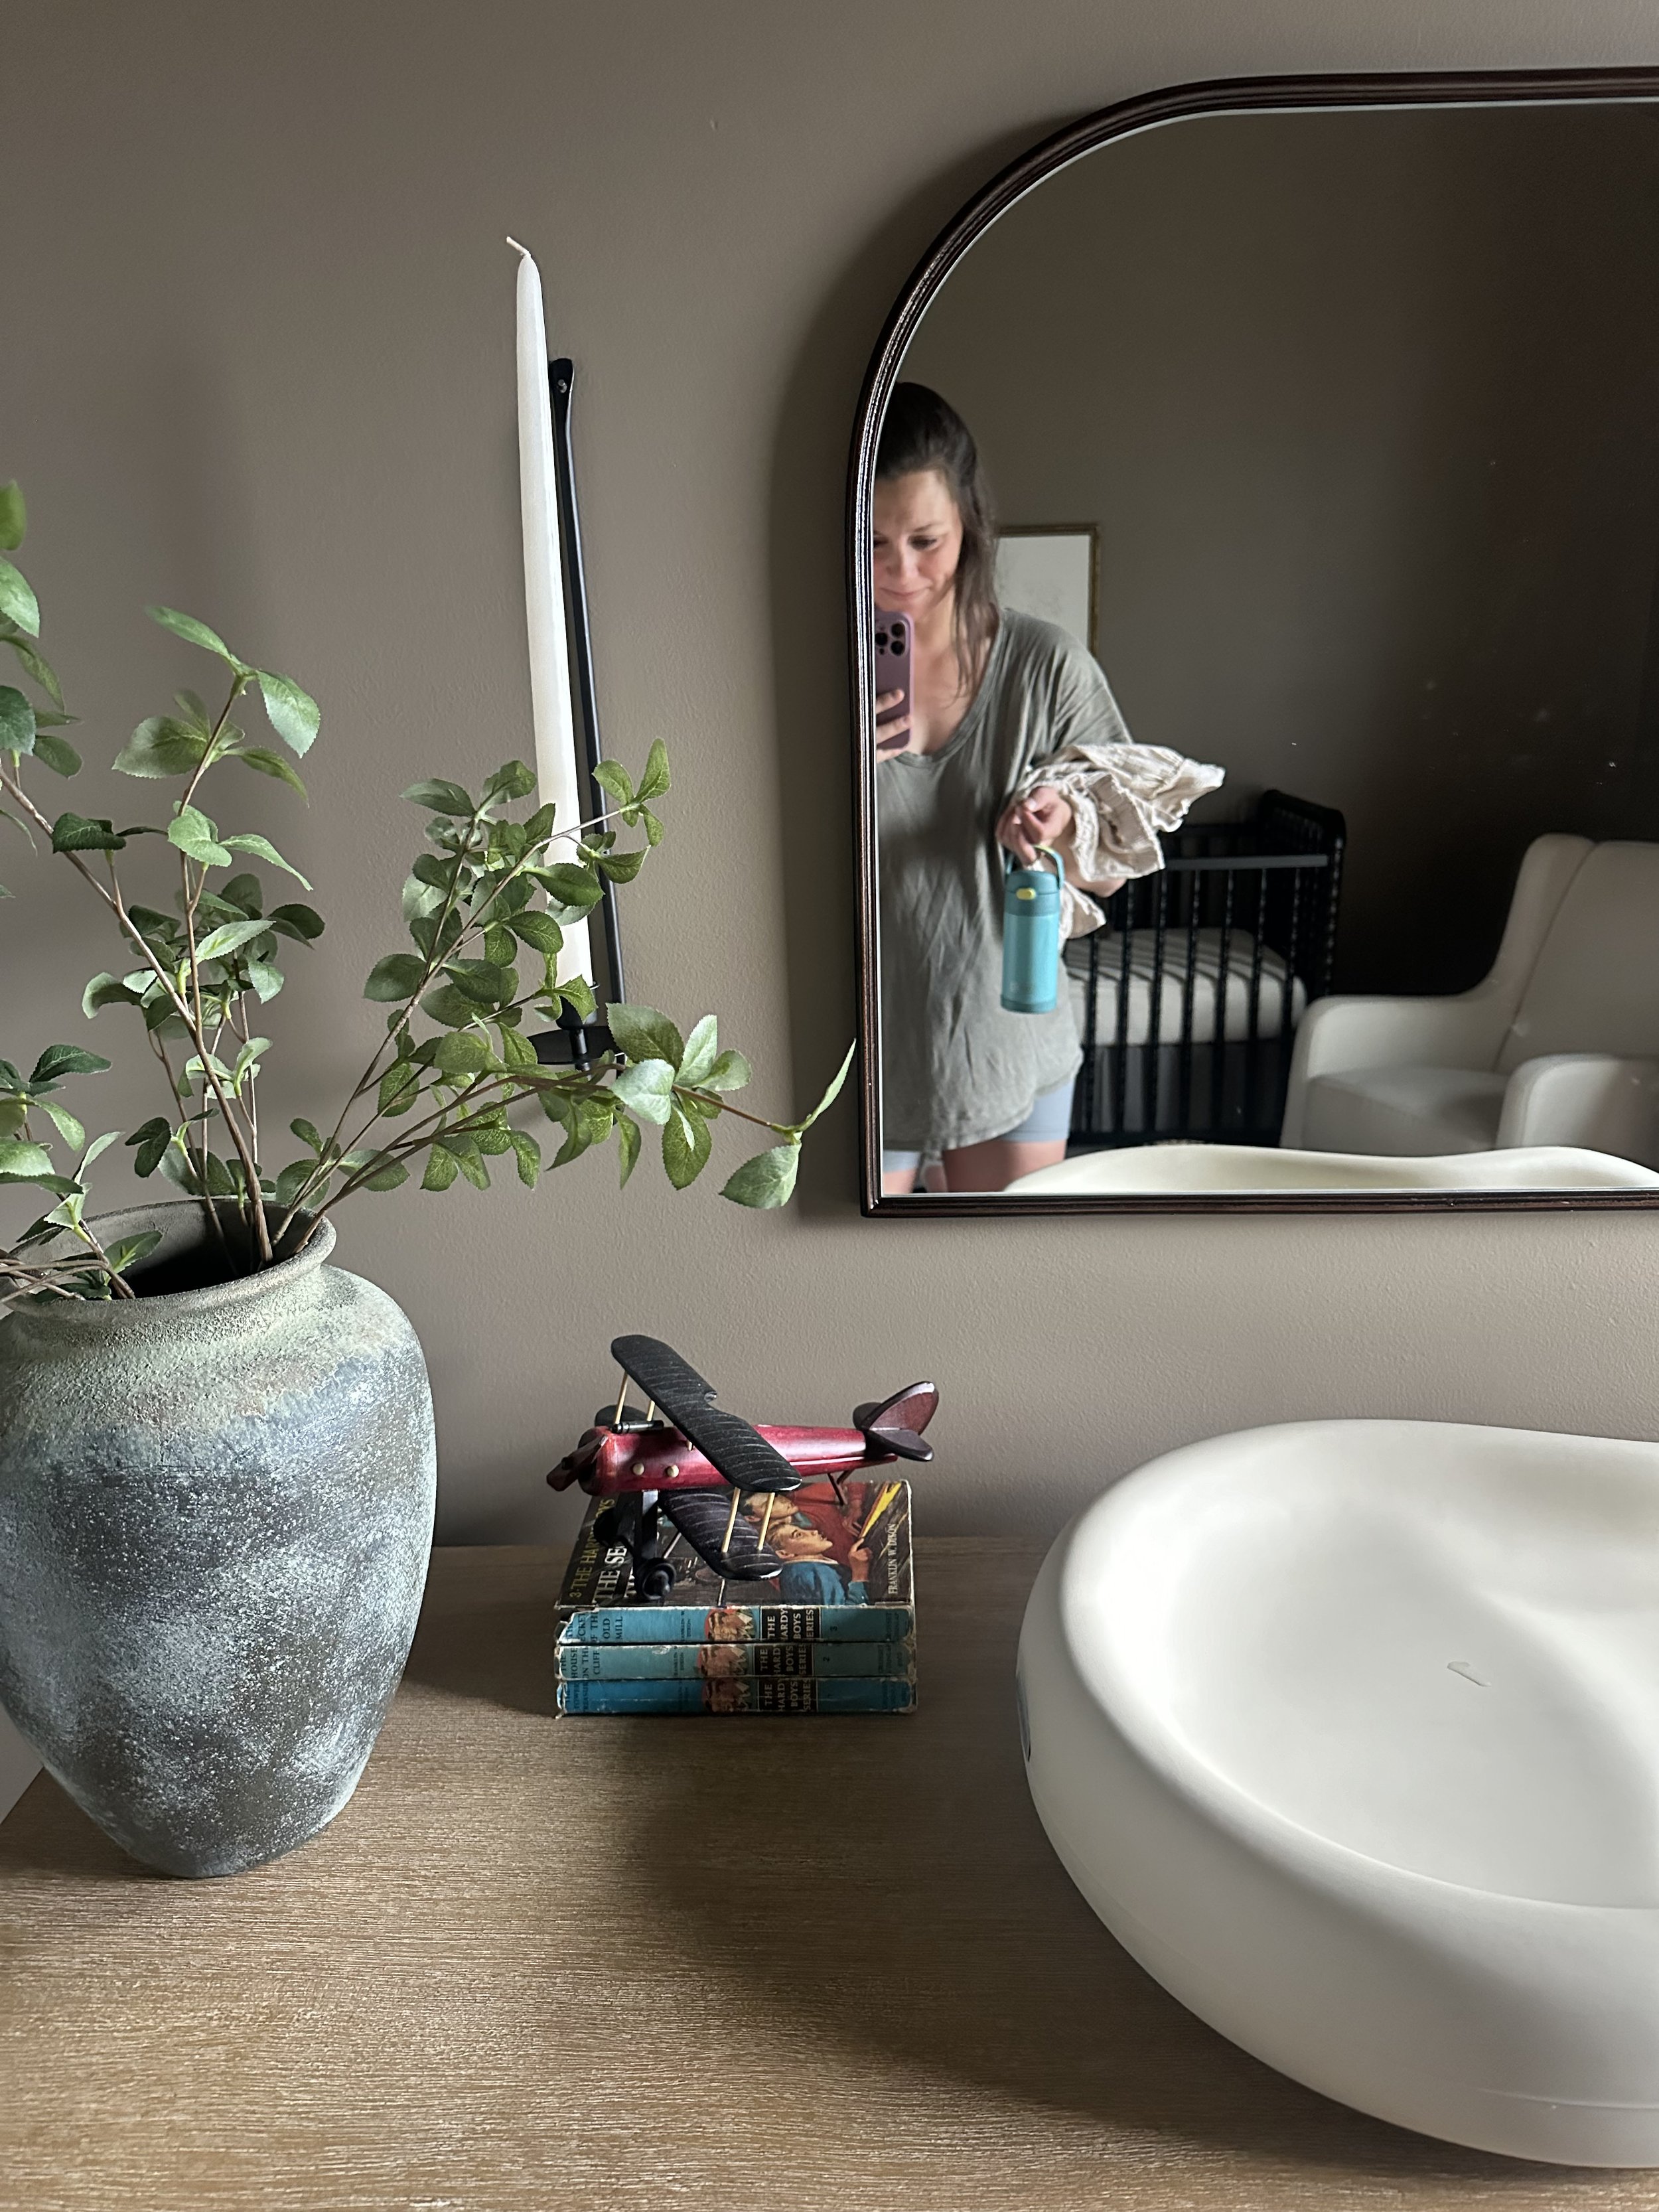
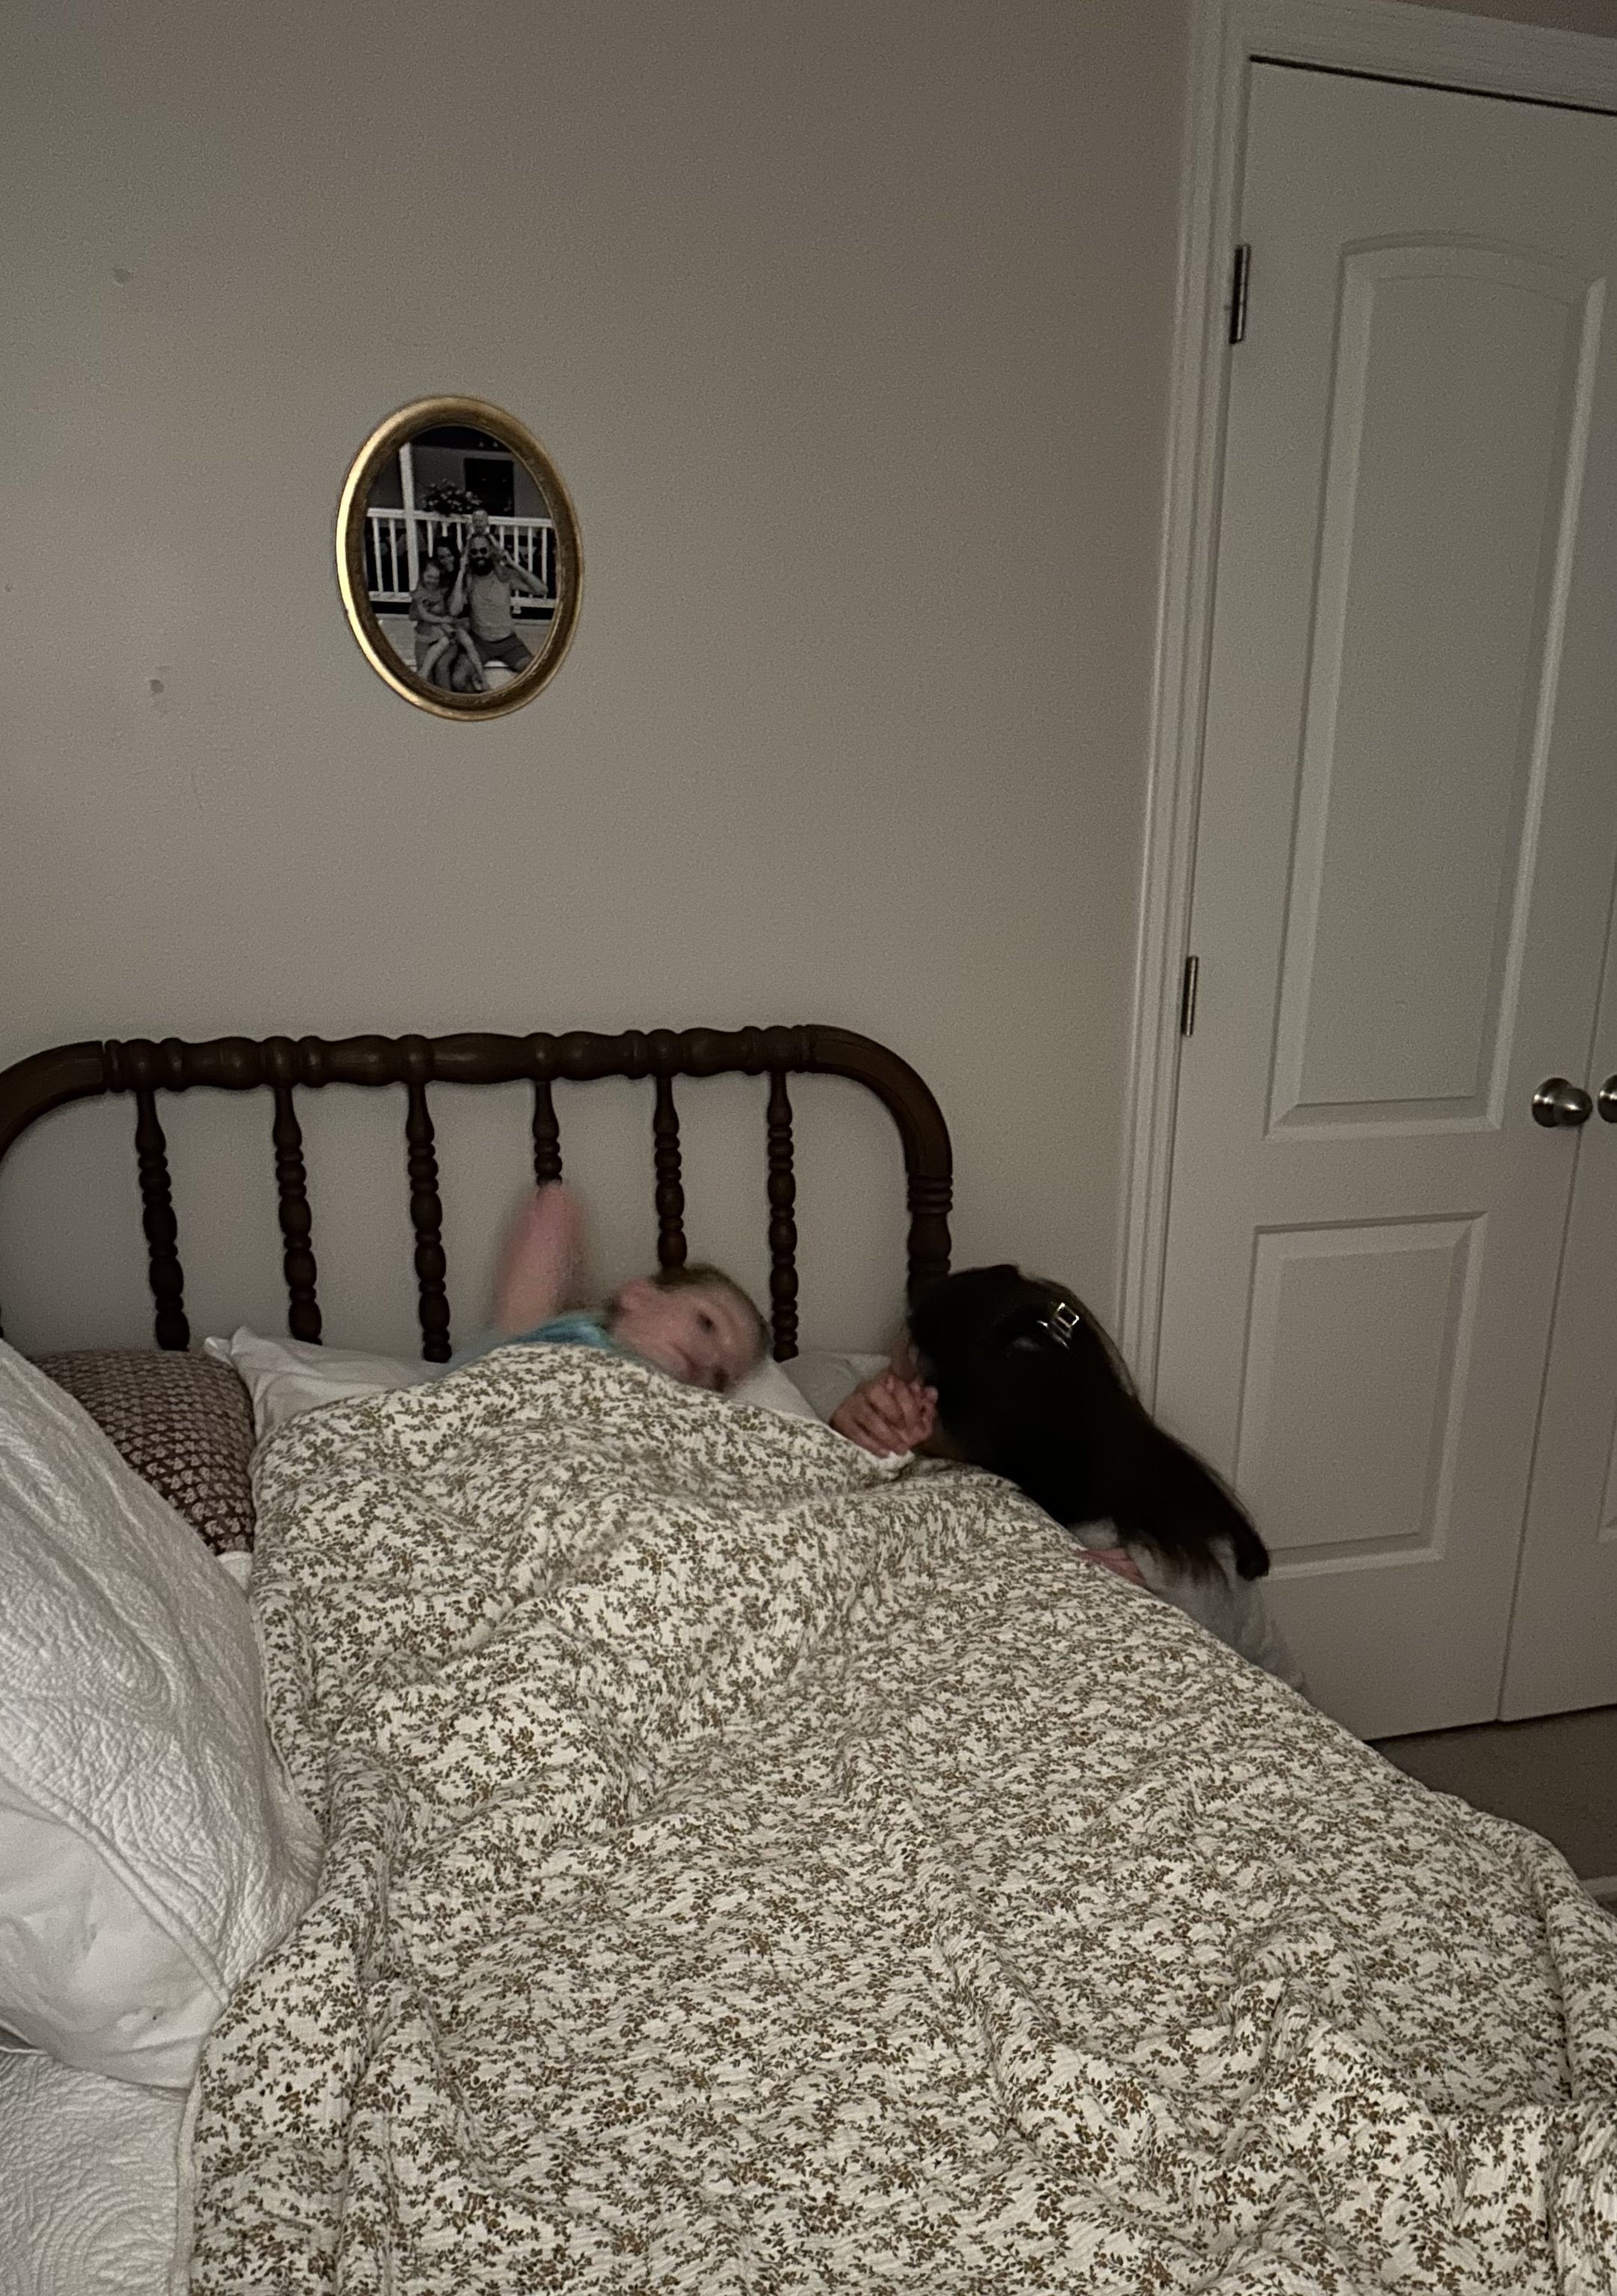
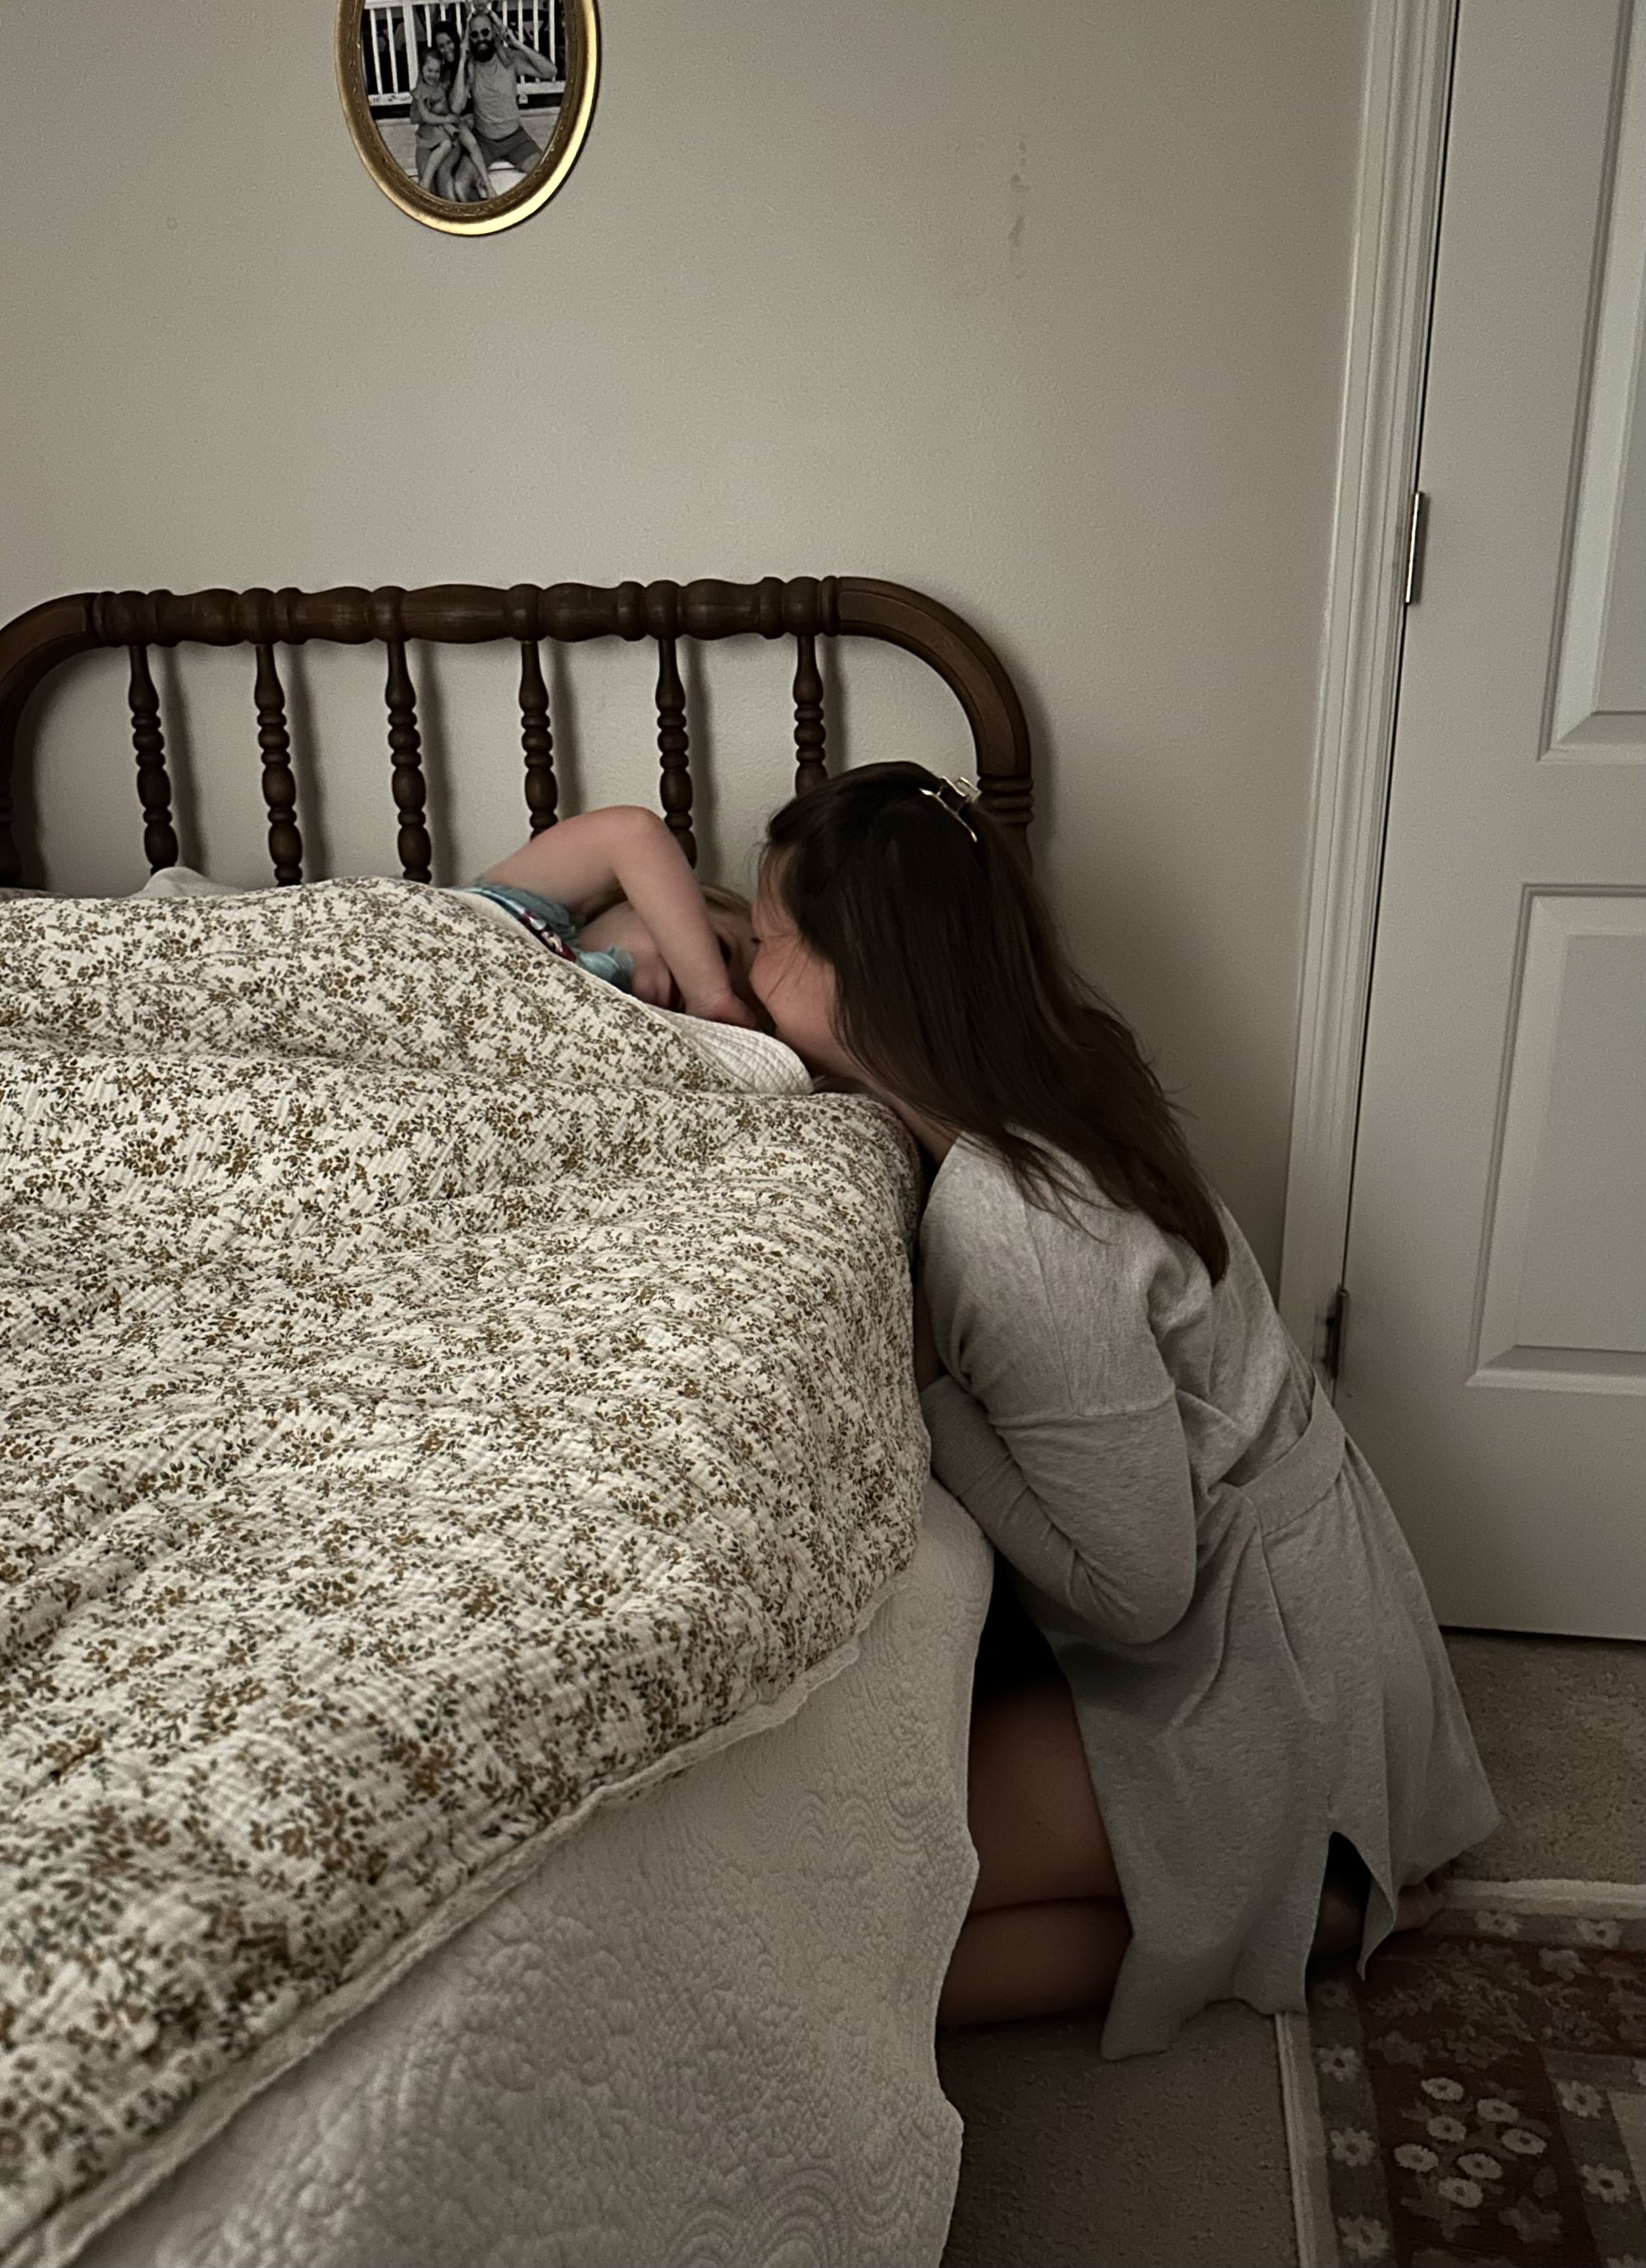
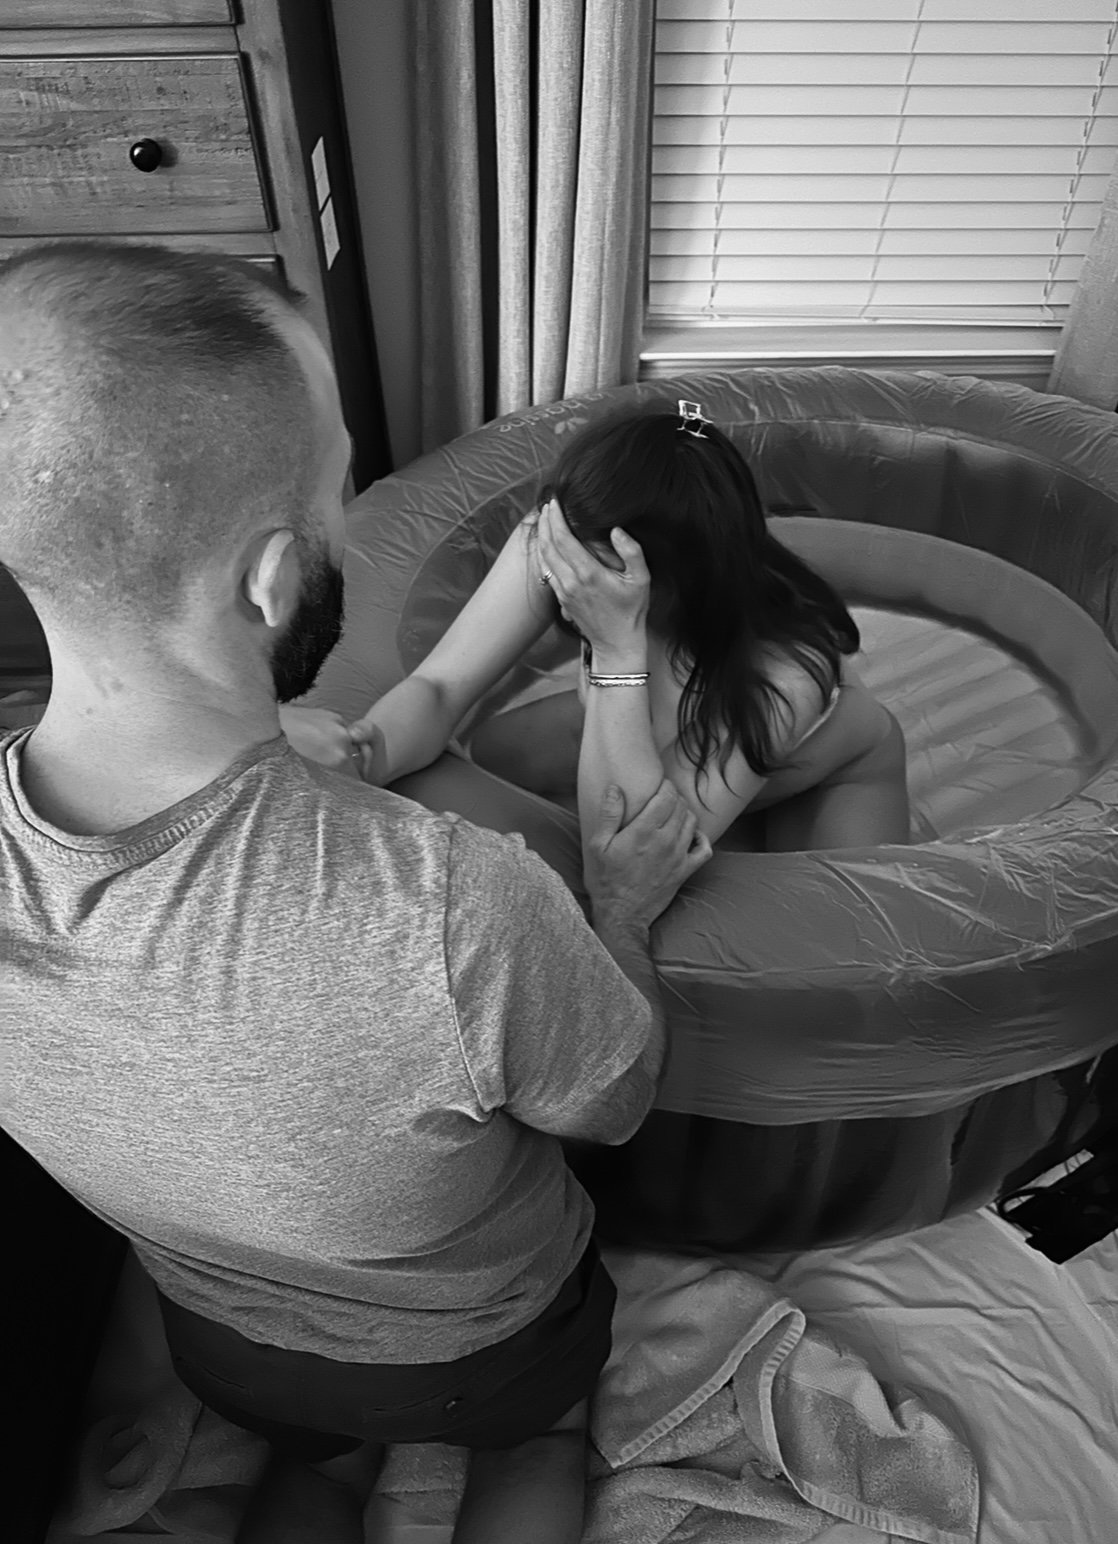
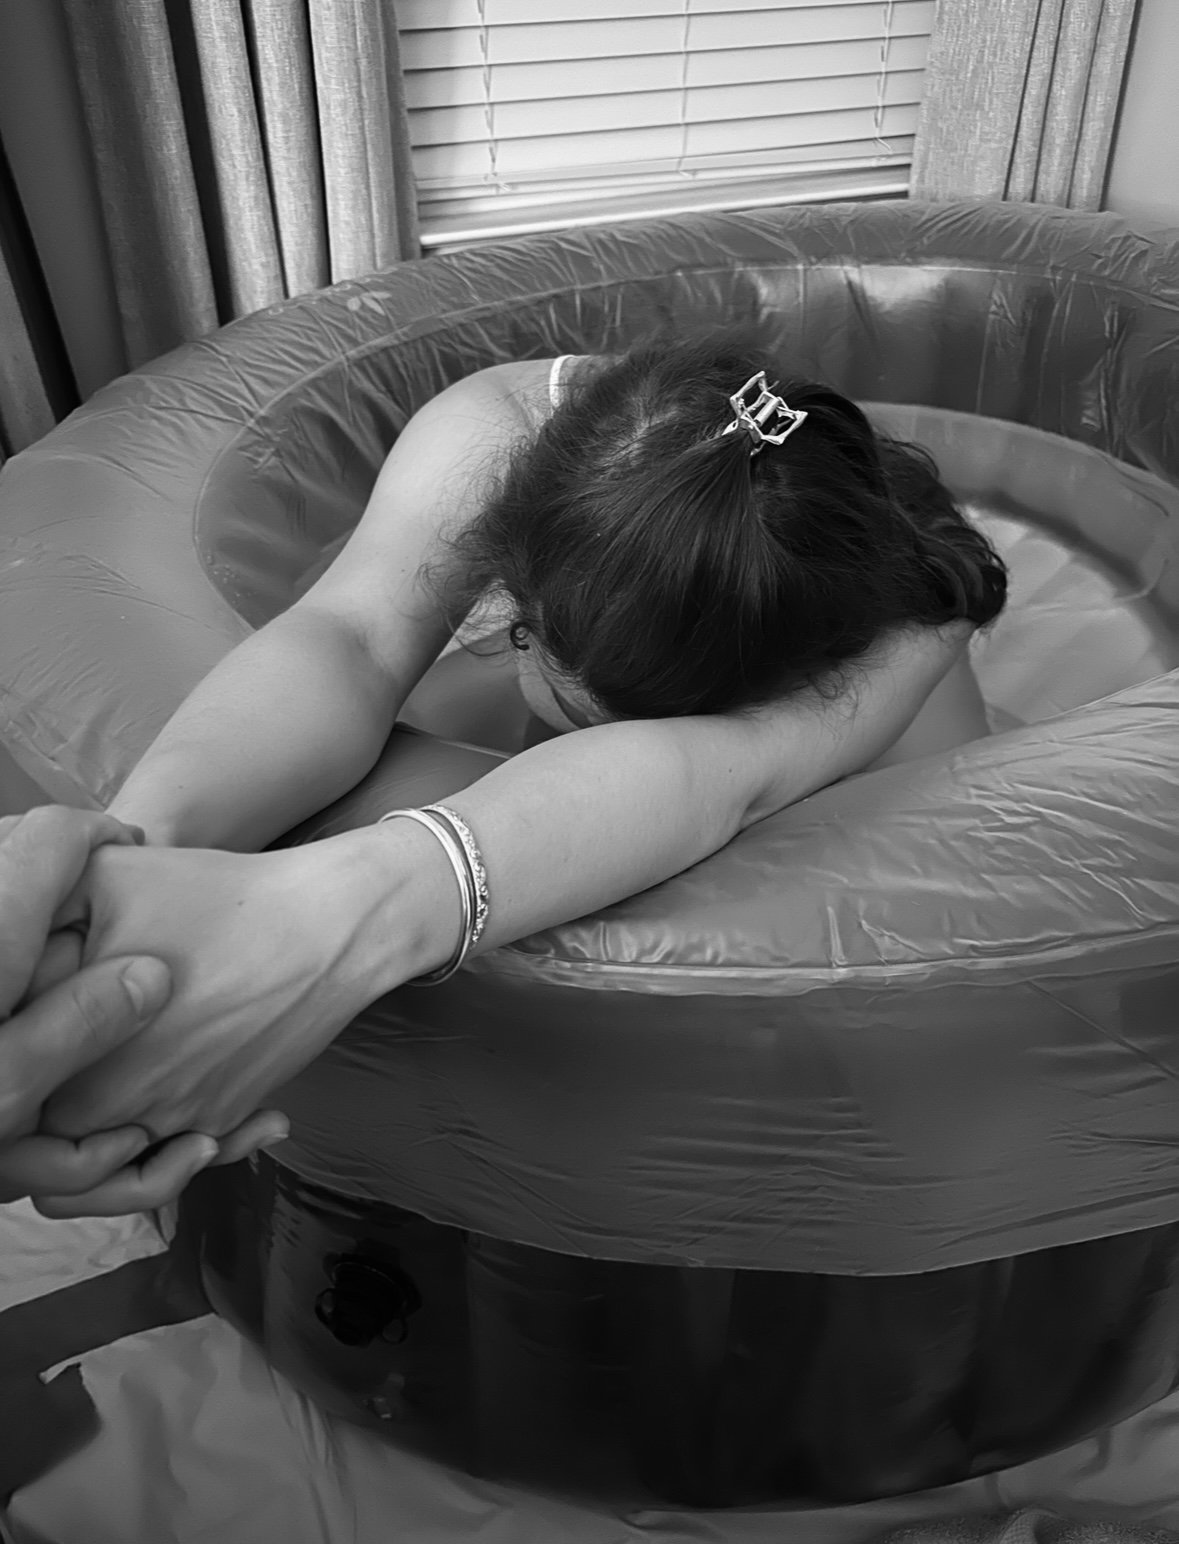
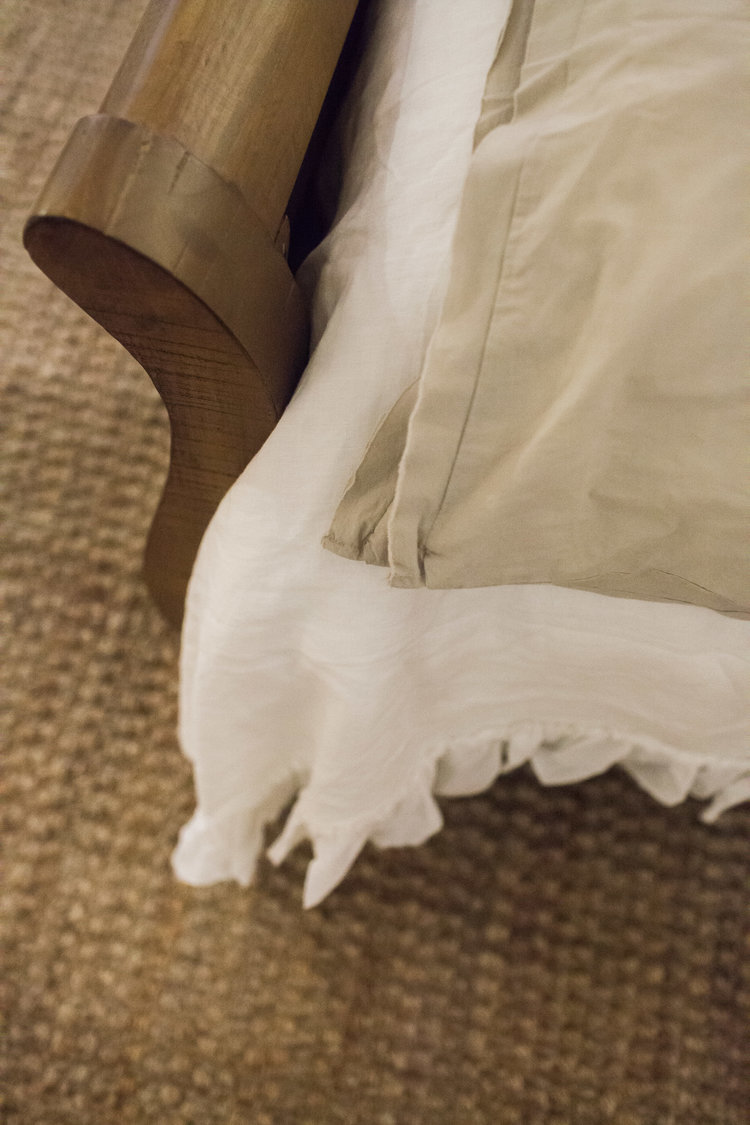
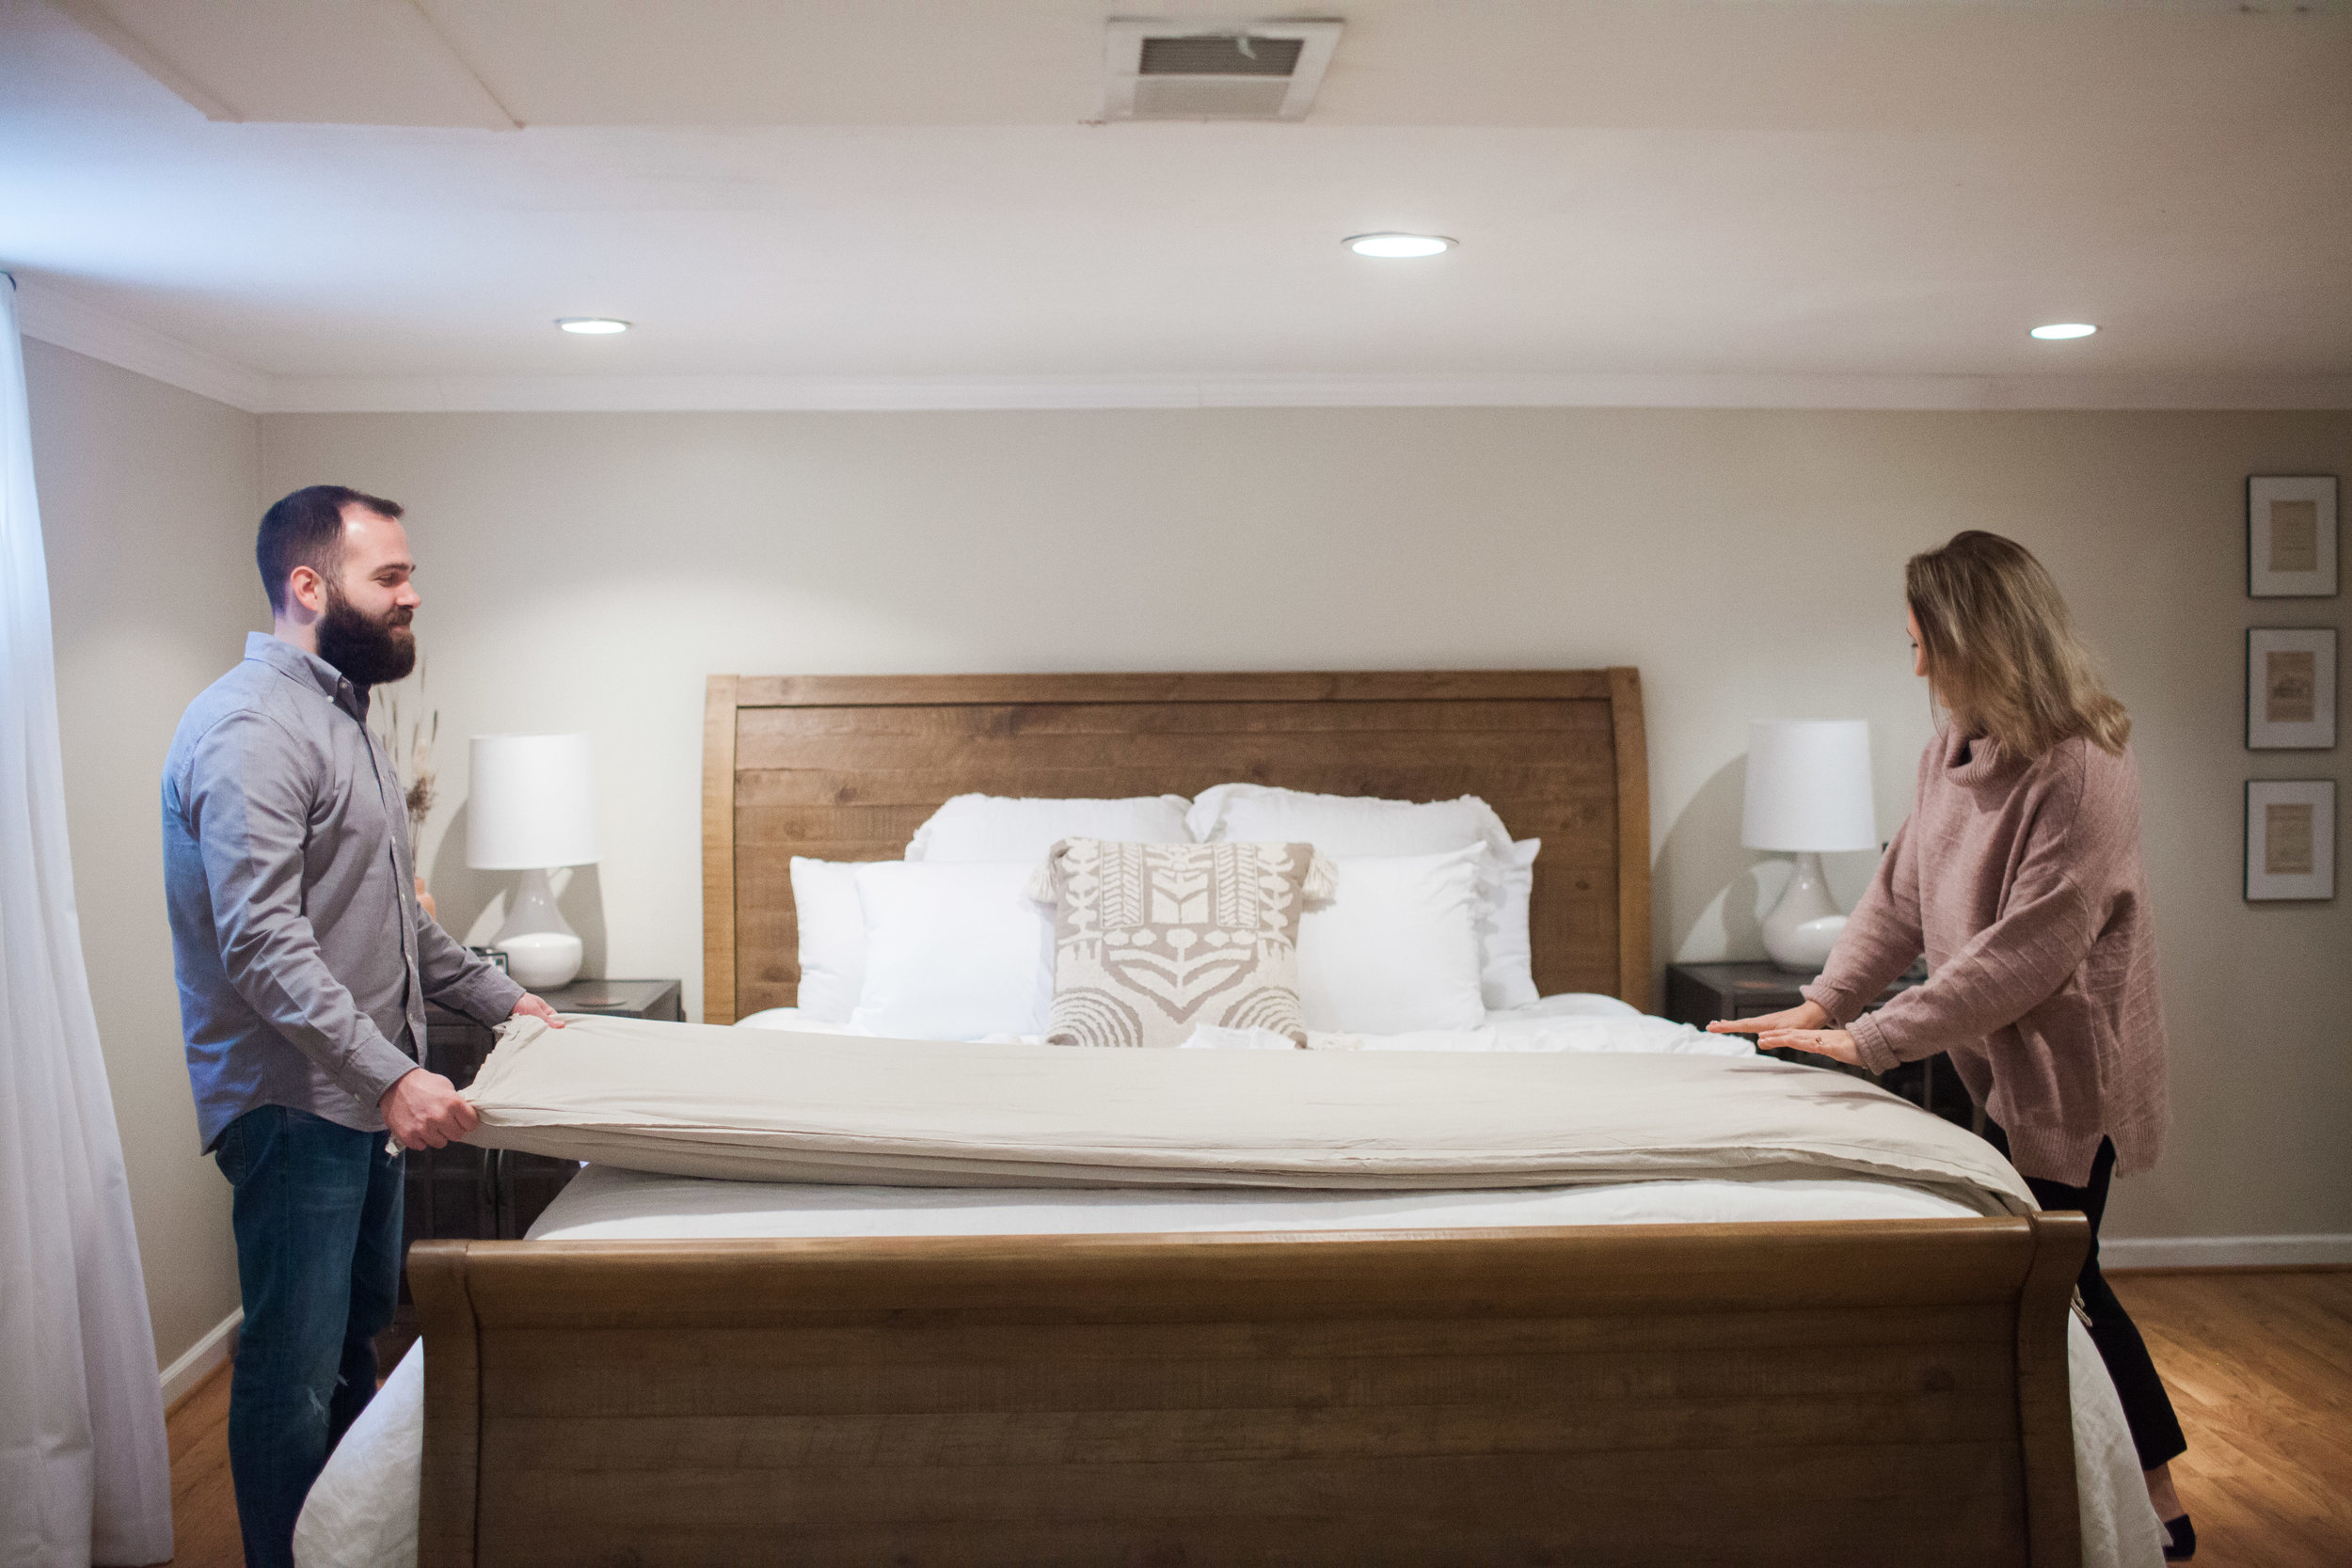
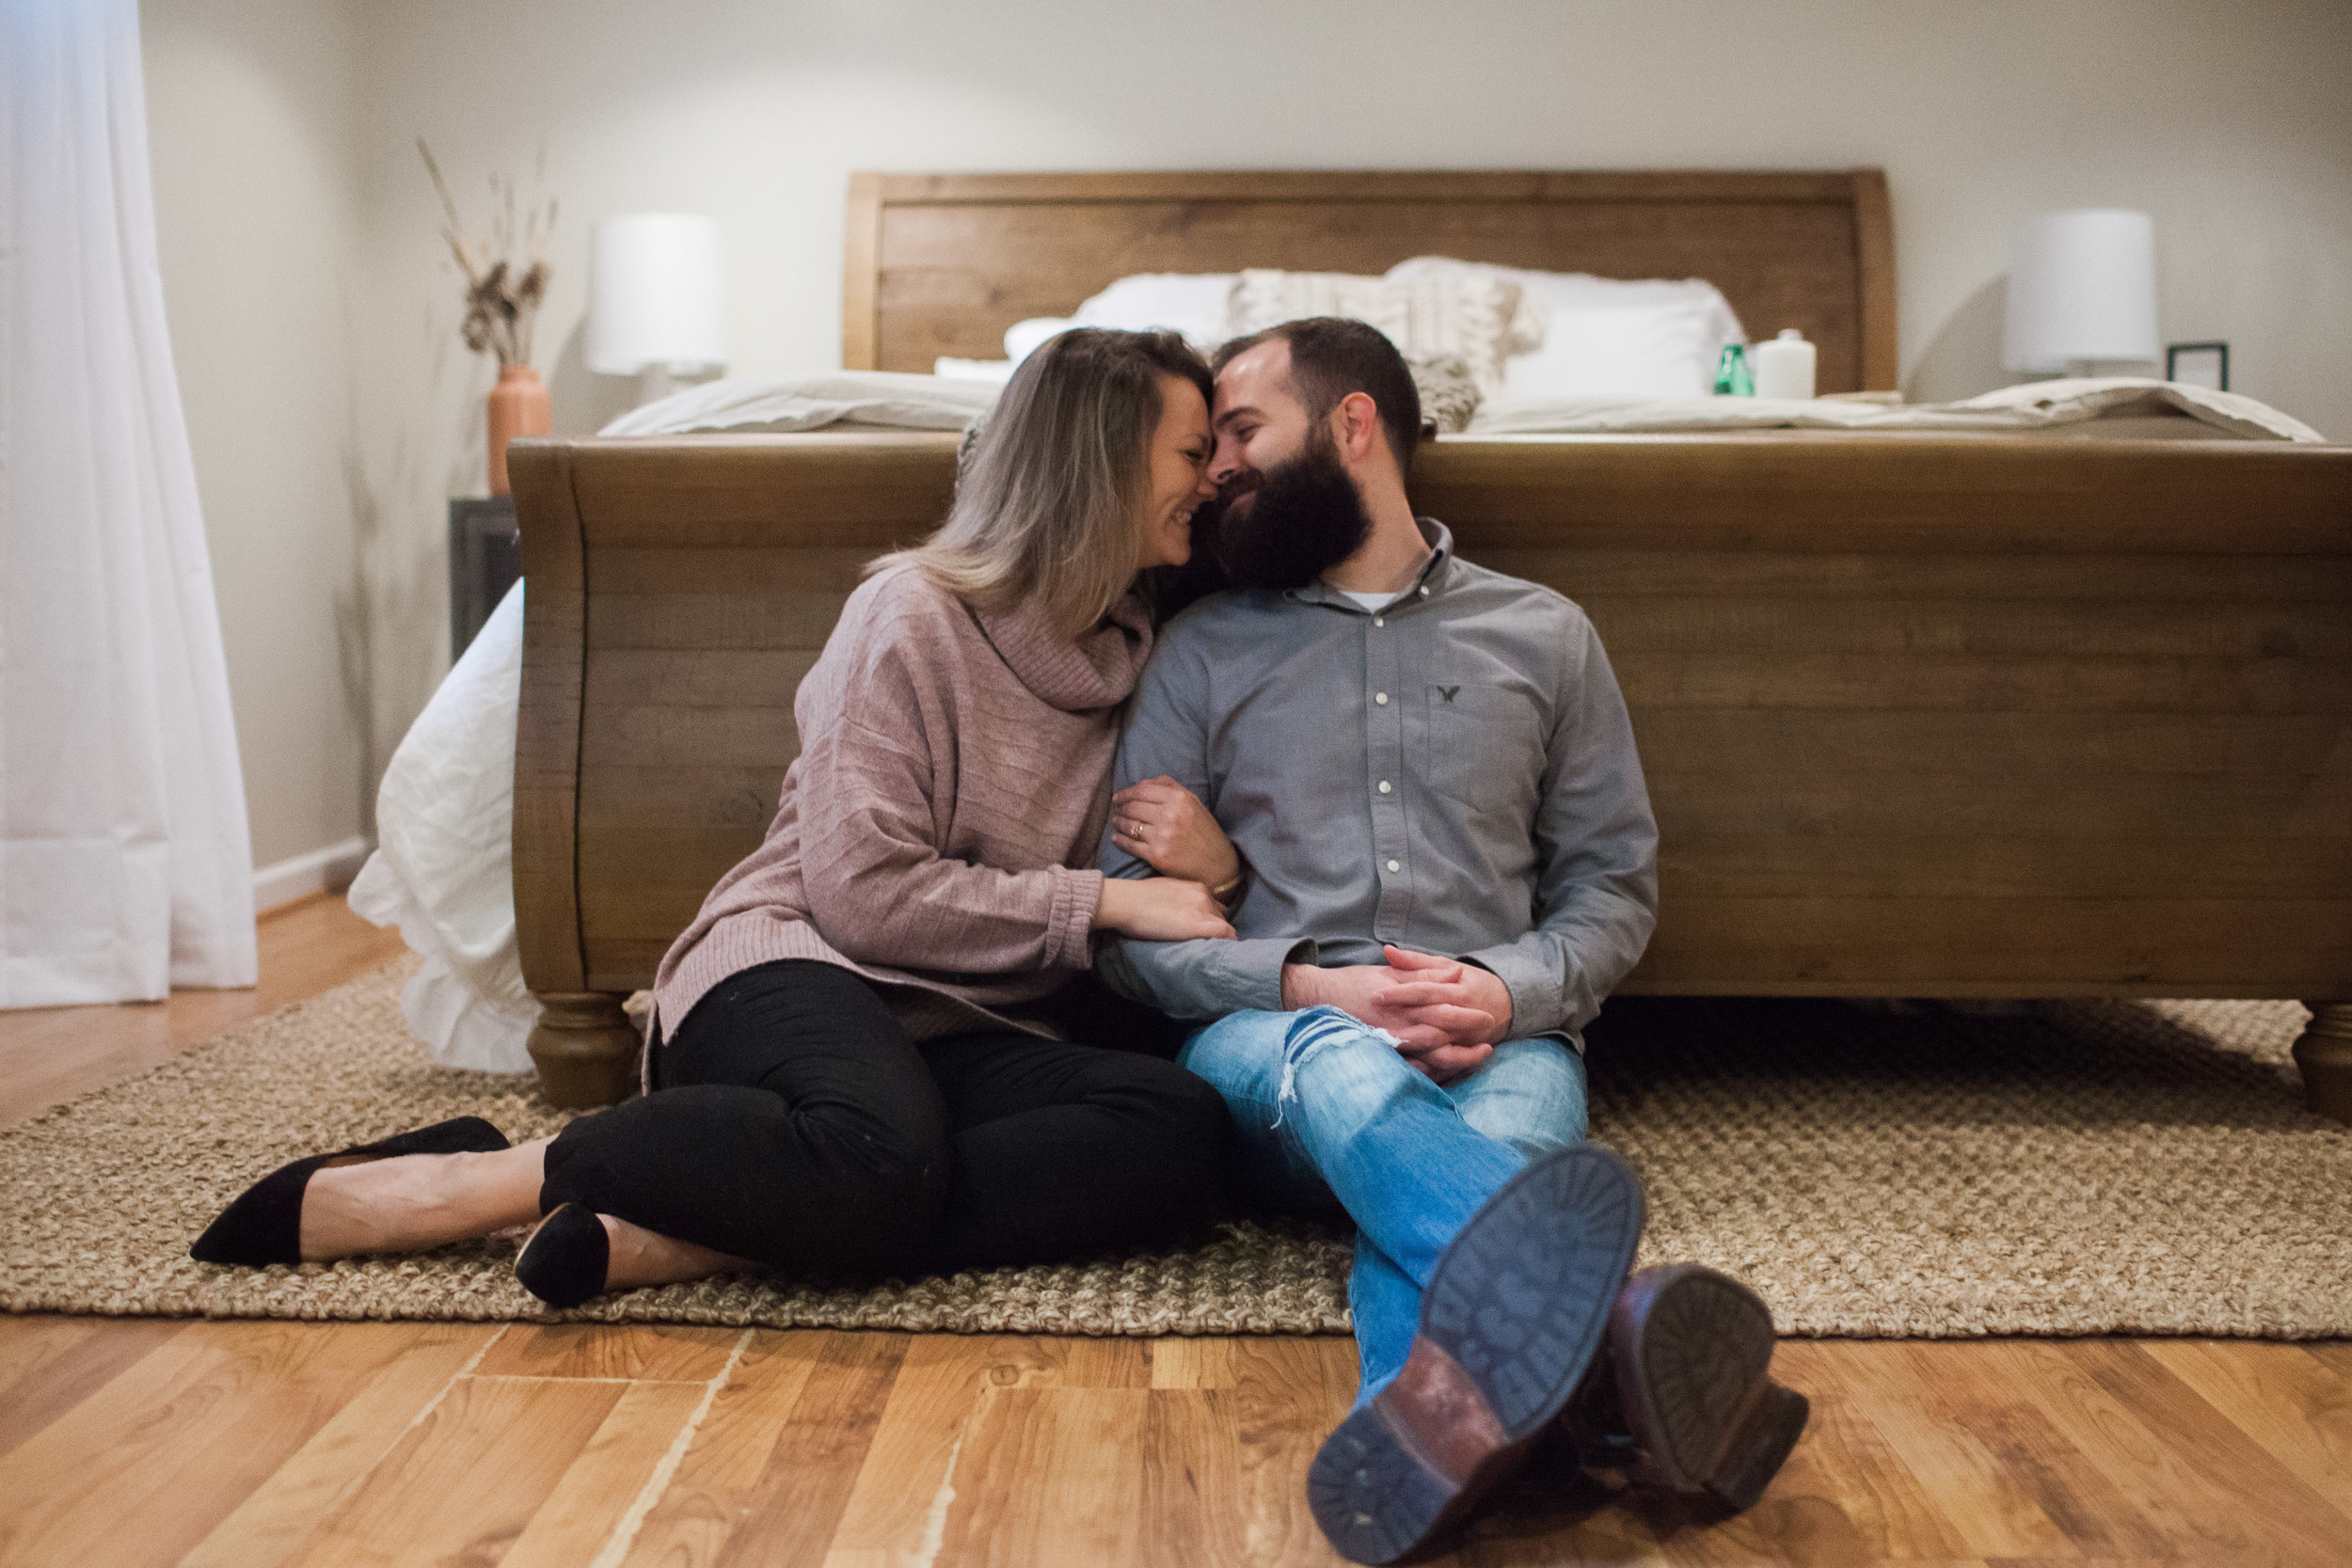
I share all of that backstory because Thursday, 6/30 started off as just a normal day, and it ended with our great reward, Eleanor Sage Craft, being born in our home.

THURSDAY, JUNE 30th

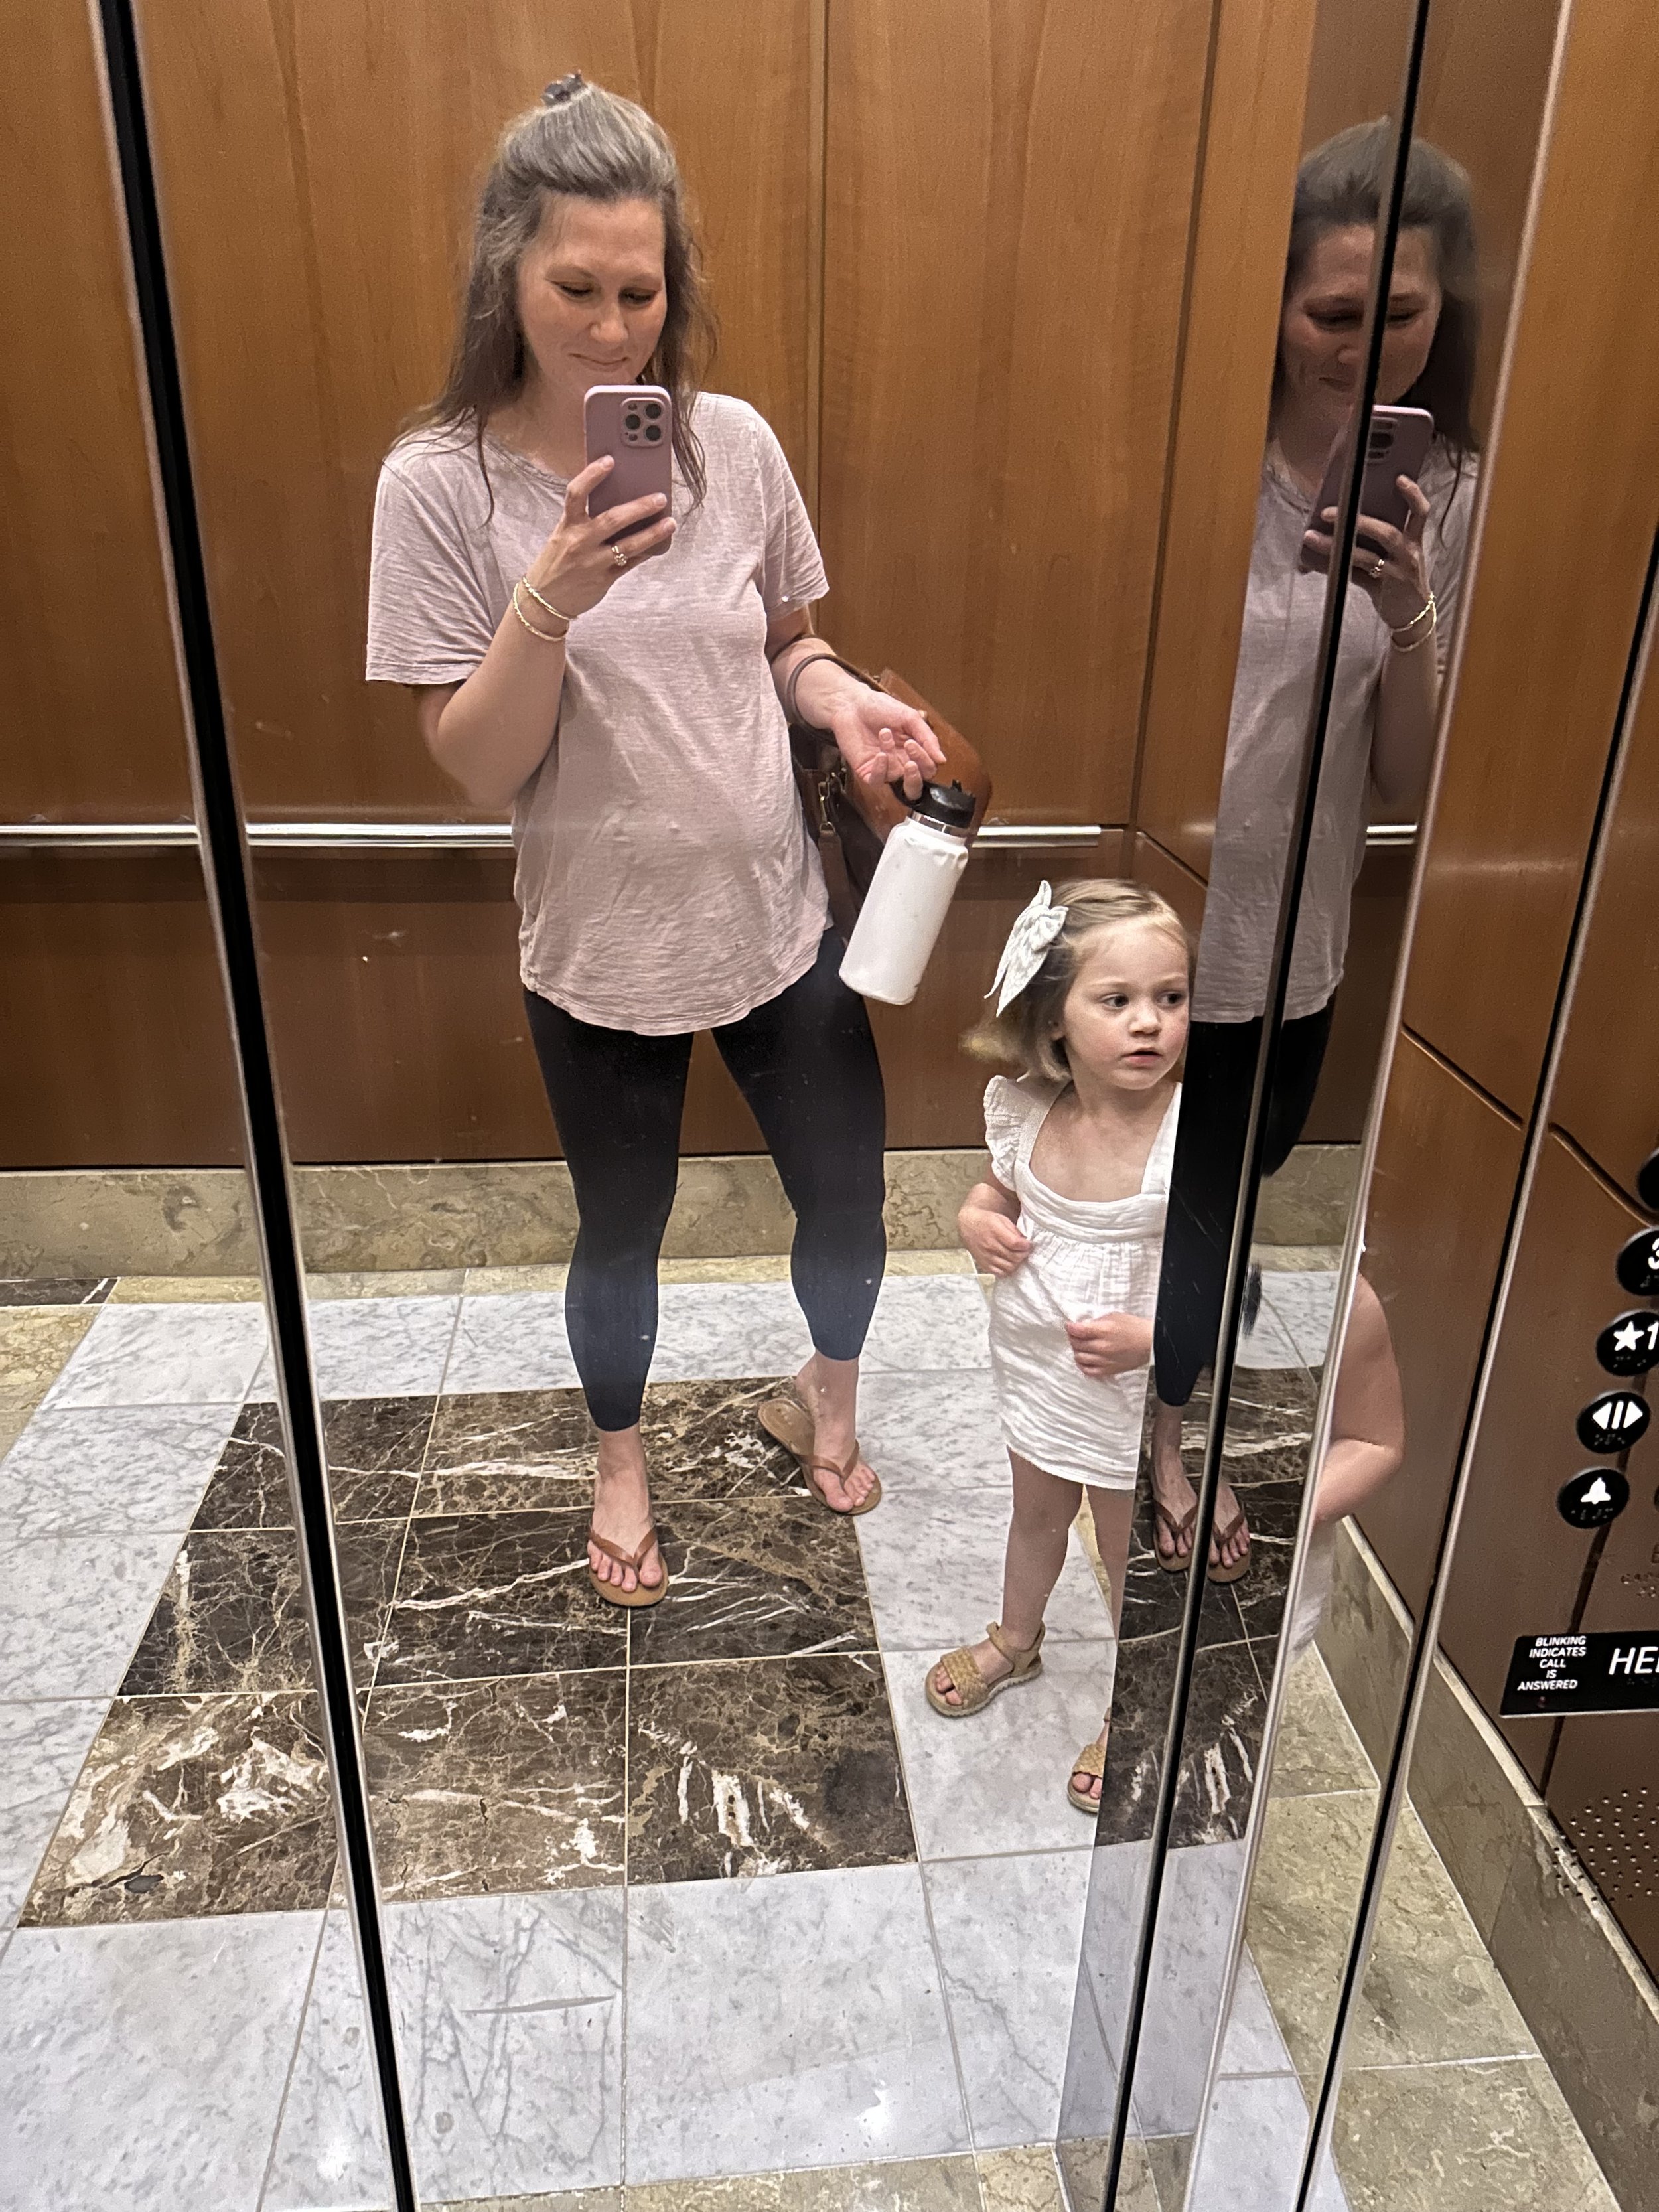
8:30 am - Went to brunch for our 6th wedding anniversary (Our anniversary is July 2nd, and we did not know if we would make it to that date to celebrate on our actual anniversary.)

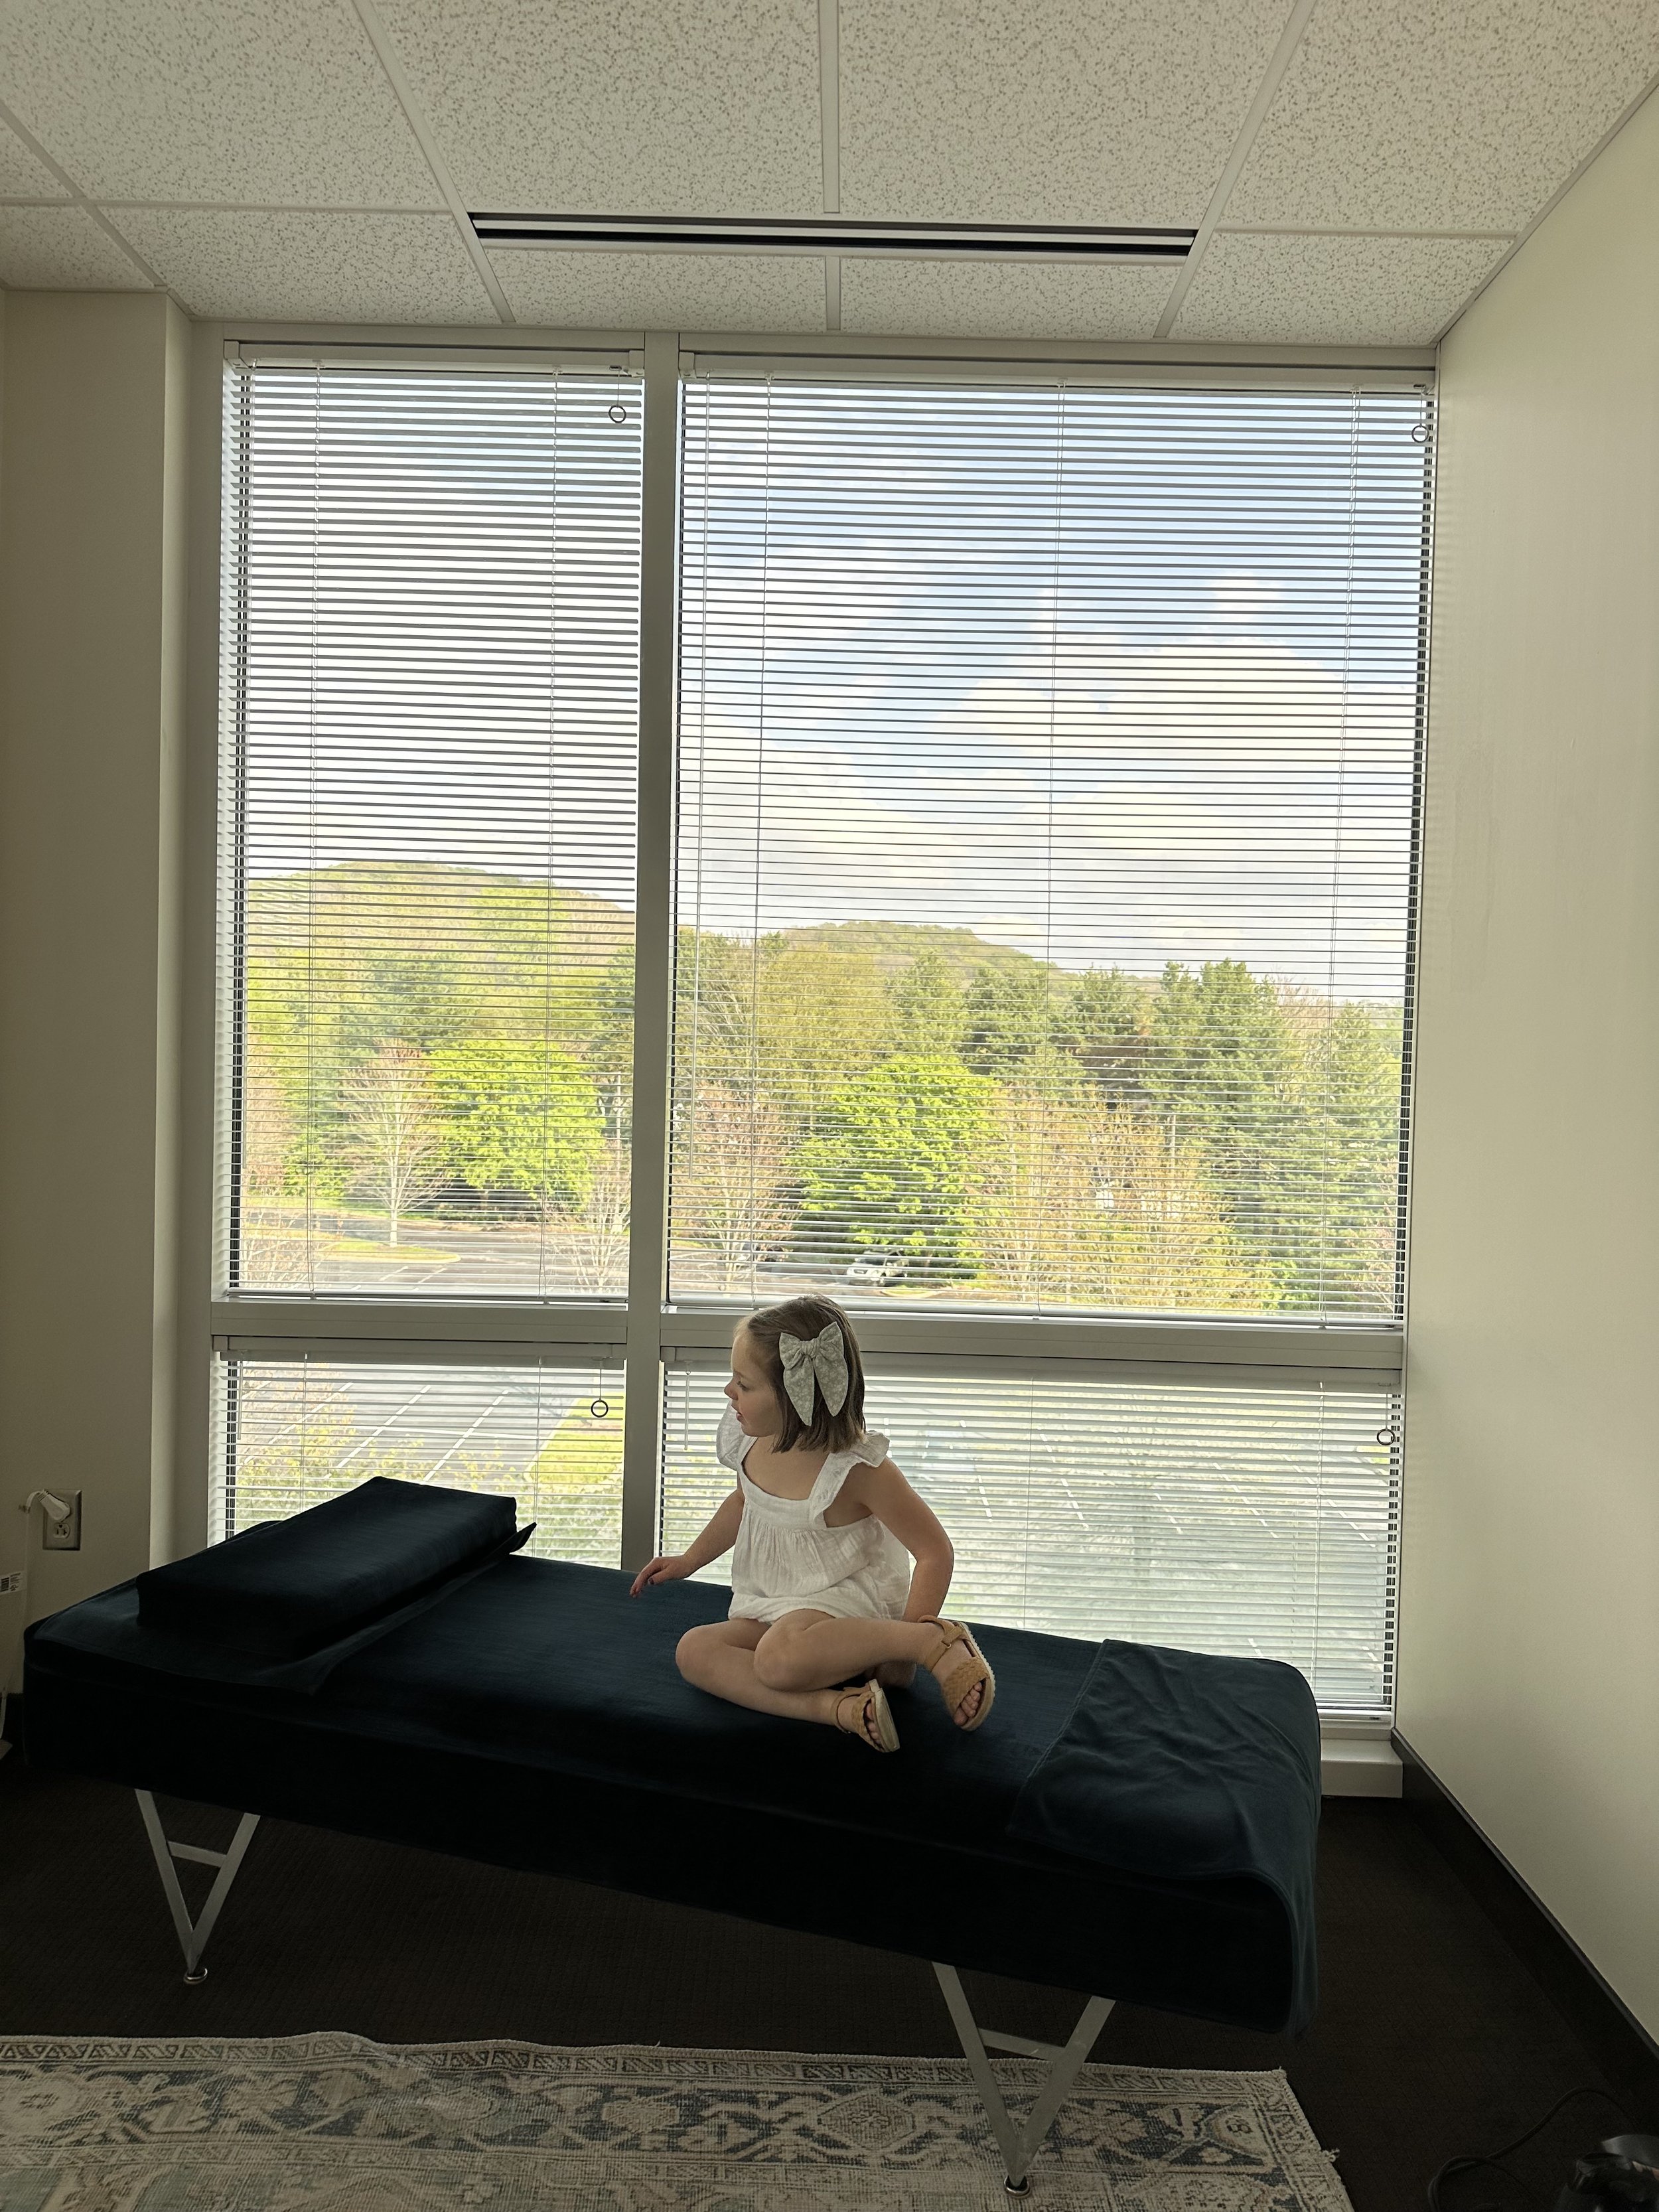
9:30 am - Went to Honest Coffee for coffee and walking around the Factory. We did this on Everly’s due date and it was fun to recreate this new tradition.

10:30 am - Membrane sweep at Haven Birth. I was 2 cm dilated and 75% effaced.

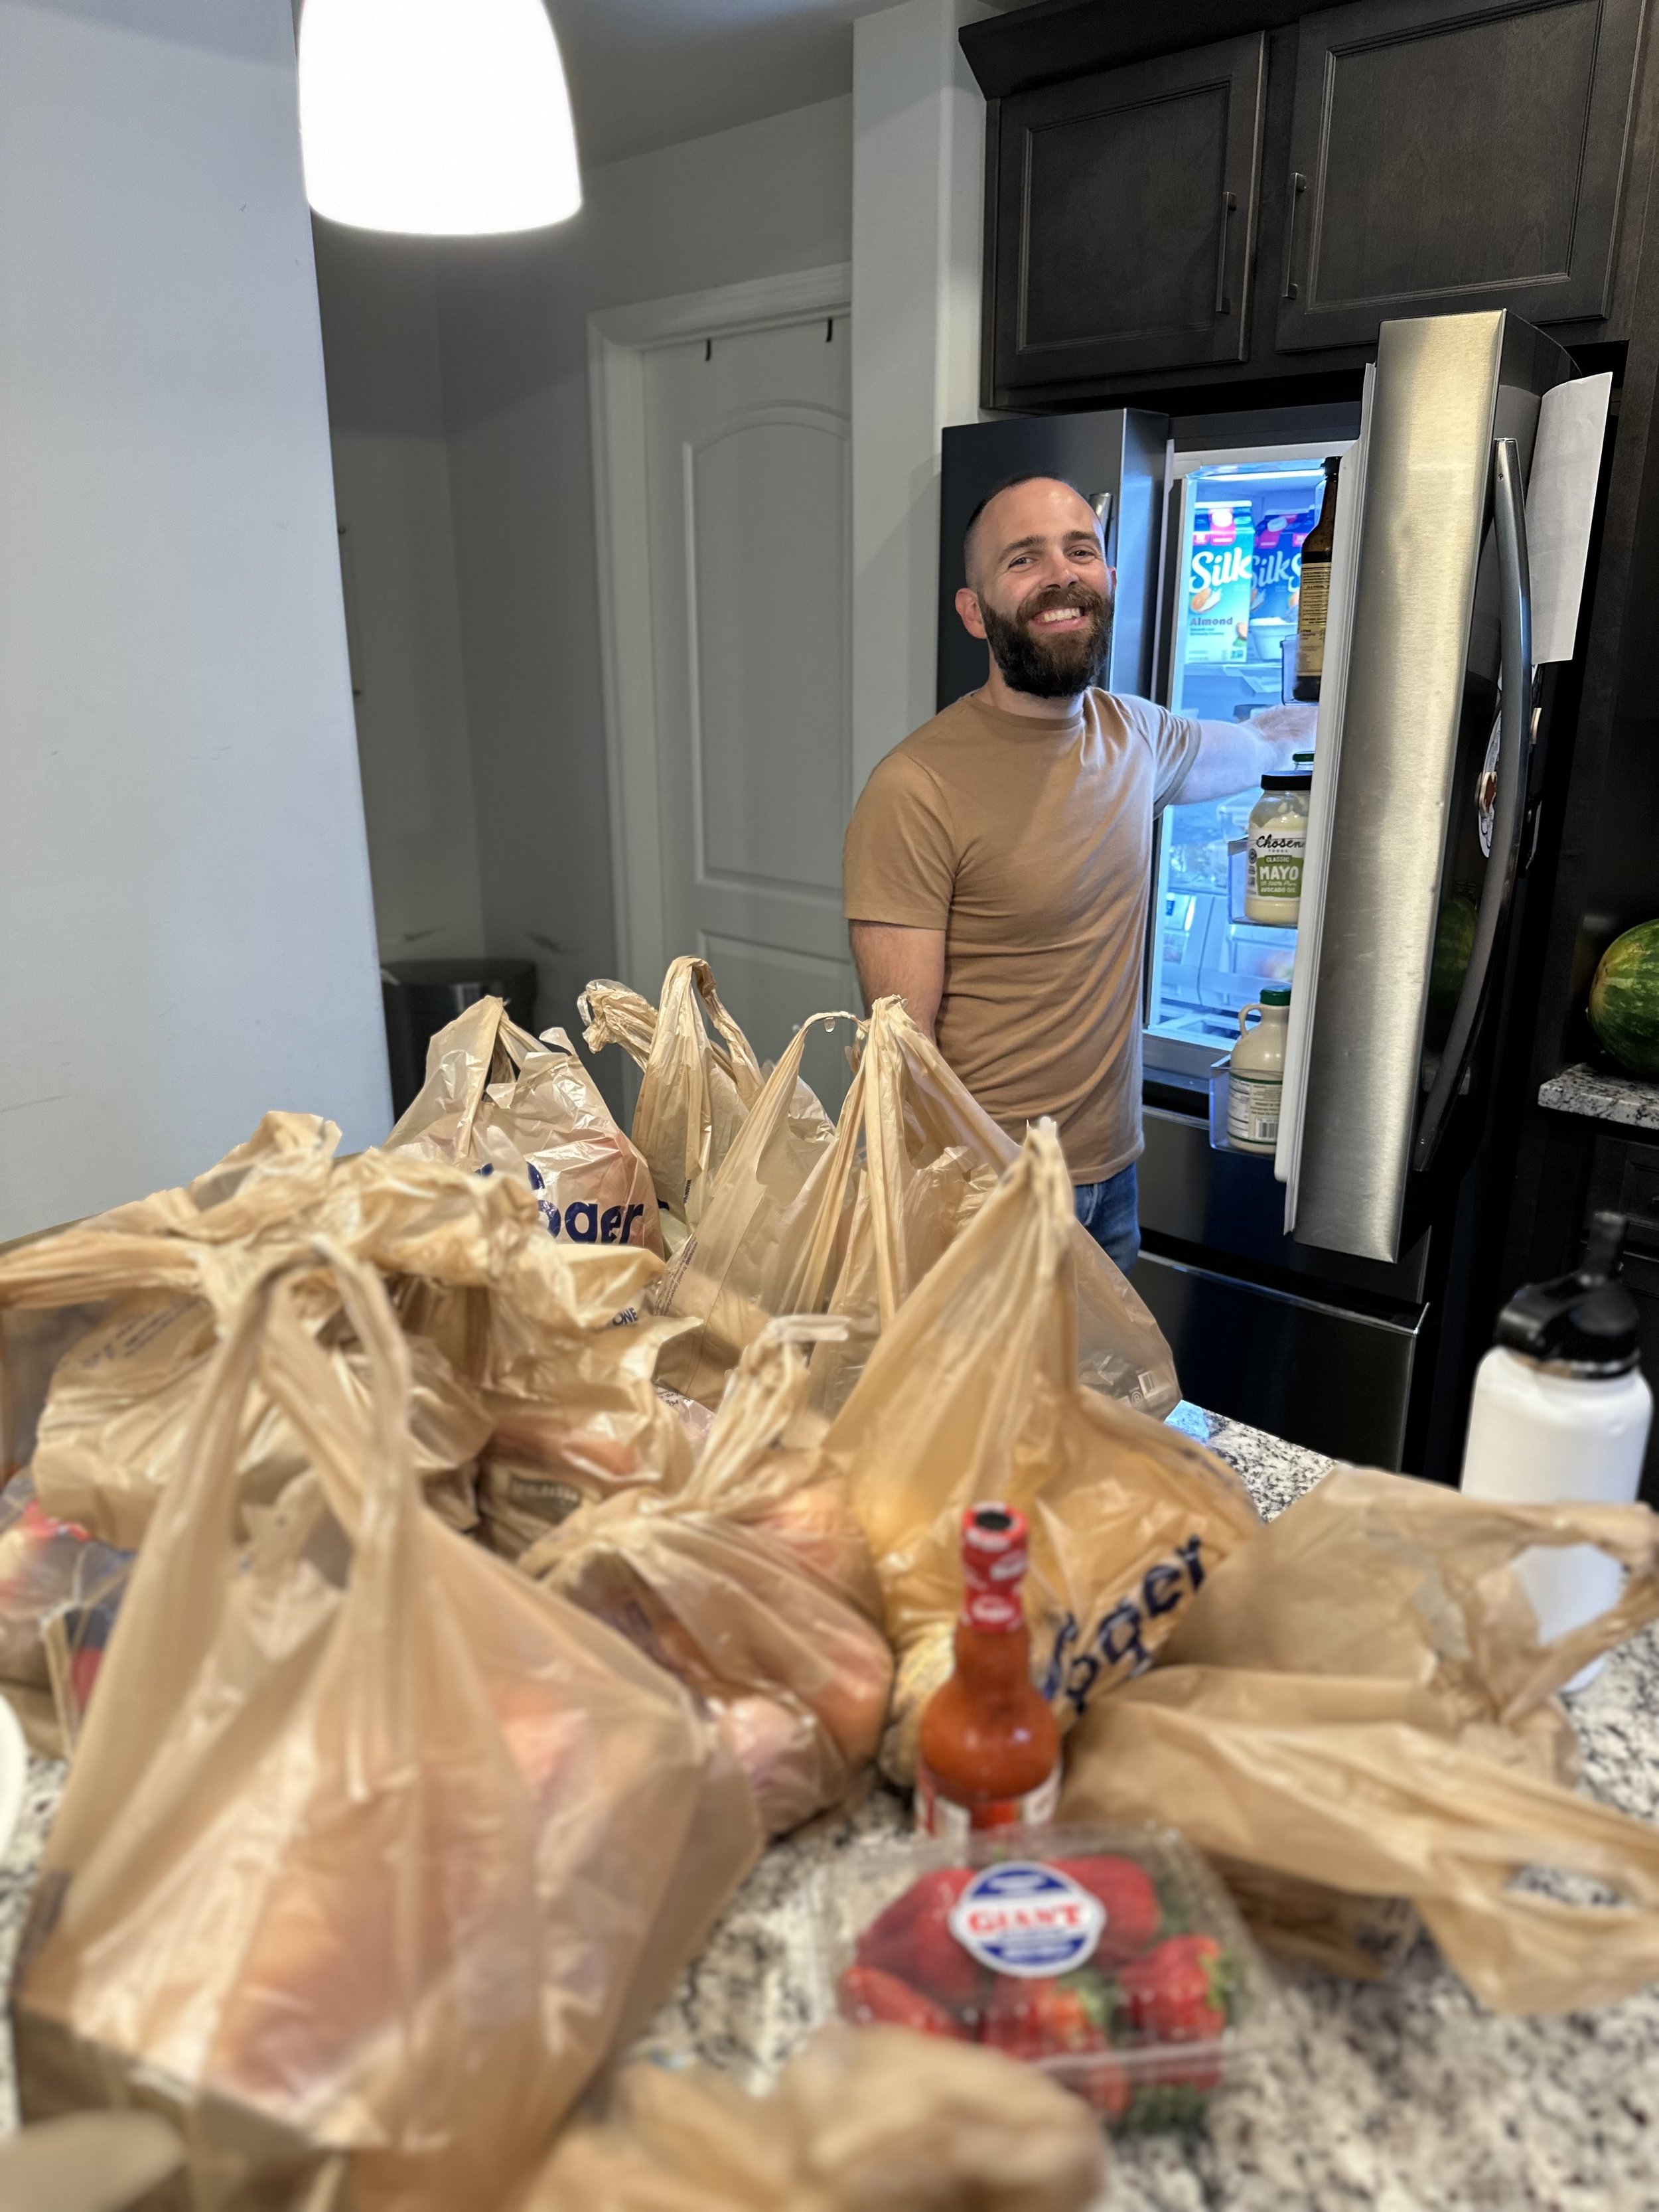
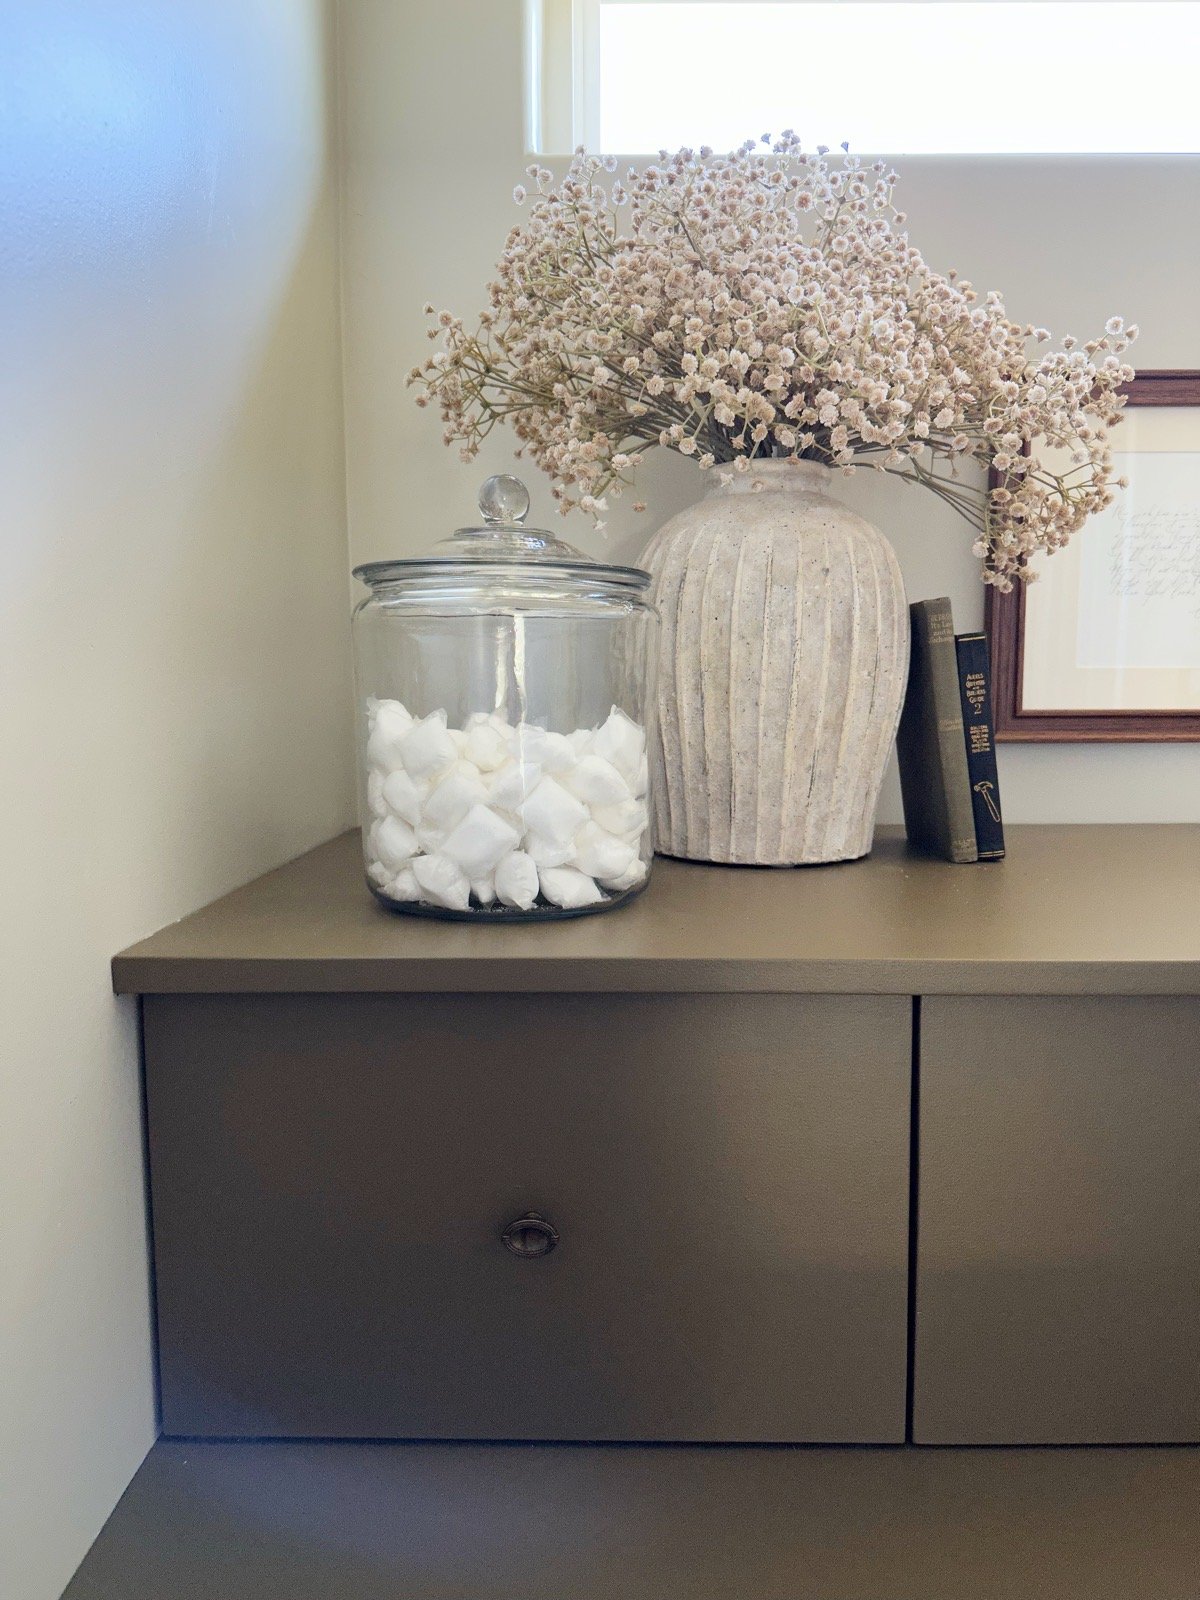
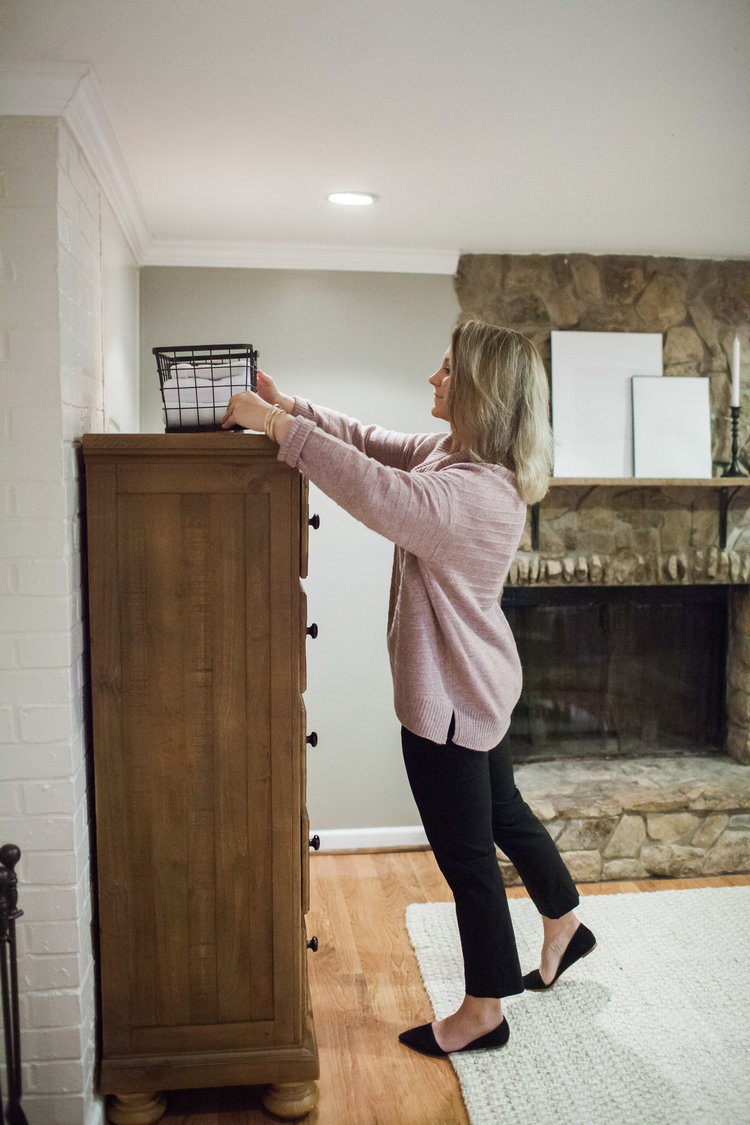
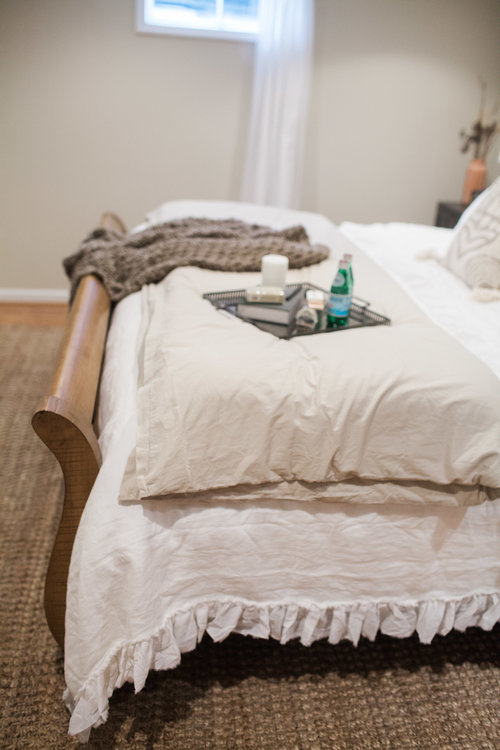
11:30 am - Grocery shopping and flower shopping with Joshua in case I went into labor. We wanted to have a full fridge since we would be home, especially for Everly. (Also, every woman should have flowers for her anniversary and birth!)


1:00 pm - Drank Castor Oil on an empty stomach. (Newsflash, it wasn’t AS bad as I thought it would be, but gosh it made me feel awful REAL fast.)

1:30 pm - Laid down to nap as I started to feel horrible.

2:15 pm - Josh brought me a Panera sandwich because I needed food. I had not eaten since 8:30 am and needed something to absorb all the sugar I had just drank in the Midwives Brew.

5:30 pm - Dance party on the front porch with Joshua and Everly. That will forever be one of the sweetest last memories with just us three. It was the first thunderstorm in over a month, and we did not waste that precious time with her.


6:30 pm - Went on our last walk as a family of three around our neighborhood. My contractions started as soon as we hit the top of our street, and they felt like they were 2-3 minutes apart. I was going to wait to time them until we got home.


7:00 pm - I laid on the couch with Everly while I timed contractions. She just held my hand while she watched Luca. After 30 minutes of timing them, they were officially 2-3 minutes apart. I honestly did not believe the timer because those contractions came on so quick and so intensely.


*At this point, we knew I was in labor, but with everything going on (putting Ever down, timing contractions, focusing intensely on labor and my contractions, Josh getting our bedroom set up, and then the team arriving, we did not even have time to let anyone, not even our parents, know that I was in labor. This was not our plan, as we had a whole list of people to text when I went into labor. We did not get to tell anyone until early the next morning while we were lying in bed with Eleanor. We so wish we could have let people know to be praying, but we already had an army of people praying around us for Eleanor since there were some concerns for her, as shared above. We felt every single one of those prayers during the labor though.

7:30 pm - Helped Josh lay down Everly in between contractions. I could barely make it up the stairs, but I got my last snuggles in with Everly before she became a big sister.


7:47 pm - Called my midwife, Dawn. She could hear it in my voice that things were serious and sped over. She lives right down the street from us, so she was able to get here pretty quickly. She suggested I start laboring in our bath tub while Josh got our bedroom, our bed, the birth tub, and the hose to fill the tub all set up. (Josh is a project manager, and he had an entire folder of to-do’s for how to set up our bedroom for the home birth - it was super cute. But this actually was so helpful for him since everything was moving so fast to have a checklist to get everything done for me to deliver at home.) As I got into our tub, I had this overwhelming desire to add the song ‘Oceans’ to my birth playlist that only had 15-20 songs on it. A dear friend gave me an affirmation to speak over my heart during contractions. “This is just a wave. He won’t let you go under.” I spoke that, alongside “Keep your shoulders down” and “Breathe her down” and “Jesus” over and and over again when I thought I couldn’t continue laboring. Little did I know, I would meet my daughter while ‘Oceans’ played just a short hour later. I would nurse her skin to skin for the first time to ‘Knowing You’ by Steffany Gretzinger.


7:50 pm - Started laboring in our tub.

8:10 pm - Dawn, our midwife, arrives. She first listened to Eleanor’s heartbeat, and it 155 and strong. She checked my progress, and I was already 6 cm and 100% effaced. She began talking me through contractions with encouragement and affirmations, as they were growing in strength and intensity, very quickly. Dan and Josh thought it would be best for me to get some electrolytes in me. He brought me over a cup of LMNT Raspberry Electrolyte drink to continue to get fluids outside of water. I took one sip, Dawn asked me a question, and I couldn’t even answer because I immediately felt like I had to throw up. I threw up twice and felt instantly better after that.

8:40 pm - Lauren, my second midwife, arrives.

8:45 pm - At this point, I felt what every birth video said I would feel - I felt like I needed to poop. I asked for privacy to use the bathroom, but of course, I did not need to. When that happened though, I knew I was so close to meeting Eleanor. I got back in our tub, and during the first contraction, I felt this overwhelming urge to push. I told them I wanted to have one more contraction in our tub before walking to the birth tub. The last contraction in this tub I remember vividly saying ‘I can’t do this’ and then right after that said ‘No, I can do this’. This was one of the most intense mental experiences of my life.

8:55 pm - Josh finished filling up the birth tub with water RIGHT before I needed to get in. Our nurse, Lia, also arrived right as I was getting into the tub. My team helped me move from our tub in our bathroom, to the birthing tub. As soon as I got in the birth tub, I felt a ‘pop’ in the water. I told Dawn and Lauren this, and they said that my water had just broken. I pushed once after my water broke, and Dawn felt Eleanor’s head. I pushed a second time and could literally feel her head come first and then her shoulders all in the same push. It was the hardest most amazing moment of my life. It was also incredible to feel everything that was happening, as I was not able to experience that with Everly. I have never been more in tune with my body and what was happening.


9:00 pm - I was holding Eleanor Sage. Her birthdate: June 30th, 2022 born at 9:00 pm. It happened so fast that I had a hard time processing that she was actually here. Josh was crying from seeing the pain I was in from laboring and meeting his second daughter all in the same moment. 

9:10pm - Moved to the bed where I was skin to skin with Eleanor for hours. Josh wanted to be really involved in the whole process. While he did not get to catch Eleanor (The position I was in was too hard for him to catch her, so Dawn caught her.), he was able to cut the cord when it stopped pulsating, measured her length with Dawn, and weighed her. Our team allowed all of Eleanor’s vernix (a protective coating that forms on baby's skin in utero. It is a thick, greasy substance made of water, fatty acids, and proteins, and it creates a moisturizing barrier for your baby's skin.) to stay on her skin and they did not require that we wash it off in a bath right away. This was totally different than a hospital birth where they clean it off right away.


FRIDAY, JULY 1st

1:00 am - Our birth team was at our house until well after midnight finishing up paperwork, getting me all taken care of with postpartum things, and cleaning up our bedroom from the birth. They drained the tub, did all the laundry for us, stripped our bed, pulled up the floor mats taped to the floor, took down the hose from the shower head, and left our home feeling like nothing ever happened. It was truly a weird and wonderful experience to just be home after such a huge life change. Joshua and I were up until 2:00 am just spending time with Eleanor and soaking her in before she met her sister in the morning.


7:19 am - Everly met Eleanor! Ever and Nora - the future best of friends. When we first brought Eleanor in to meet Everly, she started saying ‘No, no, no, no’ over and over. She finally warmed up to her sister and gave her kisses on her head. She still did not really understand what was happening since she is still so little, but she knew she loved her little sister and gave her dad the sweetest smile while he held Eleanor. This morning is etched into my heart forever.


This birth will forever be one of the top moments of my entire life. I am still not over how amazing the woman’s body is, how wonderful the Haven Birth team was, and how strong and supportive my husband was through this whole process. Praise God for a healthy mama and baby Eleanor!

We still cannot believe that we have two daughters. We are eternally grateful to get to steward their little lives together.

Sweet blessings,

TOP BABY PRODUCTS (0-6 MONTHS)

Photo by: Leah Hardcastle featuring Noell Jane bow and Amazon romper

Photo by: Leah Hardcastle featuring Noell Jane bow and Amazon romper

If you are a new momma coming here for tips, I am cheering you on! First time motherhood can be summed up by research ALL THE TIME as you are trying to figure out what the best products are, where to find them, how you want to raise your child, what do you really need, wondering how you will pursue your spouse in this new season, preparing for post partum life/healing, and all the in between. I was right there in your shoes 7 months ago! I wish I had a list like this from a trusted friend that could give me a starting point of the top baby products/resources that I would actually use…and love!

I have bucketed this list into three categories to make it a little easier to digest:

  1. Post Partum Healing

  2. Breastfeeding

  3. All Things Baby

I hope this takes some of the guess work out of new motherhood for you on the practical resources side of things, and that you find these products/tools/tips helpful!

DISCLAIMER: Joshua and I are very low-tech when it comes to baby products, so if you are looking for the geekiest tech products for little one, you will not find that here. However, if simple, beautiful, high quality, and practical are your thing, you came to the right place! Last, I am not a medical professional, nor do I have any licensure to teach anything on post-partum healing, breastfeeding, medicine for babies, sleep training, or raising a grown adult. This is me simply sharing resources because I get the question all the time from new mommas of ‘What are your facvorite products?’


POST PARTUM HEALING

I did not have c-section, so these tips will not be helpful if you had a c-section. Let’s start off getting real…REAL quick.

  1. POSTPARTUM CART (For your bathroom): I set this cart up before my daughter was born so that I was prepared for all the care that I would need. This makes it really easy and keeps your bathroom from exploding full of post partum things. I put everything that is listed below in this cart.

  2. PERI BOTTLE: I wish I brought this to the hospital, but it is a must have item. It is not needed for a C-section.

  3. DEPENDS: I brought a few of these to the hospital to leave the hospital in, and I am so glad I did. The mesh stuff is for the birds. (IMO) You can actually wear real clothes with these and they make you feel a little human again.

  4. NURSING PADS: I personally loved these nursing pads to keep from leaking. They are comfortable, disposable, and make caring for your breasts easy to keep things clean and fresh after feeding. They hold alot and I did not have any leak issues even through the night.

  5. DERMAPLAST: This will help numb the pain a little. You will want a few of these ready at home.

  6. COLACE or MAGSOOTHE: This will help your stool soften for those first bathroom trips post partum. (Colace/Magsoothe)

  7. WITCH HAZEL FOAM: Witch Hazel helps to tighten skin and reduce inflammation. This was all time favorite post partum healing product. These Tucks Witch Hazel Cooling Pads are also wonderful!

  8. EPSOM SALT: I loved this Epsom Salt for baths to help heal and help my body relax. I highly recommend these.


BREASTFEEDING

I have grown a new passion for cheering on and encouraging other mommas in their breastfeeding journeys. It is hard work, but I truly believe the right tools can make a huge difference in making this hard thing a little easier…and full of more joy! Breastfeeding and pumping can be a lonely and isolating thing…but it does not have to be. I hope you feel less alone, and seen, with these tips to help you through!

  1. IDAHO JONES PUMPING PRODUCTS: This is what I use for work, and it makes it really simple.

    1. Ellerby Pump Bag: This one fits your cooler, spectra pump, laptop, wet bag, medela wipes, and snacks. It doesn’t look like a pump bag either, which helps when going back to work.

    2. Wet Bag: One of my favorite parts of this set up. The wet bag is game changing.

    3. Roxwell Cooler: This is really nice if there is not a fridge around, but you are on the go.

    4. Ice packs: The cooler is pretty small, so the ice packs that fit this are worth it. I got 4, and they fit really well with two bottles.

  2. SPECTRA (BATTERY CHARGED): For our next child, I would love to try the Elvie or Willow pump, but the battery charged Spectra worked great for where we are now. You can also purchase the wall plug in Spectra! *Some insurance covers breast pumps. Make sure you check with your insurance company before purchasing.

  3. KINDRED BRAVELY HANDS FREE PUMPING BRAS: I purchased these when I went back to work (4.5 months), and I have no idea why I waited so long. Do yourself a favor and get 3 of these. One for wearing, one for washing, and one clean. I keep one in my pump bag for work just in case! They are the only pump bras that actually allow you to be hands free pumping. (Or you can purchase individually here: Pink, Tan, or Black)

  4. MEDELA WIPES: I put these in my pump bag for work, and they make cleaning parts so easy on the fly.

  5. COTTON ROBES: Spit up doesnt roll off a cotton robe like a silk one.

  6. LACTATION COOKIE RECIPE (CLEAN - ALMOST PALEO): I started to pump to up my supply and add in lactation cookies around 7 weeks. That was when I noticed a drop. Since we are paleo, we homemake ours, and they are still not quite paleo, but much higher quality than the boxed ones. They truly make a difference for me, and I basically eat them as my breakfast.

  7. LOOSE TSHIRTS: I wore these pregnant as well. They are very oversized and look great tucked after pregnancy. There is also a scoop neck version that I love!

  8. MY BREAST FRIEND: Another one of my all time favorite nursing products. It has great back support, has a spot to hold things, and you can stand up and move around easily while your baby is little with this. You could never do that with a boppy. I would never use a boppy for breast feeding after using this. However, the boppy is great for baby sitting up or laying down, just not as practical for breastfeeding in my opinion.

  9. TAKING CARA BABIES - BREASTFEEDING TIPS FROM A SUBWAY SANDWICH: There has never been a more accurate video on the internet than this gem full of gold. If you are breastfeeding, this is so good and so helpful. She also has great tips and tricks on time change, diapering, sleep, and more.

  10. NURSING PADS: These work so well, especially for the first few months of nursing, to not have leaking happen through your bra. :)


ALL THINGS BABY

This list is random and ranges from toys to diapering to safety! There is SO much out there, so I hope this list helps you make a decision on products in a time where you can feel like decision fatigue is plaguing you.

  1. BURP CLOTHS: The muslin material is so good at catching spit up from dripping off. I would never get any other type of burp cloth. I got a few buts bees brand, and the spit up just rolls right off. Stick with muslin material. White is classic anyways.

    1. Thinner: I like putting these ones in my pump bag as well to help dry off my pumping parts, but use them for spit up all the time. You can never have enough.

    2. Thicker: These fit perfect on you shoulder for burping.

  2. SOFT BOOKS: Everly absolutely loves her soft books and the crinkle pages. I highly recommend these.

    1. Peter Rabbit: Favorite!

    2. Hungry Hungry Caterpillar: I wish we had gotten this one instead of another one we got.

    3. Guess How Much I Love You: Favorite!

  3. KEEKAROO: I will never not love the Keekaroo. One of my all time favorite baby products. Saves time, laundry, messes. It is amazing.

  4. AVENT BOTTLE PRODUCTS:

    1. Bottle Sanitizer: We use this every night to sanitize the plastic bottles and the caps. It is very low-tech.

    2. Bottle Warmer: We are super low tech. This works perfect if you are similar in that regard!

    3. Glass Bottles: I love using glass bottles (8 oz) as they heat up faster and these are my favorite to pump into because of how tall they are. We can only use them at home though because daycare requires plastic.

    4. Plastic Bottles: We only purchased these because daycare requires plastic bottles.

    5. Sippy Cup: This is a great transition sippy cup from Avent Bottles, and can use the Avent nipples as well as the sippy cup nipple.

  5. BOOGIE SPRAY: This stuff truly is magic when used with the Frida Baby Snot Sucker.

  6. FAWN DESIGN PRODUCTS:

    1. Diaper Bag: We use this one for daycare drop off. It is very durable and the material is so easy to wipe down. I dont worry about daycare workers ‘ruining’ it. We have this in gray.

    2. Weekender Bag: We have traveled alot with Ever, and this hold every thing she needs for trips. It makes it really easy to pack for her.

    3. Stroller Straps: If you want to hang your diaper bag from your stroller, these are perfect.

  7. LULI BEBE DIAPER BAG: This is my everyday diaper bag that is more stylish and feels like ‘me’. I absolutely LOVE the size. It holds so much, and the material on the inside makes it really easy to pull things in and out of. Very different from the Fawn Design diaper bag, and I love that they are different.

  8. FRIDA BABY NOSE SUCKER: I promise, you will get over how gross this is.

  9. GRIPE WATER: I gave this to Ever at 3 AM on her first night home, and it was FINALLY the thing that helped her sleep that first night. This stuff is magic.

  10. FIRDA BABY MEDICINE DISPENSER: This works amazing for gripe water (mainly what we use it for) and giving any medicine to your baby.

  11. MERLIN SLEEP SUIT: We moved Everly to this around 12 weeks and she loved it. She had a bad startle reflex, so it was perfect for her.

  12. MOMS ON CALL: We used this book to help navigate sleep schedules, sleep training, and food schedules. I would highly recommend getting all three for the different ages, And if you have a newborn and toddler, there is a schedule for both!

    1. 0-6 months

    2. 6-15 months

    3. 15 months-4 years

  13. EXERSAUCER: There were two options on Amazon that were very similar. One has more options you can change out at different ages. You cannot go wrong with either. This was the one I got for Everly that includes the chairs for when it turns into a table. This is the one without the chairs.

  14. ERGO BABY OMNI 360/NEWBORN CARRIER: I love everything about this product. I have taken Everly on long hikes in this, do housework with it, carry her at homegroup in this, grocery shop in this, go for walks in this, and all the in between. It is one of my favorite baby purchase. It is extremely comfortable for momma and Everly sleeps super well in it. I could not recommend this enough. Worth every penny. Comes with a pouch that attaches and fit my phone, chapstick, a paci, and an extra burp cloth. This is the newborn one that is amazing for the early days. I love that it is so secure.

  15. GOUMI SLEEPER: I only had one of these sleepers, but wish I got more. The sweet spot is newborn or 0-3 months, as they are typically still swaddled for naps/night time sleep.

  16. OLLIE SWADDLE: I have no words for this product because it is amazing and Everly slept so well in it. We wish we had two, but never pulled the trigger. She slept in this until about 12 weeks, when she transitioned to the Merlin Sleep Suit.

  17. BUMBO: We still use this to feed her on the floor while she is doing purees.

  18. NOELL JANE BOWS: They have my favorite bows, the school girl bow. Bows make great stocking stuffers, easter basket ideas, and fun purchases for baby girls.

  19. UPPA BABY STROLLER VISTA V2: We absolutely love this stroller, and we use it almost everyday for walks. Everly loved the bassinet for for the first 3-4 months or so. We have the Jordan color, but they just came out with the Declan color, and had that been out when we were purchasing, we would have gone with that one. The mockingbird stroller is a great option if you are looking for something a little less expensive. We got the Uppa Baby car seat as well.

  20. PACIS: They make the best little noises when they paci. These are the only ones we bought, and we had no issues with Ever liking them because it was all she knew.

  21. PACI CLIP: These are really dainty, and not too bulky. The bubbles are a really soft silicon, so great for teething as well.

  22. BIBS:

    1. Muslin Bandana Bibs: These ones catch spit up so well and look really cute.

    2. Muslin Triangle Bibs: Another great option in the muslin material.

    3. Cotton Triangle Bibs: These ones are lightweight and really cute. I put Ever in these with dressier outfits at church or on hot days.

    4. Mushie Silicon Bibs: These are amazing when you introduce food. We used them on road trips as well to minimize the mess in a car. So easy to clean and really comfortable.

  23. BUBBLE ROMPERS (for little girls): Amazon has amazing prices on bubble rompers. I wish I could shop local more, but the prices are really hard to beat on Amazon, and babies just grow so fast!

  24. SOUND MACHINES: Simple, cheap, plug in and battery options. We got three: two for her nursery, and one to leave at daycare. We love the battery powered option, as we used these on road trips to help ‘recreate’ her nursery while we were driving.

  25. MONITOR: This one is easy, has. good range, and it really low tech. Comes with two monitors, and we have had zeros issues with it.

  26. SNUGGLE ME ORGANIC: We loved this product to set Everly down in, and she used it early on when she was doing tummy time. We got the dark birch color, and then purchased two covers (Gumdrop and Natural colors) to help protect the inside long term for other kids. If she spit up on it, it was no big deal, as we could wash the cover.

  27. KYTE BABY SLEEP SACK: We purchased this for Everly to transition out of her Merlin Sleep Suit. She has been using a hand me down Nested Bean in the meantime, but I want a simple sleep sack for her, and Kyte Baby is AH-MAZE-ING. We purchased the Cloud and Oat colors, and we will probably get the Cocoa color for daycare. The quality is incredible, and they are beyond soft. There is a ton of room for her to grow length wise in them as well. We are so pleased. I would have skipped the nested bean altogether, but since we move at the speed of cash, we used the hand me down nested bean while we waited for the next months budget. ;)

  28. FRIDA BABY THERMOMETER: This was easy to use and has a stopper so you don’t go in too far accidentally. Worked great! We really wanted this one, but we were in the heat of 2020 thermometer shortages when Ever was born, so here we are!

Photo by: Leah Hardcastle featuring the Ergo Baby carrier

Photo by: Leah Hardcastle featuring the Ergo Baby carrier


For tips on how I set up our nursery, and products that we used in our nursery, check out Everly’s nursery reveal for ALL of those details. I am biased, but her little nursery is my all time favorite space.

Sweet blessings,

Ash_NEW Website Signature-01.png

MUST-HAVE BABY REGISTRY ITEMS!

 
Don’t mind the upside down ultrasound. Pregnancy brain is strong in me.

Don’t mind the upside down ultrasound. Pregnancy brain is strong in me.


A few weeks ago, I decided to start building our registry. I immediately knew that we should get clothes, diapers, wipes, a car seat, a stroller, and…well…that was about the extent of my knowledge of what I knew to put on our registry. I was pretty frustrated and overwhelmed because I started to feel like I did not know how to provide for my baby. But one of my weaknesses is not asking for help. I like to be in control, strong, and do things on my own (Enneagram 8 problems). What I know about motherhood, though, from watching so many amazing friends become momma’s, is that it takes a tribe, and asking for help is not weakness, but WISDOM.

So, I did the best thing I could think of, and I reached out to my tribe on Instagram and Facebook to ask them this question: “Tell me your favorite, life-saving products that you wish you knew about sooner as a new mom, or that you found can CANNOT live without.

There were comments after comments of real moms showing up to share their wisdom with me, and it was so inspiring.

WHAT THIS LIST IS

These are recommendations from REAL moms who I know. I broke down all of the recommendations by category to make it a bit more digestible. Inside each category, you might find the SAME item, but a variance of brands/companies that sell this item. I personally love having multiple options so Josh and I can research them on our own, and make the BEST informed decision for ourselves, our aesthetic, and our budget, from these recommendations for our little family. This list is simply a starting point for the overwhelmed new momma like me who just needs a place to start for some of the must-haves that we would have NEVER ever thought about…because we simply haven’t been there yet, and we just want to know! No one has time to waste money on products that aren’t even important or won’t be used.

WHAT THIS LIST IS NOT

I have never been a mom, so I have never personally used or tried any of these items. This is simply a compilation of all of the suggestions I received. I want to remind you that this list will look different for every mom. Some mommas are more minimal and will only want a few things off this list. Others are world-is-going-to-end preparers (no pun intended right now during COVID-19) and they will want every single suggestion. Let’s celebrate each mom for how they decide to raise their little, and the various resources they choose to use.

Every mom needs an escape - not from motherhood, but the world’s definition of it.
— ValMarie Paper Products

HEALTH

  • Nosefrieda

  • Lotions and Soaps the mom likes the smell of.

  • Electric Baby Nail Filer (Not clippers)

  • Anything made by Frieda Baby

  • Tubby Todd All Over Ointment

  • Gripe Water

  • Gas Drops

  • Burtsbees diaper cream

  • Baby probiotics

  • Saline

  • Itzy Ritzy Teething Toys

  • Calmoseptine (Diaper cream)

  • Puracy Laundry Detergent for baby clothes

    • Don’t wash the clothes until you use them.

    • Every baby grows different, so if you get too many of a size of clothes, and your baby never wears them, you can return them, or re-gift them. If you wash them all beforehand, you can’t do this!

  • Updated First Aid kit

  • Punkin Butt Teething Oil

  • Freezer Teethers

  • Windi by Freida

  • A freezer teething ring

  • Baby brush

  • Thermometer

BABY CARRIERS

  • Wrap and Carriers were something used everyday for the first 6 months

  • Figure out if you like a wrap or a carrier

  • Konny Baby

  • Solly Baby

  • Wild Bird Sling

  • Nesting Days Carrier

  • Ring Sling

  • Moby Wrap

  • Ergo Baby 360 (Husband recommendation)

  • Baby K'tan carrier (Husbands can wear it too)

  • Baby Bjorn carrier

  • Structured baby carrier

  • Lille Baby Carrier, Solly Baby Carrier, and Ring Sling

    • This mom used all three for different reasons and times.

    • You might consider multiple carriers.

BREAST FEEDING/EATING/FEEDING

  • Hakka Breast Pump

  • Boppy Nursing Pillow

  • Nursing Cover

  • Baby Banana Teether

  • Spectra Baby USA S1 Plus Breast Pump

  • Baby Breeza (If formula feeding)

  • Burp cloths (You can never have too many)

  • A Good Pump:

    • Medela from insurance

    • Unimom pup

    • This momma had both

  • Bibs

  • Dr Browns bottles with premie nipple

  • Vitamin D drops (Essential if you are breast feeding)

  • Get a sleek pump if you are pumping at work with an insulated carrier

  • Lightweight nursing cover (Boppy brand)

  • Lightweight nursing cover (Little Miss Dessa brand)

  • Breastfeeding pillow in general

  • Hands free pumping bra

  • Willow Pump

  • My Breast Friend nursing pillow

    • Boppy pillow was a COMPLETE waste.

    • This one has lumbar support…your back will thank you for this.

  • Milk savers

  • Reusable breast pads

  • Silicone teething toys

  • Silicon bibs

  • Silicon suction plates

  • A high chair with NO fabric

    • This makes it way easier to clean.

    • It also looks newer longer because it is easier to clean.

  • Wooden high chair

  • Bottles with premie/slow flow nipple

  • Bottle brush

  • Lansinoh Breastfeeding products

DIAPERING

  • Wipes Warmer

  • Cloth Diapers

    • Mommaq Koala

    • Ava Baby

  • Ubbi Steel diaper Pail

  • Backpack Diaper Bags

  • Book bag diaper bag

  • Diaper Cady

  • Get.Dyer

    • Diapers

    • Wipes

  • Try doing a diaper raffle at your shower

  • Wipeable Changing Noads

  • Diaper Genie

  • Bum Genius reusable diapers

  • Baby Bumco

NURSERY

  • Hatch Baby Sound Machine

  • Baby Shusher

  • Black out curtains for the nursery

  • Hatch White noise sound machine

  • Homedics Sound machine

  • Mist humidifier

  • Newton Mattress

    • If you have a fear about SIDS, this is a breathable mattress.

    • It also cleans so easily for accidents.

  • Keekaroo Changing Pad

    • So easy to clean after diaper changes (No one has time to launder changing pad covers every day)

  • Gathre changing pad for on the go

  • Comfy Rocking Chair/Recliner/Glider/Swivel

  • Dohm Sound Machine

  • Mirror above the changing table (So baby can look at themselves while they get changed)

TRAVEL

  • Two sound machines

    • One for home, One for travel.

    • This just makes packing and unpacking simpler.

  • Pack-N-Play

MOMMA

  • Exercise Ball

    • This Is great for the momma to sit on and bounce the baby easier

  • Stock up on easy, healthy snacks for YOU as the momma

    • Don’t forget to care for YOU well.

  • Ice or hot pads for breasts

    • Earth Mama Booby Tubes (Gel-Free breast packs for breastfeeding)

    • Philips Avent 2-pack Thermal Gel-Pads

  • Baby Memory Book or Journal

    • Promptly journals

    • ValMarie Paper Products

  • Nipple cream

SLEEP

  • Snuggle Me Organic (Newborn and Lounger)

  • Dock-a-tot

  • Jersey Knit Swaddlers

  • Owlet Care Smart Sock

    • This is expensive, but it can help give the parents peace of mind and sleep better at night.

  • Halo Bassinet Swivel Sleeper

  • White Noise Sound Machine (That doesn’t turn off)

  • Swaddle Me Velcro Swaddles

  • Lots of swaddles

  • A good bassinet that pulls up to your bed

  • Hushh Sound Machine

  • Love to Dream Sleep Sack

  • Halo sleep swaddles

  • Little Miss Dessa Swaddle Blankets

  • SNOO Bassinet from Happiest Baby

  • Lou Lou Swaddles

  • Ollie World Swaddle

  • Swaddles:

    • Velcro ones

    • Wearable sack

    • Copper pearl swaddle

  • Little Unicorn Official - has the cutest muslin sheets and swaddles

  • Sleepsack for when they outgrow or don’t like to be swaddled anymore

  • Muslin Swaddle blankets

  • SwaddleMe Swaddles

  • Merlins Magic Sleep suit

  • Wombie sleep sack

  • Happiest Baby Swaddles

  • Moses blanket

  • Zip pods for newborns

  • Swaddle Me after they grow out of Zip Pods

TOYS/ENTERTAINMENT

  • Play Gym

  • Bouncer Chair

  • Baby Swing

  • Sit-Me-Up Chair

  • Kick N Play Piano Studio

  • Regular Swing

  • Leachco Podster (Newborn Lounger)

  • Love Very Playgym

  • Gathre Play Mat

  • Angel Dear Lovey

  • Baby books

  • Rock and Play

  • MamaRoo swing

  • Bouncer Seat

    • One that you can move easily from room to room.

    • You will want to move this from the kitchen while you cook, to the bathroom while you get ready, and everywhere in between.

  • Swings that swing side to side

    • A lot of kids don’t like front to back ones

  • Jolly jumper

  • Infant lounger

  • Baby Einstein toys

  • Activity center for when they are 5+ months or so

RESOURCES

  • Sleep Wise Consulting

  • Follow Mommy.LaborNurse on Instagram

  • Taking Cara Babies 0-12 week class

  • Little Z Sleep

  • Make/ Find a baby playlist made with lullabies and hymns

  • Wonder Weeks App

    • Track growth and learn about your baby as they grow.

    • This will help you know what to expect each step of the way as you heal and your baby grows.

PACIFIERS

  • Purchase JUST a few different styles/types of pacifiers before the baby is born (

    • There will be a learning curve for you in regards to what type of pacifier your baby takes well t o.

    • If you buy a bunch of one kind, and your baby doesn’t take to it, it will be a waste.

  • All things Ryan and Rose

  • Glow in the dark pacifiers

  • Frieda Pacifier that you can give medication through

  • Maam pacifiers

  • Bibs USA Pacifiers

  • Bib pacifier clips

  • Pacifier clips

CLOTHES

  • GoumiKids stay on baby bootie sleepers

    • They velcro

  • Long sleeve onesies with built in gloves that pull over hands

    • If you can’t keep up with clipping their nails, they will scratch themselves bad.

  • Velcro socks/booties

  • GoumiKids mittens

    • They velcro

  • Katie Quinn bamboo onesies

  • Night gowns

    • Makes changing diapers at night super easy.

    • Do not buy sleeper clothes with buttons. They are so hard to button in the middle of the night.

    • Try to find clothes that zip up from the bottom to make changing easier, especially in the middle of the night.

  • Newborn socks

STROLLERS/CAR SEATS

  • Chicco Bravo Travel System

  • Bob stroller with infant seat adapter

  • Evenflo lightweight

  • Bugaboo Chameleon 3 Stroller

  • Doonausa

    • This one is just a little on the heavier side.

  • City Select by Baby Jogger

    • Fits any brand pumpkin seat

    • Can have a boogie board attachment

    • Can have 2 seats

    • If you plan on having more kids soon, this is a great option.

  • Maxi Cosi stroller

  • Jogging Stroller

  • Nuna USA Infant car seat

  • Bob stroller

    • They make infant car seat adapters to make the stroller compatible.

    • If you are a runner, this Is a must!

  • City Mini Stroller

  • Car Seat

    • Peg Perego

  • Milk Snob carseat

  • Convertible carseat because infant grows out of the first super fast

BATHTIME

  • Blooming Bath Lotus

  • Baby Bath tub with sling for a newborn

  • Baby Flower Bath Collapsible baby bath (To save space)

  • Tubby Todd Bath products

If you are a new momma like me, I want to encourage you after looking at this list. The Lord knows us. And he knows that huge life changes, like having a baby for the first time or second or third time, take time to adjust to. In His goodness, he GAVE US a season of waiting and preparing for our baby; 9 months of them growing in our bellies! During that time, we have been given the space to mentally prepare, emotionally prepare, physically prepare, practically prepare, spiritually prepare, financially prepare, and all the in between prepare. He built in pregnancy to be a season for us to prepare for this new life to come into the world that you will care for.

So stop right now.

Take a deep breath as you read this list. I want to encourage you to sit with your spouse, and do research together. I highly recommend also taking the time to figure out what your budget is for what you can afford to purchase. Take time to soak in all the last moments with your husband of time with JUST the two of you. Take time to think about what you will name this child and the meaning behind that name. Take TIME in this season, because that is what this season is for. Don’t rush this season of pregnancy past, but take this season to prepare your heart, and everything in between, for this next adventure.

I have a feeling it is going to be the wildest adventure of my life, and of yours too!

I pray this must-have baby registry items list is helpful as you begin your baby registry as well!

Sincerely-

…Josh, and Baby Craft!

…Josh, and Baby Craft!

 
EU8A9895.jpg
 

CREATE YOUR OWN PLASTER STYLING BOARD

 
IMG_2372.JPG
 

Since I started my calligraphy and design business, rugs, tables, and my floor have been my go-to for styling my work on. With my new rebrand, it just wasn’t going to cut it, so I am finally coming around to bringing to life my very own styling boards. Whether you are a calligrapher, photographer, florist, essential oil seller, hair stylist, bride-to-be, or small business owner, this is the perfect way to make your work stand out with a beautiful background. The best part is: it is SIMPLE and CHEAP. The total cost for this project is under $40, depending on how many styling boards you make, and how many paint colors you choose.

MATERIALS: (You can find all the links to the materials at the end of this bog post)

I- Fabric Canvas (See what NOT to use below…please learn from my mistakes!)

II- All Purpose Joint Compound (Found at any Home Depot or Lowes)

III- Trowels (Plastic or Wooden and Metal)

IV- Drop Canvas (or plastic paint protectors)

V- Acrylic Paint (Whatever color you desire to create your styling board)

VI- Paint brushes

VII- Container for the paint to dip the brush in

VIII- Foam Painters

DIRECTIONS:

I- Pick your desired canvas size. Lay the canvas onto your drop cloth. Open the plaster, and spread it over the canvas with the trowels. Start from the middle, and work your way to the outsides.

II- Once the canvas is spread how you like it, let it dry for up to 24 hours before your paint. You will see it start to turn white when it is drying, and that is perfectly fine.

III- Choose your paint color, and pour it into your container. With your paint brush, paint the plaster until you have the desired color you are looking for. You may also use the foam painted to give the styling board more texture. Let dry for 6 hours, and then paint a second coat of paint.

IV- Start styling and making some magic!

 
Shop these: Trowels

Shop these: Trowels


Shop these: Foam Painters

Shop these: Foam Painters


Shop these: Paint Brush Set

Shop these: Paint Brush Set


Shop these: Fabric Canvas (20” x 20”) (I found them in a 3-pack for $30, but am not able to find them online)

Shop these: Fabric Canvas (20” x 20”) (I found them in a 3-pack for $30, but am not able to find them online)


Shop these: Acrylic Paints

Shop these: Acrylic Paints


Shop this: Joint Compound

Shop this: Joint Compound

 
I always thought that the “thriving” would come when everything was perfect, and what I learned is that it’s actually down in the mess that things get good.
— JOANNA GAINES, The Magnolia Story

Now, for those of you out there who are like me, and like to tweak things just a little to try to make them your own, or be a little different, DON’T! I love wood, and I really wanted to do these on a thin piece of wood to have mine stand out. But I SHOULD have known…because hello, I am a carpenters daughter, and I didn’t even think about how dumb this was. Once all the joint compound was applied, it made the wood really wet, and made it bow up while it was drying. Because of that bowing, it cracked the joint compound all over, and it caused it to dry that way. Once it dried fully, it did end up laying flat again, and the bow went away, but the cracks were still extremely visible and have not gone away. This is not the look I was going for at ALL, and I had to start all over again. Moral of the story: don’t be like me. Trust the process. Trust what I am sharing with you. I want you to learn from me, and do it right the first time. Consider this me giving you the gift of going second. You are welcome, friend!

 
Unpainted dried joint compound on wood. Please see the VERY visible cracks.

Unpainted dried joint compound on wood. Please see the VERY visible cracks.


Unpainted dried joint compound on fabric canvas. Please see how perfect this is! NO cracks. NO bowing. Perfection.

Unpainted dried joint compound on fabric canvas. Please see how perfect this is! NO cracks. NO bowing. Perfection.


Styling board with no paint, just the color of the dried joint compound. It dries a pretty light grey color on its own!

Styling board with no paint, just the color of the dried joint compound. It dries a pretty light grey color on its own!


I hope this short tutorial was helpful, and that you are able to make your beautiful work shine with this textured, simple, beautiful styling board. Please enjoy some of the STUNNING final results of investing in creating your own styling board. I am ecstatic to share these with you.

Shop recipe cards, greeting cards, and more!
Craft-41.jpg
Craft-18.jpg
Craft-21.jpg
Craft-11.jpg
Craft-17.jpg
Craft-30.jpg
Craft-45.jpg

Sweet blessings,

Ash_NEW Website Signature-01.png

WHAT WOULD YOUR FAMILY MISSION STATEMENT SAY?

 
IMG_2938.JPG
 

Libby and Isaac Wendland are two of the most inspirational people I have had the honor of knowing. I went to college at in Lynchburg, VA at Liberty University with them, and I knew Isaac through my time running Cross Country and track there my freshman year. He and Libby were school grade crushes, and they married right out of college. Their love for each other and for the Lord is fierce, strong, deep, passionate, humble, and always seeking to bring glory to the Lord, not themselves. Isaac is now the Assistant Track and Field Coach at Liberty University, and Libby is a teacher in the surrounding area.

After a few years of being married, they started trying to have their own child. Month after month, and year after year, that sweet baby never came and they never got that positive test. They finally sought out a doctor to understand why it was not happening for them, and they were told it would be very difficult for them to have their own children naturally. It had always been their dream to be parents, and they were just broken when they found out that news. One day, traveling back from a trip, they were sitting in the airport. They were in a deep valley season on this hard road to parenthood, and they sat together in the airport to just cry out to the Lord. Right after they prayed, a little girl came running up to them, and she just brought them so much joy. Little did they know that they would be seated right next to this little family on the airplane. During the plane ride, Libby looked over at the mom of that little girl, and simply asked ‘Where did she get her big brown eyes from?’ The mom answered that she was not biologically theirs, but that their daughter was actually adopted.

After that conversation, Libby and Isaac began to have their hearts softened towards adoption. They began to do research on different ways to adopt around the world, and ultimately, the Thailand program tugged at their hearts, and made the most sense for their season of life with all of the Thai rules and regulations. They finally got their acceptance letter into the Thailand program, and it was the best day of their lives. They started a campaign called ‘Miles to Eden’, and after 2.5 years, they finally brought their daughter, Eden Hazel Wendland, HOME.

As their family grew, they knew they wanted to have a strong family mission statement to have as the center of their home to always be able to come back to when life got hard, or they were faced with challenges. When Libby reached out to me, I was honored, as this piece is truly a keepsake that will be passed down for generations to come of the legacy they hope to leave to their family, and to their daughter Eden, of what their family mission statement is. Friends, words MATTER. The words we hang in our home are important and the words we see everyday have the power to CHANGE our everyday.


To hear their sweet hearts, and learn more about their story, please watch the video below from their ‘Miles to Eden’ journey, and how they were finally able to bring home this little girl with the help of the body of Christ.

Click the Photo to watch the Wendland’s ‘Miles to Eden’ story.

The Lord will surely comfort Zion and will look with compassion on all her ruins; he will make her deserts like Eden, her wastelands like the garden of the Lord. Joy and gladness will be found in her, thanksgiving and the sound of singing.
— Isaiah 51:3 (NIV)

Read their full mission statement and see an up close of the hand calligraphed keepsake below:

 
IMG_2939.JPG
 

WENDLAND FAMILY MISSION STATEMENT

VI XXVII MMIX

Seek His Kingdom

Love God, Love people

Experiences over things

When they go low, we go high

Be in the world, but not of it

Kindness changes everything

We can do hard things

We go to the ends of the earth for each other

CHALLENGE: What would YOUR family mission statement say if you hung one in your home? I would be honored to calligraph this keepsake piece for you to hang intentionally in your home so that every single person who walks through your doors knows exactly what your family’s mission is.

Purchase your own custom piece!
IMG_2782.JPG

Sweet blessings,

Ash_NEW Website Signature-01.png

TWENTY WAYS TO CREATE AN INTENTIONAL GUEST SUITE

Those who live out radically ordinary hospitality see their homes not as theirs at all but as God’s gift to use for the furtherance of His kingdom.
— ROSARIA BUTTERFIELD, THE GOSPEL COMES WITH A HOUSE KEY

Welcome to part two of this guest suite Cranberry Bog series! I was really eager to share Bog Post one with you, ‘THE GUEST SUITE REVEAL’, because as humans, we LOVE radical transformations…and I will tell you, this guest suite was a RADICAL transformation. But this second Bog Post, I have been particularly excited about because I learned it from YOU! I asked THOUSANDS of you what makes you feel at home, cozy, and welcomed in when staying in a guest suite. This is a true compilation of community coming together with ideas. So, if you contributed to this list, and shared what is important to you in a guest suite, THANK YOU! You have not only helped me, but you are helping to serve so many who are also seeking ideas on how to host WELL in their home through a guest suite.

BELOW YOU WILL FIND THE TWENTY WAYS TO CREATE AN INTENTIONAL GUEST SUITE! I hope that this content is helpful, practical, and that it allows you to serve those you invite into your home WELL this holiday season, and every season after that.

 
Guest Suite 1.jpg
 

I- BLANKETS: Friends, this was the number one thing that you shared with me that makes you feel at home and cozy. If there is ONE thing you do in your guest suite, have LOTS of cozy blankets, and give your guest options of blankets. We decided to put a throw blanket on the bed and on the chair so they are easily accessible, but also, we wanted more options in case it was particularly cold. We put extra quilts and comforters in the drawers in the mirrored chest so that they were not taking up space, but were easily accessible. As much as hosts try, it can still be hard for guests to ask for things, so make it easy for them to have access to those extra blankets.

II- GUEST BOOK TO SIGN: Can you believe that this was the second most shared tip?! I LOVE this because it means that you, friend, are a guy or gal after my own heart. I truly believe that there are power in words, and especially written letters. As both the guest and the host, this is such a fun, long time tradition that preserves the art of writing letters. Give your guests the gift of writing you a letter, and give yourself the joy of reading their words. We will cherish this tradition that we have started forever. As you host, make sure your guest book is somewhere that is EASILY visible with a pen ready to go so that guests dont forget. Also, leave a little note in the guest book cover welcoming your guests, and inviting them to sign and date the journal.

III- WIFI INFORMATION: This seems like something so silly, but it was the third most shared tip. This is something so simple to do, but because it is such a small thing to add to a guest room, it usually gets forgotten. It is so funny, because this one actually helps the host too! When your guest asks for the wifi password, usually that means you have to go, bend over, and rummage on the floor with all the cords to pick up the box that has that little sticker on the back with the password that is harder to type in than it is to graduate from college! (i.e. 5G6dsjkl4757HGdeGH5) Make this display fun, simple, and easy to find to simply avoid that whole debacle!

IV- CLEAN SOFT LINENS ON A COMFORTABLE BED: This goes without saying, but I think it is worth saying. There is nothing like sliding into bed after a long day of driving, flying, or visiting friends, and feeling like you are in a cozy bed that is clean, soft, and fresh. The best way to add fluff and extra coziness is with a bed shawl at the end of the bed. It makes the bed look fluffier, and adds extra layers of linens. The bed we chose was a Nectar, and we have been thoroughly pleased so far with the results. The bed is a little firmer, but the reason we chose the brand Nectar is that it has a one-year return policy in case we are not 1000% satisfied with it, and we got two free memory foam pillows!

Guest Suite 13.jpg

V- PROVIDE BOXES OF KLEENEX: Would you believe that only ONE person shared this tip? (I am looking at you Elisabeth!) That doesn’t mean it isn’t important, it just means it is one of those guest suite amenities that you don’t realize you need until, well, until you absolutely need it, and then you have a giant booger running down your face, and you are too embarrassed to go ask the host for a tissue? Yes, just trust me. Have Kleenex in your guest suite. I wanted them to be invisible unless you needed them, so we tucked a Kleenex box in each night stand, and they will be perfectly accessible all hours of the night to guests.

VI- HEADBOARD ON THE BED: This was one of the most surprising shared tips that I received. but after I thought about it, it makes perfect sense. When you stay somewhere, you want to feel like you are not going to break the furniture when you sit on it, and move around on it. You dont want to have to worry about your pillow falling between the wall and the bed halfway through the night, and being exhausted for the next days adventures from a poor nights sleep. We fell in love with this Trishley Sleigh Bed, and it is a stable, sturdy piece of furniture that will remain a classic, timeless piece to have for years to come.

VII- MIRRORS: At the end of the day, everyone who stays in your home will have a different ‘getting ready’ routine. It will makes your guests feel so comfortable and at home in your guest suite when you provide them with getting ready mirrors, and a full length mirror. When someone is traveling, and staying in your guest room, they are most likely going to have places to go that require getting dressed up, and you know every girl needs to check all angles! Having a full length mirror and getting ready mirror where your guests can have their own routine in privacy will make them feel like they can use a hair dryer without taking up the bathroom, or being too loud.

VIII- LAMPS ON NIGHTSTANDS: Lamps are so important, because when guests stay in your room, they do not know the room like the back of their hand like they do their home. You can avoid nasty toe stubs and running into the edge of the bed while your guests turn off the light switch on the other side of the room by giving them lamps with nightstands. There is nothing worse than not having a place to put a glass of water or your alarm clock while you sleep.

IX- READ THIS BOOK: The Gospel Comes with a House Key’, Rosaria Butterfield. This was the MOST thoughtful suggestion that I received from a dear friend. (Thank you, Leah, for your heart to care for souls, not just the material things!) This book has already started to shift my mindset on what it means to be a host, and what it means to be a guest, and I HIGHLY recommend you purchase it and give it a read as you seek to serve well through hosting in your home.

When Jesus walked the earth, he wasn’t afraid to touch hurting people. he drew people in close. He met them empty and left them full. Jesus turned everything upside down.
— ROSARIA BUTTERFIELD, THE GOSPEL COMES WITH A HOUSE KEY

X- FLUFFY PILLOWS: Not only did so many of you share tips to have fluffy pillows, but to have multiple options for pillows. Some people sleep with 57849 pillows, some sleep with a flat pillow. Some sleep with two pillows, some sleep with a firm one, some with a fluffy one. Everyone is different so I loved this tip because it considers others. We decided to keep the fluffy ones on the bed, and put the memory foam pillows in drawers so they could choose which pillows are best.

XI- CANDLES, ROOM SPRAYS, AND DIFFUSERS: The VERY first thing someone will notice, and remember, about your home, is how it smells; It is one of the strongest sense. So many of you suggested diffusers, which we unfortunately do not have right now, but what we do have is candles and room sprays. My mother-in-law is really good at teaching me about how to make a home always smell welcoming, and she was the first person to introduce me to room sprays. We have an organic one not featured below, as well as fun ones from Bath and Body Works, and they instantly change a home or space through smell!

XII- ROOM FOR LUGGAGE: One of the most frustrating things can be staying somewhere where you feel cluttered and like you cannot get to your luggage easily. If Josh and I can fit at the end of this bed, so can your luggage! It is also helpful to leave extra drawers open in your guest suite dressers for guests to be able to put their clothes in for an extended stay. This can make them feel like they are more settled.

XIII- OUTLETS NEAR THE BED, AND EASILY ACCESSIBLE: This suggestion just reminds me how tied to our phones and technology we are in the 21st century. However, it is a great suggestion because most people have their alarm clocks on their phones, and it very helpful so your guests can charge their phones all night so they have them ready for the next day of adventures. This can be as simple as running an extension chord to each side of the bed so the phone plugs in easily without having to move the entire bed.

Guest Suite 46.jpg

XIV- FACE WIPES FOR MAKE-UP: This was one suggestion that I would have never thought of, but really does make a difference. I placed wet make-up towelettes next to the face clothes, and hand towels, as well as hand cream. I placed these someplace easy to find in the top drawer of the chest with a mirror where they could easily take off their makeup and get ready for bed.

XV- HOOKS: This suggestion is perfect for the guest who is coming in in the winter with lots of coats, or the guest who has multiple purses or bags to hang. It is one of those guest suite items that, like the Kleenex, isn’t something you realize you need until, well, you need it!

 
Guest Suite 51.jpg
 

XVI- NOISE CONTROL: Growing up, my mom would let me sleep in her room when my dad would go away on trips. I always loved staying with her in her room because she had this big, antique, Tiffany Blue, metal fan that she would run all night for the noise. I never realized just how much this noise made a difference until I stayed in a home that didn’t have a fan. This can also be helpful if a husband and wife are staying in the guest suite, and one gets hotter than the other. It is always nice to have the option of a fan. I decided to store these in the bottom dresser drawers so they were easily accessible, but not in the way if they did not need them.

 
Guest Suite 52.jpg
 

XVII- BATH TOWELS, HAND TOWELS, FACE CLOTHS: One of the most awkward things to ask for in my books is towels from a host. Do your guests a huge favor, and make your towels, hand towels, and face clothes visible, and easy to find so they don’t have to come and ask for them. I decided to store these in drawers as well, and on top of our tall dresser in little baskets so they are easily seen.

XVIII- SNACKS, WATER BOTTLES, AND A TRASH CAN: This is one of those little details that is such a fun tip because it is just, oh I don’t know, FUN! It is a way to show your guests that you know them through their favorite snack, candy, or drink. (Don’t we all just have a deep longing to be known? Show you guests that you KNOW them.) Practically, sometimes you just need a piece of chocolate or a bottle of water! With all these snacks though, don’t forget a trash bin! Back to the Kleenex…it can get real awkward real quick when you are standing with an empty chocolate wrapper or a tissue full of boogers, and no where to put it. Don’t forget the trash can!

 
Guest Suite 57.jpg
 

XIX- CURTAINS: This tip goes without saying, but it needs to be said: have curtains in your guest room so that you guests can have their privacy. They do not need to be fancy, they just need to block the view from the outside. I have to hand it to Josh, AGAIN, for this genius idea to have LONG curtains in this room. Don’t y’all LOVE how they add so much length to the room and the windows? I also think there is nothing like the feeling of ‘home’ like opening the curtains wide in the morning to let the sun in.

XX- ALL THE LITTLE DETAILS TO MAKE A GUEST SUITE FEEL LIKE HOME: At the end of the day, your guests are coming to stay with YOU. Invite them in. Let them come empty. Leave them full; spiritually, physically, mentally, and emotionally. Home in this day and age is not always a safe place, but we can give people safe places in the homes we invite them into. Let us seek peace in our homes, and extend grace upon grace upon grace to those who enter our doors, as you may be the only picture of the Gospel they ever see or hear. We are tow imperfect humans serving a perfect Lord who has given us good gifts to share with friends, family, neighbors, our church, and strangers.

We must participate as both hosts and guests - not just one or the other - as giving and receiving are good and sacred and connect people and communities in important ways. But this is not where it ends. God calls us to practice hospitality as a daily way of life, not as an occasional activity when time and finance allow. Radically ordinary hospitality means this: God promises to put the lonely in families (Psalm 68:6), and he intends to use your house as LIVING PROOF.
— ROSARIA BUTTERFLIED, THE GOSPEL COMES WITH A HOUSE KEY

I pray that the Lord inspires you to invite people in and give well through these 19 tips from my tribe. Let’s host well this holiday season, and every season after, to the glory of God, the furthering of His Kingdom, and the joy of his people as they do real, raw, transparent, vulnerable, and joyful life together in homes just like ours all over the world.

Sincerely-

Ash_NEW Website Signature-01.png

P.S. Below, you will find all of the details on where we found all of the pieces for our guest suite. Some pieces are older, so I tried to go back and find them all! I hope this helps you host well over the holidays too, and get your own inspiration for your holiday hosting and remodels.

PAINT COLORS || ‘Garden Wall’ and ‘Roman Plaster’ by Behr Paint, Home Depot

MATTRESS || Nectar (Comes with two free memory foam pillows, and a one year money back guarantee.

END TABLES || World Market

BED AND TWO DRESSERS || Trishley Sleigh Bed Set Originally found at Ashley Furniture, purchased at Louisville Overstock Warehouse. (I believe the sleigh bed has been discontinued.)

DUVET || Bed Bath and Beyond

BED SHAWL || Walmart

BEDDING INSERTS AND SHEETS || Walmart and Target

CHAIRS || Pier 1 Imports

BROWN JUTE RUG || World Market

WHITE WASHED JUTE RUG || World Market

THROW BLANKETS || Target

FRAMES || Hobby Lobby

CALLIGRAPHY ON PAPER || Ashley Margaret Calligraphy Keepsakes

CALLIGRAPHY FABRIC BANNER || Not for purchase. Handmade by Ashley.

WIFI STAND || World Market

BLACK AND WHITE PILLOW || World Market

TAN AND WHITE PILLOW || World Market

METAL SERVING TRAY || World Market

GUEST BOOK || Target, Magnolia Homes

LAMPS || Target

CANDLESTICK HOLDERS || Target

CURTAINS || Target